Baking · Biscuits and Cookies · Chocolate · Christmas

Chocolate Shortbread

Rich, homemade Chocolate Shortbread. Divine cocoa flavour is celebrated in this buttery, crumbly, and slightly salted chocolate shortbread recipe. Made in one bowl AND no chilling!

This intensely chocolatey shortbread recipe is a perfect Christmastime treat. It’s not overly sweet, slightly bittersweet, and has a salty hit in each bite.

A slice of shortbread anytime of the year is lovely, but around Christmas, I feel it’s even more special. Whether you have friends or family stopping by, want a gift to share with neighbours, or simply want to treat yourself to some baking and a sweet for an afternoon or evening dessert.

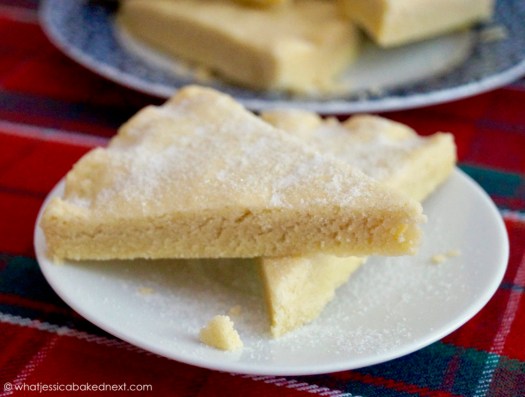
My chocolate shortbread has the flavour of a chocolate brownie. Rich, decadent, but without either a cake or fudgy texture, but instead the delectable, crumbly texture of shortbread.

When I made my Scottish Shortbread recipe for the blog back in 2015, I fell in love with the idea of baking shortbread by pressing the dough straight into a tin rather than rolling, then cutting the dough into shapes. We’re cutting the prep in half, which means we get to eat our shortbread even sooner!

Saving time is always helpful around December and the weeks leading up to Christmas, when we’re often pushed for time.

Like with most biscuit or cookie recipes, this one is just a base recipe.

Switch the recipe up by adding some freshly grated orange zest, tossing in some nuts, or combining some dark, milk, or white chocolate chips into the shortbread dough.

Once baked, you can dip the shortbread pieces into melted chocolate or drizzle it over.

There are so many exciting ways to make this recipe your own!

This recipe is found in ‘The Great British Book of Baking’. I was given this as a Christmas present from a work colleague last Christmas, and ever since spotting this recipe in the book, I’ve been excited to try it! It certainly did not disappoint, and it has me intrigued to try more!

Print

Chocolate Shortbread

Rich, homemade Chocolate Shortbread. Divine cocoa flavour is celebrated in this buttery, crumbly, and slightly salted chocolate shortbread recipe. Made in one bowl AND no chilling!
Prep Time 15 minutes
Cook Time 30 minutes
Total Time 45 minutes
Servings 12
Author What Jessica Baked Next

Ingredients

  • 200 g butter (salted or unsalted) softened
  • 100 g caster sugar
  • 260 g plain flour
  • 40 g cocoa powder
  • Pinch of salt omit if using salted butter

Instructions

  • Preheat oven to 180°C / 160°C / 350°F / Gas Mark 4. Lightly grease a 20cm cake tin with extra butter.
  • Cream the butter for a minute to soften. Now add the sugar and cream for a further 2 minutes until lightened in colour and fluffy.
  • Add the flour, cocoa powder, and the pinch of salt (if using), and mix until a dough comes together - don't over work the dough, just mix until there's no visible specks of flour remaining.
  • Transfer the shortbread dough to the greased cake tin and press down until compact. Score into 12 triangles, making sure you don't slice all the way through. Prick each piece of shortbread once or twice with a fork, and bake the shortbread for 25-30 minutes until the top is firm to the touch - mine was in the oven for a full 30 minutes.
  • Once baked, allow the shortbread to cool in the tin. Remove from the tin and sprinkle with a little extra caster sugar/or icing sugar if you prefer. Slice into 12 triangles and serve. The shortbread will keep for up to 1 week, stored in an airtight container/or a covered plate.

Try these festive-inspired biscuit/cookie recipes next!

Snowball Cookies

Butter Cookies

Scottish Shortbread

Terry’s Chocolate Orange NYC Cookies

Keep up to date with me on:

Like my Facebook page here

Instagram: @whatjessicabakednext

Twitter: @jessbakednext

Pinterest: @jessbakednext

Baking · Biscuits and Cookies · Chocolate · Christmas

Terry’s Chocolate Orange NYC Cookies

A chocolate orange flavour spin on the popular NYC cookies! Thick cookies filled with chunks of Terry’s Chocolate Orange segments, vanilla, orange zest, and chocolate chips!

I’m kicking off the run of Christmas recipes today with these decadent NYC cookies! As I do from November onwards every year, I’m sharing Christmas-inspired recipes right through until the New Year! This year, I hope to entice you to make some festive recipes, and I have plenty for you to choose from.

My Terry’s Chocolate Orange CheesecakeNo-Bake White Chocolate Orange CheesecakeTerry’s Chocolate Orange CookiesTerry’s Chocolate Orange TraybakeTerry’s Chocolate Orange Cupcakes, or how about some Vegan Chocolate Orange Brownies?

Can you tell I’m obsessed with Terry’s Chocolate Orange?!

I’ve made sure these cookies are well and truly packed with TCO, with three whole chocolate oranges needed!

I have shared a Terry’s Chocolate Orange cookie recipe previously, but this time, rather than a chocolate cookie dough, I went for an orange-flavoured cookie dough (without cocoa powder added).

I baked a NYC-style cookie similar to Levain Bakery/Crème in London a few years ago, sharing my Chunky Milk Chocolate Pecan Cookies. It’s been a while since I baked some super chunky/thick cookies, so I couldn’t wait to get in my kitchen and bake some!

Enjoy one of these cookies dipped in a mug of hot chocolate or warm with a scoop of ice cream!

They’re the taste of the Christmas season, filled with gooey chocolate orange segments and freshness from orange zest. I add some vanilla extract to my cookie dough, but this can be substituted with orange extract for a more delicious orange flavour.

I love a bit of festive baking; it’s lovely filling the house with freshly baked goods.

It’s my favourite time of year, with so many recipes featured on my Christmas menu. Butter Cookies, Gingerbread MenVegan Sausage Rolls (Easy Puff Pastry Sausage Rolls)Cheese and Mustard Puff Pastry Pinwheels, and Cinnamon Rolls.

You need a little patience with this cookie recipe. The secret to a super-thick cookie with crisp edges and a gooey centre is freezing the cookie dough for at least 90 minutes before baking. I leave mine overnight for an even thicker cookie and bake the cookies for exactly 17 minutes (until the edges are nicely browned), so they have incredible soft centres.

As the cookies cool on the baking trays, another finishing touch I do is press a few extra chocolate chips and a segment of Terry’s Chocolate Orange on the top of each cookie.

I hope you enjoy baking these in the lead-up to Christmas!

Print

Terry's Chocolate Orange NYC Cookies

A chocolate orange flavour spin on the popular NYC cookies! Thick cookies filled with chunks of Terry's Chocolate Orange segments, vanilla, orange zest, and chocolate chips!
Prep Time 15 minutes
Cook Time 17 minutes
Chilling Time 1 hour 30 minutes
Total Time 2 hours 2 minutes
Servings 12
Author What Jessica Baked Next

Ingredients

  • 230 g butter (salted or unsalted) cold and cut into small cubes
  • 160 g caster or granulated sugar
  • 160 g dark or light brown sugar
  • 1 large orange zest only
  • 300 g plain flour
  • 200 g self-raising flour
  • 2 teaspoons baking powder
  • 1/2 teaspoon bicarbonate of soda
  • 1/4 teaspoon salt
  • 3 Terry's Chocolate Oranges save 12 segments for decoration and break the remaining chocolate into chunks - I used 1 dark chocolate and 2 milk chocolate
  • 100 g dark/milk or white chocolate chips
  • 2 medium or large eggs beaten
  • 1 teaspoon vanilla extract this can be substituted with orange extract or left out

Instructions

  • In a large mixing bowl, cream the cold butter for about 30 seconds until softened slightly. Add the orange zest to the sugars, and rub the orange zest into the sugars until combined. Now add the sugars to the butter and mix again until just combined. You don’t want to make this mixture creamy and fluffy.
  • Now add both types of flour, baking powder, bicarbonate of soda, and salt. Mix until you have a fine, breadcrumb texture. Save 12 segments of Terry's Chocolate Orange for decoration later on. Now stir through the remaining chocolate.
  • Add the beaten egg and vanilla and just mix until a dough comes together; be careful not to overmix. Weigh roughly 125g portions of the cookie dough and roll into a ball - this doesn't need to be perfect just lightly press them together. Place on a lined baking tray or container and freeze for at least 90 minutes, or overnight for a thicker cookie.
  • When ready to bake the cookies, preheat oven to 200°C / 180°C Fan / 400°F / Gas Mark 6. Line two large baking trays with parchment paper and place the trays in the oven for 5 minutes to heat before spacing the rolled cookie dough balls out leaving at least 2 inches between each to allow room for spreading.
  • Bake the cookies for 17 minutes, until lightly golden and crisp around the edges. Allow the cookies to cool for a few minutes, then if you desire, press a few extra chocolate chips and top each cookie with a Terry's Chocolate Orange segment.
  • Leave the cookies to cool on the baking trays for 5 minutes then transport to a wire rack and allow the cookies to cool slightly before serving. Cookies will keep stored in an airtight container for up to 3 days.

Some favourite Christmas recipes!

Gingerbread Men

Butter Cookies

Vegan Gingerbread Loaf Cake

Keep up to date with me on:

Like my Facebook page here

Instagram: @whatjessicabakednext

Twitter: @jessbakednext

Pinterest: @jessbakednext

Biscuits and Cookies · Candy and Sweets · Chocolate · No-Bake

Halloween Chocolate Bark

The easiest of recipes! This Halloween Chocolate Bark is a great treat to rustle up for trick-or-treaters, serve at a Halloween party, or to use up any leftover chocolate and sweets!

We’ve kicked off Halloween on the blog with my Ghost Cupcakes, now we move onto another devilishly delicious treat…

Pick your favourite chocolate for the base of your chocolate bark. I made this recipe with my sister, we went for Cadbury Dairy Milk, then swirled some melted white chocolate through the milk chocolate. We’ve topped our bark with Reese’s Pieces, chopped Reese’s Peanut Butter Cups, and crushed Oreos. All our favourite chocolate and confectionery!

You could also top the bark with Halloween-inspired sprinkles, gummy sweets – we didn’t do this because all the sweets we found weren’t vegetarian. But toppings are totally individual, next time we even discussed adding some pretzels for extra crunchy texture.

This chocolate bark is perfect for making to give out to any trick-or-treaters and Halloween parties.

Kids will love getting involved in making this! It’s a super fun and easy treat to whip up, there’s absolutely no baking involved, and it takes only 30 minutes to set in the fridge. It can be topped differently depending on the season – I’m already thinking of a (dare I say it?) Christmas-inspired one!

This chocolate bark tastes just so good, you may or may not want to open the door to any trick-or-treaters. I don’t blame you if you keep it all to yourself!

It’s like creating your own chocolate bar, you can add all your favourite chocolates and sweets – make a bark completely unique to you!

Print

Halloween Chocolate Bark

The easiest of recipes! This Halloween Chocolate Bark is a great treat to rustle up for trick-or-treaters, serve at a Halloween party, or to use up any leftover chocolate and sweets!
Prep Time 15 minutes
Chilling Time 30 minutes
Total Time 45 minutes
Servings 12
Author What Jessica Baked Next

Ingredients

  • 360 g dark or milk chocolate
  • 100 g white chocolate
  • 90 g bag Reese's Pieces
  • 5 snack size Reese's Peanut Butter Cups each chopped into quarters
  • 5 Oreos broken into a mixture of big and small pieces - you can add more

Instructions

  • Line a large baking tray/sheet with baking paper or a silicone baking mat.
  • Melt both types of chocolate, separately in either the microwave, or in a bowl atop a pan of simmering water (make sure it's not directly touching) - this is known as a bain-marie.
  • Spread the melted milk chocolate over the baking tray/sheet into an even layer, about 1/2-inch in thickness.
  • Top with the Reese's Pieces, chopped Reese's Peanut Butter Cups, and the crushed Oreos. Add any additional toppings you desire.
  • Place the chocolate bark in the fridge for 30 minutes, or until ready to serve. Cut into pieces as big or small as you like. The bark will keep in the fridge for up to a week.

Bake more Autumn/Halloween recipes!

Ghost Cupcakes

Pumpkin Cake with Cream Cheese Frosting

Keep up to date with me on:

Like my Facebook page here

Instagram: @whatjessicabakednext

Twitter: @jessbakednext

Pinterest: @jessbakednext

Baking · Buttercream and Frosting · Chocolate

Ghost Cupcakes

It’s spooky season and time to get ready for Halloween! Nothing screams Halloween more than these hellishly good Ghost Cupcakes! You get to decide whether they’re cute or spooky…

I first baked some Ghost Cupcakes many years ago when I’d only just started food blogging. I didn’t end up sharing the recipe, but years later I’ve decided to have another go at this cool recipe idea and bring it to the blog.

The recipe is super adaptable, take your favourite cupcake recipe. Chocolate, funfetti, red velvet, pumpkin, or vanilla.

My cupcakes were chocolate flavoured. I used my go-to Ultimate Chocolate Cupcake recipe, and topped the cupcakes with white chocolate buttercream.

In the past, I’ve used a cream cheese frosting. However, I love the un-beatable flavour combination of dark chocolate cupcakes with fluffy white chocolate buttercream.

The final decoration is super simple, take mini dark/milk chocolate chips or regular-sized chocolate chips and place two to make the ghosts eyes, and if you desire, place an extra chocolate chip for the mouth – I just went for two eyes!

These cupcakes will haunt you, that’s how good they are! You won’t be able to stop thinking about them…

Print

Ghost Cupcakes

It's spooky season and time to get ready for Halloween! Nothing screams Halloween more than these hellishly good Ghost Cupcakes. They're just as cute as they are scary!
Total Time 1 hour
Total Time 1 hour
Servings 12
Author What Jessica Baked Next

Ingredients

Chocolate Cupcakes

  • 85 g dark chocolate chopped into small pieces
  • 40 g cocoa powder
  • 1 teaspoon coffee granules or powder
  • 180 ml boiling water
  • 105 g strong white bread flour you can substitute this with plain flour
  • 150 g caster sugar
  • 1/2 teaspoon salt
  • 1/2 teaspoon bicarbonate of soda
  • 6 tablespoons vegetable oil
  • 2 medium or large eggs
  • 2 teaspoons white vinegar
  • 1 teaspoon vanilla extract

White Chocolate Buttercream

  • 150 g butter (salted or unsalted) softened
  • 300 g icing sugar sifted
  • 1 teaspoon vanilla extract
  • 200 g white chocolate melted and cooled slightly
  • Dark or milk chocolate chips for decoration

Instructions

  • To make the cupcakes: Place the chopped chocolate, cocoa powder and coffee granules/powder (if using) in a medium mixing bowl. Pour the boiling water over and whisk until smooth and all the chocolate has melted. Place in the fridge for 20 minutes.
  • Meanwhile, preheat oven to 180°C / 160°C Fan / 350°F / Gas Mark 4. Line a 12-hole cupcake/muffin tin with paper cases. In a large mixing bowl, whisk together the flour, sugar, salt and bicarbonate of soda until thoroughly combined. Whisk the oil, eggs, vinegar and vanilla into the now cooled chocolate mixture. Finally, add the wet ingredients to the dry ingredients and whisk until you have a smooth batter.
  • Divide the batter between the paper cases – I find using an ice cream scoop best for doing this as it makes less mess. Bake for 17-19 minutes or until the cupcakes are well risen and a cake tester comes out clean when inserted into the centre. Leave to cool in the tin for a few minutes and then transport to a wire rack to finish cooling completely.
  • To make the buttercream: Cream the butter for about a minute or two to soften. Now add the sifted icing in two batches and beat for another 2-3 minutes until the buttercream is light and fluffy. Add the vanilla extract and double cream.
  • Mix in the melted chocolate until just combined and decorate the cupcakes as desired - I use a large round piping tip to create the ghost shape. Decorate each cupcake with a couple of chocolate chips for the ghosts eyes. The cupcakes will keep in an airtight container at room temperature for up to 3 days.

Get ready to bake some truly spooktacular cupcakes!

Keep up to date with me on:

Like my Facebook page here

Instagram: @whatjessicabakednext

Twitter: @jessbakednext

Pinterest: @jessbakednext

Baking · Breakfast · Chocolate

Chocolate Granola

My easy homemade TRIPLE Chocolate Granola makes a fun, chocolatey breakfast. It’s delicious, slightly bittersweet and great served with creamy yoghurt, or milk of your choice. A day that starts with a little chocolate is sure to be good!

There are many granola recipes on my blog. We’re utterly in love with this Peanut Butter Chocolate Chip Granola when in need of a sweet ‘n’ salty treat for breakfast, but when we’re feeling like something a touch healthier, then our Basic Homemade Granola hits all the right notes.

I’ve said it lots of times before, I love making granola just as much as baking a batch of cookies, or a cheesecake. This granola is in fact inspired by my Triple Chocolate Cookies!

I’ll always find a way of getting chocolate involved in my breakfast bowl/plate…

Why buy all the expensive cereal/granola, when you can make it at home for cheaper?

When you make it yourself, you can control what ingredients are going in, which is definitely one of the many added bonuses of anything homemade.

What makes this granola contain triple chocolate: firstly, the cocoa powder combined with the oats before baking, secondly, the pack of dark/milk chocolate chips that’s stirred through the granola as it’s cools, and thirdly, the white chocolate chips added once the granola has completely cooled.

This granola is a dream breakfast for me. I love chocolate cereal, but with the oats in this and nuts, I feel it is just that little bit healthier than reaching for one of the go-to chocolate cereals!

Print

Chocolate Granola

My easy homemade TRIPLE Chocolate Granola makes a fun, chocolatey breakfast. It's delicious, slightly bittersweet and great served with creamy yoghurt, or milk of your choice. A day that starts with a little chocolate is sure to be good!
Prep Time 10 minutes
Cook Time 40 minutes
Total Time 50 minutes
Author What Jessica Baked Next

Ingredients

  • 350 g jumbo rolled oats
  • 100 g flaked almonds substitute with chopped hazelnuts, if preferred
  • 45 g dark or light brown sugar
  • 120 ml maple syrup or honey
  • 120 ml vegetable oil I use rapeseed oil
  • 60 g cocoa powder
  • 1 teaspoon vanilla extract optional
  • sea salt flakes a generous pinch
  • 100 g dark/milk chocolate chips
  • 100 g white chocolate chips

Instructions

  • Preheat oven to 150°C / 130°C Fan / 300°F / Gas Mark 2. Line a large baking sheet with baking parchment or a silicone baking mat.
  • In a large mixing bowl, combine the oats, flaked almonds and sugar until combined.
  • In a small jug, whisk together the maple syrup/honey, oil, cocoa powder and vanilla extract until smooth.
  • Add the wet ingredients to the dry ingredients, along with a generous pinch of sea salt flakes until the oats are all thoroughly coated. Spread the granola out on the baking tray - making sure it's an even layer.
  • Bake for 15 minutes, then give a good stir, making sure the edges are pushed to the centre and redistributed so every bit of the granola gets evenly toasted.
  • Bake again for another 15 minutes and repeat again, stirring as you did before. Now bake for a further 10 minutes. Sprinkle over 3/4 of the dark/milk chocolate chips, let the granola sit for a few minutes before stirring the chocolate in.
  • Allow the granola to cool on the tray, once it's completely cool, add the remaining dark/milk chocolate chips and the white chocolate chips, and stir through. The granola will keep stored in an airtight for up to a fortnight.

Serve your granola at breakfast: my favourite way to serve it is with natural yoghurt and fresh raspberries.

It’s also fantastic sprinkled over ice cream/frozen yoghurt, or eaten straight by the handful – something I’m most certainly guilty of doing!

A couple more granola recipes to try next!

Peanut Butter Chocolate Chip Granola

Basic Homemade Granola

Keep up to date with me on:

Like my Facebook page here

Instagram: @whatjessicabakednext

Twitter: @jessbakednext

Pinterest: @jessbakednext

Baking · Biscuits and Cookies · Chocolate

Caramilk Cookies

Caramilk Cookies are incredibly soft and chewy. Filled with lots of chunks of caramelised white chocolate and white chocolate chips!

I’m a wee bit late jumping on the caramelised white/caramel chocolate bandwagon! Upon my first taste, I’ve since become literally obsessed. Whenever I’m eating a bar of caramelised white chocolate, I’m thinking of the many ways I can combine it in my bakes.

This cookie recipe is based on the cookie dough I use to make my Mini Egg Cookies. It’s perfect in every way possible. These cookies are soft, a little bit chewy and jammed full of gooey chunks of Cadbury Caramilk and white chocolate chips.

Exactly how a good cookie should be!

Homemade cookies are always a good idea! You can never have enough cookies. I could eat them all day long.

That first bite of a gooey, delicious cookie is simply amazing. We loved the combination of creamy white chocolate chips, mixed with the decadent caramelised chocolate.

With the summer season here, take a couple of these cookies, and add a scoop of ice cream to the centre. Your very own cookie sandwich is a decadent treat that will satisfy your sweet cookie craving and cool you down.

Every time I make cookie dough, I always leave some in the freezer, so then I can reach for a homemade cookie when I want! I have some of this Caramilk white chocolate cookie dough in the freezer, and cannot wait for another one!

I might reach for the extra cookie dough very soon, along with a tub of vanilla ice cream…

These cookies reminded us of bakery-style cookies we loved years ago, but better!

The cookies will keep on your kitchen countertop for a few days. They taste best on the day of baking, but on the second day we find they firm up and the flavour has developed further.

Print

Caramilk Cookies

Soft and chewy cookies filled with chunks of caramelised white chocolate and white chocolate chips!
Prep Time 3 hours 10 minutes
Cook Time 12 minutes
Servings 18
Author What Jessica Baked Next

Ingredients

  • 280 g plain flour
  • 1 teaspoon bicarbonate of soda
  • 1 and 1/2 teaspoons cornflour
  • 1/2 teaspoon salt
  • 170 g butter (salted or unsalted) melted and cooled for 5 minutes
  • 150 g dark or light brown sugar
  • 100 g caster or granulated sugar
  • 1 medium or large egg
  • 1 medium or large egg yolk
  • 2 teaspoons vanilla extract
  • 100 g white chocolate chips
  • 250 g caramelised white chocolate chopped - I use Cadbury Caramilk but Caramac works too

Instructions

  • In a large mixing bowl, whisk together the flour, bicarbonate of soda, cornflour and the salt - only add a pinch of salt if using salted butter.
  • In a medium mixing bowl, whisk the melted butter with both types of sugar until the sugar has dissolved. Add the whole egg, egg yolk and the vanilla extract, and whisk again to combine.
  • Now add the wet ingredients to your bowl of dry ingredients. Gently fold together to combine. Add your white chocolate chips and chopped Caramilk, stir to mix through. Cover the bowl and chill the cookie dough for at least 2-3 hours, or up to 3 days. I leave mine overnight and then allow it to sit at room temperature for 15 minutes before rolling.
  • When ready to roll the cookie dough, take 60g portions and roll into balls. Preheat oven 160°C / 150°C Fan / 325 °F / Gas Mark 4.
  • Space the cookie dough out on 2-3 large baking trays - you might need to bake the cookies in batches. Bake for 12-14 minutes or until lightly golden around the edges - the cookies will appear very soft, but that's what you want. Press extra white chocolate chips and chopped Caramilk on top of each cookie while they're still hot. Leave the cookies to cool for 10 minutes on the baking trays, then they're ready to serve.
  • The cookies will keep for up to 3 days, stored in an airtight container or a covered plate at room temperature. Freeze the cookies in an airtight container/or freezer-safe bag for up to 3 months - thaw the cookie before baking.

Keep up to date with me on:

Like my Facebook page here 

Instagram: @whatjessicabakednext

Twitter: @jessbakednext

Pinterest: @jessbakednext

Biscuits and Cookies · Candy and Sweets · Chocolate · No-Bake

Crunchie Slice

Easy Crunchie Slice recipe! Made in a matter of minutes, this decadent slice combines crushed biscuit with melted butter, condensed milk and chopped Crunchie pieces, then it’s topped with a layer of milk chocolate and more Crunchie.

Today’s new recipe is this delicious Crunchie Slice. It’s no-bake and takes little time to prepare – only about 30 minutes in total!

For years on the WJBN, as soon as the summer arrives, I’m more in favour of sharing no-bake, easy and minimal fuss recipes, so you won’t be spending hours in the kitchen.

I’m really excited to kick off the summer-themed recipes on the blog. This slice is super simple to make, and it’s fantastic packed up and taken along as part of a picnic, or for a chocolatey sweet treat to enjoy.

Rocky road, slice, tiffin – I love all these kinds of recipes and want to further experiment with different flavour combinations!

Homemade Crunchie Slice is crushed biscuits mixed with melted butter, a whole can of condensed milk, then a whole load of chopped Cadbury Crunchie bars are folded through. The mixture is then pressed into a lined baking tin, then it’s topped with melted milk chocolate (I love Dairy Milk for this), with more chopped/crushed Crunchie bars scattered over!

It’s one hundred percent a truly indulgent sweet treat…

This recipe is one you’ll need to make in advance and allow to set overnight. If you try slicing after a few hours in the fridge, it will be too soft, so overnight refrigerating is essential.

Once it’s set, slice up pieces as big or small as you want!

If you love Crunchie, try my No-Bake Crunchie Cheesecake next!

Print

Crunchie Slice

Easy Crunchie Slice recipe! Made in a matter of minutes, this decadent slice combines crushed biscuit with melted butter, condensed milk and chopped Crunchie pieces, then it's topped with a layer of milk chocolate and more Crunchie.
Prep Time 20 minutes
Chilling Time 1 day
Total Time 1 day 20 minutes
Servings 16
Author What Jessica Baked Next

Ingredients

  • 300 g digestive biscuits finely crushed
  • 100 g butter (salted or unsalted) melted
  • 397 g tin sweetened condensed milk
  • 6 Cadbury Crunchie chocolate bars chopped into medium-sized pieces
  • 200 g dark or milk chocolate (I used Dairy Milk)
  • 1 tablespoon butter (salted or unsalted) - this is 15g

Instructions

  • In a large mixing bowl, combine the biscuit crumbs, with the melted butter and condensed milk. Stir until throughly combined. Now fold through 6 chopped Cadbury Crunchie bars.
  • Transfer this mixture to a lined 20cm square cake tin (or other suitably sized tin) and press down until compact and smooth on top.
  • Melt the chocolate and butter over a bain-marie, or in the microwave until smooth. Pour and spread the melted chocolate over the top of the biscuit layer. Now top with the remaining two chopped Cadbury Crunchie bars. Cover and leave to set in the fridge overnight.
  • When ready to serve, slice up into 16 squares or smaller pieces if desired. The slice will keep in the fridge for up to a week - the honeycomb will start to ooze slightly once sliced, but it still tastes delicious nonetheless.

Very similar to this recipe, No-Bake Chocolate Peanut Butter Bars

Keep up to date with me on:

Like my Facebook page here 

Instagram: @whatjessicabakednext

Twitter: @jessbakednext

Pinterest: @jessbakednext

Cheesecake · Chocolate · No-Bake

Mini Egg Cheesecake

No-Bake Mini Egg Cheesecake. Vanilla cheesecake filled with grated chocolate and chopped Cadbury Mini Eggs. This is an easy recipe to make for your Easter celebrations and for any Mini Egg lover!

This is the latest ‘bake’ of my Easter recipes. My blog is home to a vast range of cheesecakes – a few baked cheesecakes, but mainly no-bake cheesecakes. All very tasty, all easy and fun to make.

The Easter recipes have been featuring on WJBN over the last month and a bit, having shared these Double Cheese Hot Cross Buns and my Mini Egg Cookies recently. I’ve been looking for ways I can incorporate Mini Eggs into just more recipe before Easter!

This no-bake treat is an Easter-inspired cheesecake and it certainly is an indulgent dessert. I’ve used a basic vanilla no-bake cheesecake (without gelatine), but to make it perfect to serve at Easter, I’ve folded through some grated chocolate and chopped Mini Eggs. I used a 100g bar of dark chocolate, but feel free to swap that for either milk or white chocolate instead, if you fancy!

Adding grated chocolate as well as Mini Eggs makes this cheesecake even more decadent and I love how much chocolate you get in each bite of the cheesecake…

The chocolate mixed with the cheesecake reminds me of a Stracciatella-style dessert.

Once I added all that delicious grated chocolate and folded through the chopped Mini Eggs, the cheesecake was ready to go in the fridge to set. You can add more Mini Eggs if you like, just swap the grated chocolate for the same quantity of Mini Eggs.

To decorate, I load on more chopped/whole Mini Eggs and a few extra bits of Easter chocolate.

Serve this over Easter for friends and family and they’ll go absolutely mad for it! It’s light, mousse-like, packed full of chocolate. THE dream Easter dessert.

Print

Mini Egg Cheesecake

No-Bake Mini Egg Cheesecake. Vanilla cheesecake filled with grated chocolate and chopped Cadbury Mini Eggs. This is an easy recipe to make for your Easter celebrations and for any Mini Egg lover! THE dream Easter dessert.
Prep Time 6 hours 20 minutes
Total Time 6 hours 20 minutes
Servings 12
Author What Jessica Baked Next

Ingredients

Biscuit Base:

  • 300 g chocolate or plain digestive biscuits
  • 140 g butter (salted or unsalted)

Cheesecake Filling:

  • 100 g dark or milk chocolate finely grated
  • 200 g Cadbury Mini Eggs roughly chopped or crushed
  • 600 g full-fat cream cheese leave it out at room temperature for half an hour to soften slightly
  • 100 g icing sugar
  • 1 teaspoon vanilla extract
  • 300 ml double cream chilled - cream whips better when fridge cold

Instructions

  • Start by grating your chocolate and chopping your Mini Eggs.
  • Melt the butter in a small saucepan. Blitz the biscuits in a food processor to a fine crumb. Add the melted butter and mix until well combined. Tip the biscuit crumbs into a 23cm springform cake tin and press down until firm. Use the back of a spoon to smooth over, place in the fridge to chill whilst you make the filling.
  • In a large mixing bowl beat together the cream cheese with the icing sugar and vanilla extract until smooth. In another mixing bowl whisk the cream until stiff peaks form.
  • Start folding the cream in a bit at a time and mix to combine. Now fold through the grated chocolate and chopped Mini Eggs. Spread the cheesecake filling on top of the biscuit base, cover and refrigerate the cheesecake for at least 6 hours or overnight for best results.
  • When ready to serve, decorate as desired. I piped 150ml of extra whipped cream around the edge, then sprinkled over chopped/whole Mini Eggs - decorate the cheesecake just before serving. The cheesecake will keep in the fridge for up to 3 days.

Doing some more baking this Easter? Here’s some recipe inspiration!

Mini Egg Cookies

Carrot Cake Traybake

Easter Chocolate Nest Cakes

Cadbury Creme Egg Ice Cream

Easter Bunny Shortbreads

Keep up to date with me on:

Like my Facebook page here 

Instagram: @whatjessicabakednext

Twitter: @jessbakednext

Pinterest: @jessbakednext

Baking · Candy and Sweets · Chocolate · Cookies

Mini Egg Cookies

Soft and chewy cookies, filled with crushed Mini Eggs, dark chocolate chips and white chocolate chunks. Topped while still warm with even more Mini Eggs and chocolate!

Easter is getting closer and I felt like baking cookies, as I hadn’t made any for such a long time.

I love all kinds of cookies. I’m not fussy at all!

I’m all for the super soft, chewy ones, the deliciously thick Crème London/Levain Bakery cookies, and thin and crispy cookies!

I’ve taken the elite Easter chocolate, Cadbury Mini Eggs, and added them to a batch of cookie dough. Today, I’m presenting to you my Mini Egg Cookies.

Over the last few weeks, most supermarkets here have unveiled huge displays of Easter eggs and various Easter favourite chocolates – there’s an incredible amount of choice. A couple of my favourites include Cadbury Mini Eggs and Malteser Bunnies.

You’re going to fall in love with the texture of these cookies. They’re super soft, with a gooey middle that’s filled with chocolate.

Chocolate wise in this cookie, you can add a combination you like. I went for a mixture of dark chocolate chips, white chocolate chunks, along with crushed Mini Eggs. You can add more Mini Eggs if you want. I like decorating the tops with more Mini Eggs for extra crunchy texture – this also ensures you get Mini Eggs in each bite of your cookie!

I find the easiest way to prepare the Mini Eggs for the cookie dough is to crush the Mini Eggs in the bag they come in with a rolling pin. You want a mixture of big and small pieces. Then tip the crushed eggs straight into your cookie dough! Alternatively, you can add the Mini Eggs whole into your cookie dough.

I used a Cadbury Mini Egg bar to top my cookies too. It’s delicious – I used the extra chocolate I had leftover from this bar and filled a croissant for breakfast. It’s game-changing!

These cookies are a scrumptious Easter bake! So good eaten freshly baked to really enjoy the gooey, soft texture. Equally enjoyed with a scoop of ice cream or dunked in a glass of milk.

With this recipe, you’re now ready to get your cookie fix this Easter!

Print

Mini Egg Cookies

Soft and chewy cookies, filled with crushed Mini Eggs, dark chocolate chips and white chocolate chunks. Topped while still warm with even more Mini Eggs and chocolate!
Prep Time 3 hours 10 minutes
Cook Time 12 minutes
Total Time 3 hours 22 minutes
Servings 18
Author What Jessica Baked Next

Ingredients

  • 280 g plain flour
  • 1 teaspoon bicarbonate of soda
  • 1 and 1/2 teaspoons cornflour
  • 1/2 teaspoon salt add just a pinch if using salted butter
  • 170 g butter (salted or unsalted) melted and cooled for 5 minutes
  • 150 g dark or light brown sugar
  • 100 g granulated or caster sugar
  • 1 medium or large egg
  • 1 medium or large egg yolk
  • 2 teaspoons vanilla extract
  • 150 g Cadbury Mini Eggs crushed or roughly chopped
  • 150 g chocolate chips or chunks I used a mix of dark chocolate chips and chunks of white chocolate - you can add more mini eggs instead
  • Cadbury Mini Eggs and chocolate extra to decorate the tops of each cookie

Instructions

  • In a large mixing bowl, whisk together the flour, bicarbonate of soda, cornflour and the salt - only add a pinch of salt if using salted butter.
  • In a medium mixing bowl, whisk the melted butter with both types of sugar until the sugar has dissolved. Add the whole egg, egg yolk and the vanilla extract, and whisk again to combine.
  • Now add the wet ingredients to your bowl of dry ingredients. Gently fold together to combine. Add your Mini Eggs and other chocolate of choice, stir to mix through. Cover the bowl and chill the cookie dough for at least 2-3 hours, or up to 3 days. I leave mine overnight and then allow it to sit at room temperature for 15 minutes before rolling.
  • When ready to roll the cookie dough, take 60g portions and roll into balls. Preheat oven 160°C / 150°C Fan / 325 °F / Gas Mark 4.
  • Space the cookie dough out on 2-3 large baking trays - you might need to bake the cookies in batches. Bake for 12-14 minutes or until lightly golden around the edges - the cookies will appear very soft, but that's what you want. Press extra chopped Mini Eggs and chocolate on top of each cookie while they're still hot. Leave the cookies to cool for 10 minutes on the baking trays, then they're ready to serve.
  • The cookies will keep for up to 3 days, stored in an airtight container or a covered plate at room temperature.

Below are the Easter cookies I baked last year. These were vegan and were filled with dark chocolate chips and hazelnuts – yum!

We’re crazy for cookies here on WJBN! We’ve shared many biscuit/cookies with you, below are some favourites!

Easy Oat Biscuits

Vegan Chocolate Chip Cookies

Pret’s Dark Chocolate Almond Cookies

Butter Cookies

Triple Chocolate Cookies

Scottish Shortbread

Keep up to date with me on:

Like my Facebook page here

Instagram: @whatjessicabakednext

Twitter: @jessbakednext

Pinterest: @jessbakednext

Chocolate · Ice Cream · No-Bake

White Chocolate Ice Cream (Easy Three Ingredient Recipe)

Indulgently creamy homemade White Chocolate Ice Cream. This ice cream is made with three ingredients and without an ice cream machine in sight!

This White Chocolate Ice Cream is another recipe inspired by food I ate whilst away on a trip.

Ice cream was something we certainly indulged in during that holiday. I think I devoured about two or three ice creams a day…

I talked about a fantastic ice cream shop in this blog post. This shop sold really great ice cream and there was a flavour suited to everybody. On offer were classics like chocolate, strawberry and vanilla, and then some slightly different flavours, such as Kinder Bueno, berry/strawberry cheesecake, and fruity flavours including refreshing lemon, mango and watermelon.

One flavour that did amaze us, was white chocolate ice cream (chocolate blanco).

My sister picked this flavour the first night out and we all tried some. It was delicious, so utterly creamy and tasted just like eating a bar of white chocolate.

And you guessed it, the very next night I picked that flavour without hesitation!

I have a few no-churn ice cream recipes on my blog already, check these out below!

My most recent ice cream recipe is this No-Churn Oreo Ice Cream

Try my Cadbury Creme Egg Ice Cream for a delicious Easter-inspired recipe

Or if you’re a fan of Biscoff, try this incredibly good Speculoos Cookie Butter Ice Cream

I’ve said this many times before, but the no-churn method of making ice cream is truly special. It’s amazing how easy and quick (minus the freezing time) you can make homemade ice cream. I’ve made ice cream a couple of times in my ice cream machine, but it really is a faff and takes a lot longer than this no-churn version does to make!

The texture of this ice cream is very similar to gelato. A very decadent ice cream, one of which when you’ve started eating, it isn’t easy to stop yourself going back for more…

The ice cream takes just 10 minutes to prepare and then needs to freeze for at least 6 hours, or up to overnight.

All you need is a mixing bowl, a whisk, a spatula, three ingredients and a dish to pop your ice cream into.

Remember to take your ice cream out from the freezer and allow it to warm up for 10 minutes before scooping.

Serve your homemade ice cream in cones or a bowl. Other serving ideas include: serving the ice cream with strawberries or raspberries, topping the ice cream with a sprinkle of coconut, some toasted hazelnuts or pistachios. You could also serve this ice cream with a slice of your favourite chocolate or vanilla cake, brownies, a stack of pancakes, or even some apple crumble.

Print

White Chocolate Ice Cream (Easy Three Ingredient Recipe)

Deliciously creamy white chocolate ice cream. Made with only three ingredients!
Prep Time 6 hours 10 minutes
Total Time 6 hours 10 minutes
Servings 8
Author What Jessica Baked Next

Ingredients

  • 300 g white chocolate
  • 500 ml double cream chilled
  • 397 g tin sweetened condensed milk

Instructions

  • Melt the white chocolate either in a heatproof bowl atop a pan of simmering water (bain-marie), or in a microwave in 20-second bursts, stirring well until it's completely melted, and then set aside to cool slightly. Watch carefully as chocolate burns very easily.
  • In a large mixing bowl, whisk the cream until soft peaks form. Fold through the condensed milk, followed by the melted chocolate. Mix until everything is all combined - the mixture will thicken significantly once the white chocolate is added. Don't over mix.
  • Spread the ice cream mixture out into a suitable container. Scatter over some white chocolate curls and extra pieces of white chocolate, if desired. Cover the top with a lid or a piece of clingfilm.
  • Freeze for at least 6 hours or until firm and scoopable. I recommend freezing it overnight for the best results. Once ready to serve, scoop into cones or bowls. The ice cream will store in the freezer for up to one month.

Keep up to date with me on:

Like my Facebook page here

Instagram: @whatjessicabakednext

Twitter: @jessbakednext

Pinterest: @jessbakednext