Baking · Buttercream and Frosting · Cakes

Coffee and Walnut Cake

A classic two-layer coffee and walnut cake recipe. This British cake is a hit! Light and fluffy coffee-flavoured sponge cake with crunchy walnut pieces, then filled and topped with decadent espresso buttercream, and decorated with a combination of walnut halves and pieces.

This cake features in tearooms, cafes, and bakeries all across the UK. Along with a Classic Victoria Sandwich, this is probably my favourite cake flavour!

In 2023, I worked on a few baking projects for customers away from my blog, decorating several cakes. This was something I was anxious about, but I’m now really pleased I had these jobs to work on, as my confidence with cake decorating has grown a lot. I was busy from April onwards last year with numerous orders, so now that I have more time on my hands, I want to make the effort to share some ‘classic’ cake recipes.

I’ve baked coffee and walnut cakes like this during my day job; this is always a popular cake choice for customers. Coffee cake is different in various parts of the world. In the UK, it’s exactly what it says on the tin; it’s a coffee-flavoured sponge cake, whereas in the US, coffee cake is cake with a crumble topping that’s served with a cup of coffee on the side.

I used a Nigella Lawson recipe, and, oh my, is it good! I made just a few alterations to the original recipe.

What Ingredients You’ll Need:

Butter/Margarine – salted or unsalted is absolutely fine. I prefer using margarine, as I find it produces a lighter-textured cake, and the cakes rise more evenly.

Sugar – caster/granulated sugar is what I use. However, I have made this cake with light brown sugar, and that works great too.

Eggs – this recipe requires 4 eggs (medium or large).

Self-Raising Flour – the raising agents already in the flour will help the cake rise. Nigella’s original recipe uses 200g of plain/all-purpose flour, along with 2 + 1/2 teaspoons baking powder and 1/2 teaspoon bicarbonate of soda.

Walnuts – for the cake batter and the decoration. Chopped walnuts are folded through the cake batter, whereas walnut halves, and walnut pieces are used for the cake decoration.

Coffee/Espresso – I use espresso powder in the cake batter, and the buttercream. I love the intense coffee flavour it adds!

Milk – just a couple of tablespoons is needed to loosen the cake batter before baking.

Butter – for the buttercream I recommend salted butter opposed to unsalted. The salted butter evens out all the sweetness.

Icing Sugar – make sure you sift the icing sugar before creaming with the butter. This ensures your buttercream will be super smooth and luxurious.

We love the bittersweet combination of flavours, and the crunchy walnut pieces in the cake and topping.

Coffee buttercream is simply divine, and so easily eaten straight from the mixing bowl. I don’t drink coffee, but even I cannot get enough of this cake. I just love those specks of espresso in the buttercream!

This cake is a staple cake recipe in British kitchens! It’s a very homely cake, with rich coffee and lovely nutty flavour from the chopped walnuts inside the cake, and decoration.

The cake serves around 10 delicious slices!

Print

Coffee and Walnut Cake

A classic two-layer coffee and walnut cake recipe. This British cake is a hit! Light and fluffy coffee-flavoured sponge cake with crunchy walnut pieces, then filled and topped with decadent espresso buttercream, and decorated with a combination of walnut halves and pieces.
Prep Time 30 minutes
Cook Time 35 minutes
Total Time 1 hour 5 minutes
Servings 10
Author What Jessica Baked Next

Ingredients

Coffee and Walnut Cake:

  • 225 g butter (salted or unsalted) or margarine softened, you can use the margarine straight from the fridge
  • 225 g caster or granulated sugar can be substituted with light/dark brown sugar instead
  • 4 medium or large eggs
  • 225 g self-raising flour
  • Small pinch of salt omit if using salted butter
  • 4 teaspoons instant espresso powder feel free to reduce this amount
  • 2 tablespoons milk
  • 50 g walnuts chopped into small pieces

Coffee Buttercream:

  • 175 g butter (salted or unsalted) softened
  • 350 g icing sugar sifted
  • 2 and 1/2 teaspoons instant espresso powder or instant coffee granules dissolved in 2 tablespoons of boiling water

Decoration:

  • 10-12 walnut halves
  • chopped walnut pieces

Instructions

  • Preheat oven to 180°C / 160°C Fan / 350°F / Gas Mark 4. Line the base of two 20cm / 8-inch round cake tins with parchment paper, and set aside.
  • Cream the softened margarine/butter and sugar together until lightened in colour and fluffy in texture - this should take only a few minutes to achieve.
  • Now add the eggs one at a time and beat in to combine - don't worry if the mixture looks curdled at this point, as once the flour is added it will come together.
  • Now add the flour, along with the espresso powder, and a generous pinch of salt.
  • Mix until a smooth batter has come together - try not to over mix. Now, mix in the milk, and then fold in the chopped walnuts. Transfer the cake batter evenly between the two cake tins, and smooth the top over before baking for 30-35 minutes (I would recommend checking the cake just after 25 minutes). All ovens are different, my cakes took nearer to 35 minutes to fully bake - but just check, once the middle is cooked the cakes are ready.
  • Leave the cakes to cool in the tins for about 15 minutes, then carefully remove from the tins and leave to cool completely on a wire rack.
  • Once the cakes are cool, prepare the buttercream. Dissolve the espresso powder/coffee granules in 2 tablespoons of water, and set aside for the moment to cool slightly. Take the butter and cream for a minute to soften. Now add the sifted icing sugar and cream for a further 2-3 minutes, until lightened in colour. Now add the slightly cooled coffee mixture, and mix until combined fully.
  • To assemble the cake, place one cake half upside down on your chosen serving cake stand/plate/platter. Spread half the buttercream on this cake half. Place the other cake half over top. Now spread/or pipe the remaining buttercream on top. Take 8-10 walnut halves (or more if you like) and place around the edge of the buttercream. Sprinkle over some crushed walnuts directly on the middle of the cake, if desired.
  • Decorate further as desired, even a light dusting of cocoa powder, or chocolate-coated coffee beans would look great. The cake is ready to be served. It's best eaten on the day, or day after baking, but it'll last for up to 3 days covered at room temperature.

Love cake as much as me? Try these amazing cake recipes next!

School Cake

Eton Mess Cake

Classic Victoria Sandwich

Keep up to date with me on:

Like my Facebook page here

Instagram: @whatjessicabakednext

Twitter: @jessbakednext

Pinterest: @jessbakednext

Baking · Buttercream and Frosting · Chocolate

Ghost Cupcakes

It’s spooky season and time to get ready for Halloween! Nothing screams Halloween more than these hellishly good Ghost Cupcakes! You get to decide whether they’re cute or spooky…

I first baked some Ghost Cupcakes many years ago when I’d only just started food blogging. I didn’t end up sharing the recipe, but years later I’ve decided to have another go at this cool recipe idea and bring it to the blog.

The recipe is super adaptable, take your favourite cupcake recipe. Chocolate, funfetti, red velvet, pumpkin, or vanilla.

My cupcakes were chocolate flavoured. I used my go-to Ultimate Chocolate Cupcake recipe, and topped the cupcakes with white chocolate buttercream.

In the past, I’ve used a cream cheese frosting. However, I love the un-beatable flavour combination of dark chocolate cupcakes with fluffy white chocolate buttercream.

The final decoration is super simple, take mini dark/milk chocolate chips or regular-sized chocolate chips and place two to make the ghosts eyes, and if you desire, place an extra chocolate chip for the mouth – I just went for two eyes!

These cupcakes will haunt you, that’s how good they are! You won’t be able to stop thinking about them…

Print

Ghost Cupcakes

It's spooky season and time to get ready for Halloween! Nothing screams Halloween more than these hellishly good Ghost Cupcakes. They're just as cute as they are scary!
Total Time 1 hour
Total Time 1 hour
Servings 12
Author What Jessica Baked Next

Ingredients

Chocolate Cupcakes

  • 85 g dark chocolate chopped into small pieces
  • 40 g cocoa powder
  • 1 teaspoon coffee granules or powder
  • 180 ml boiling water
  • 105 g strong white bread flour you can substitute this with plain flour
  • 150 g caster sugar
  • 1/2 teaspoon salt
  • 1/2 teaspoon bicarbonate of soda
  • 6 tablespoons vegetable oil
  • 2 medium or large eggs
  • 2 teaspoons white vinegar
  • 1 teaspoon vanilla extract

White Chocolate Buttercream

  • 150 g butter (salted or unsalted) softened
  • 300 g icing sugar sifted
  • 1 teaspoon vanilla extract
  • 200 g white chocolate melted and cooled slightly
  • Dark or milk chocolate chips for decoration

Instructions

  • To make the cupcakes: Place the chopped chocolate, cocoa powder and coffee granules/powder (if using) in a medium mixing bowl. Pour the boiling water over and whisk until smooth and all the chocolate has melted. Place in the fridge for 20 minutes.
  • Meanwhile, preheat oven to 180°C / 160°C Fan / 350°F / Gas Mark 4. Line a 12-hole cupcake/muffin tin with paper cases. In a large mixing bowl, whisk together the flour, sugar, salt and bicarbonate of soda until thoroughly combined. Whisk the oil, eggs, vinegar and vanilla into the now cooled chocolate mixture. Finally, add the wet ingredients to the dry ingredients and whisk until you have a smooth batter.
  • Divide the batter between the paper cases – I find using an ice cream scoop best for doing this as it makes less mess. Bake for 17-19 minutes or until the cupcakes are well risen and a cake tester comes out clean when inserted into the centre. Leave to cool in the tin for a few minutes and then transport to a wire rack to finish cooling completely.
  • To make the buttercream: Cream the butter for about a minute or two to soften. Now add the sifted icing in two batches and beat for another 2-3 minutes until the buttercream is light and fluffy. Add the vanilla extract and double cream.
  • Mix in the melted chocolate until just combined and decorate the cupcakes as desired - I use a large round piping tip to create the ghost shape. Decorate each cupcake with a couple of chocolate chips for the ghosts eyes. The cupcakes will keep in an airtight container at room temperature for up to 3 days.

Get ready to bake some truly spooktacular cupcakes!

Keep up to date with me on:

Like my Facebook page here

Instagram: @whatjessicabakednext

Twitter: @jessbakednext

Pinterest: @jessbakednext

Baking · Brownies · Buttercream and Frosting · Chocolate · Vegan

Vegan Chocolate Orange Brownies

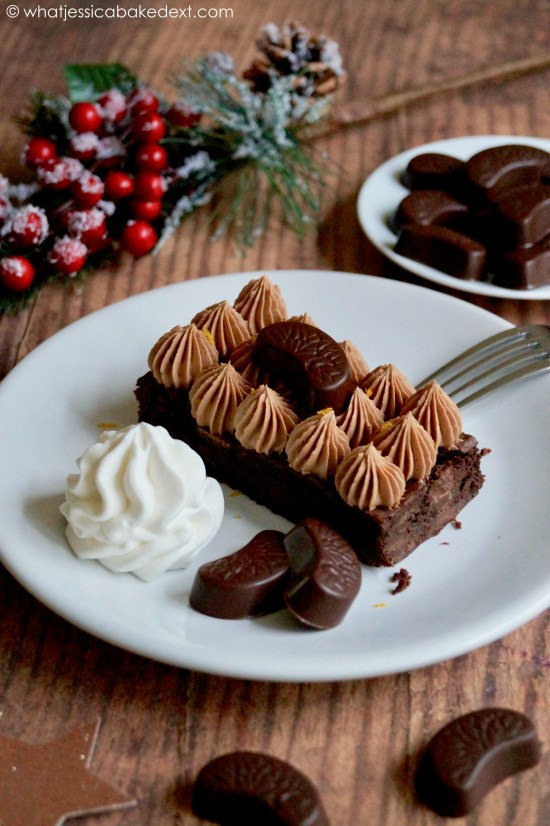
Vegan Chocolate Orange Brownies: rich and fudgy chocolate orange flavoured brownie with a chocolate orange buttercream.

In case you missed them, the festive recipes I’ve blogged so far: 3 Ingredient Oreo Truffles (perfect Xmas gift idea), Orange Chocolate Chip Cookies, Vegan ShortbreadVegan Gingerbread Loaf Cake and Vegan Cinnamon Rolls. My first year baking entirely vegan Christmas recipes!

Since sharing this Vegan Brownies recipe last year, I’ve been desperate to put a twist on the recipe. These vegan brownies are perfect for fans of fudgy brownies. I know I am, I’ll take a fudgy brownie over a cakey brownie any day.

The orange flavour in these brownies comes with a real punch, the way I’ve incorporated so much orange flavour is by adding orange extract instead of vanilla and adding the zest from one large orange.

I make my own vegan chocolate orange – they’re delicious and so easy to do! I have a 9-segment mould and melt 75g of vegan chocolate and once the chocolate has melted I stir through 1/4 teaspoon of orange extract.

The buttercream is optional, these brownies taste divine without it just served warm with vegan whipped cream or ice cream. The chocolate orange buttercream is made by creaming softened vegan butter and sifted icing sugar until lightened. Then adding orange extract and gently mixing in melted chocolate plus enough vegan cream or milk until the buttercream is a spreadable consistency.

I also decorate with extra orange zest and homemade chocolate orange segments. This brownie will make an impressive Christmas Day dessert, it’s pretty rich so only a small piece is needed – though I went overboard with these pictures as three of us ended up sharing one piece!

The recipe serves 16 depending on how big or small you slice the brownie up.

Print

Vegan Chocolate Orange Brownies

Vegan Chocolate Orange Brownies: rich and fudgy chocolate orange flavoured brownie with a chocolate orange buttercream.
Prep Time 10 minutes
Cook Time 25 minutes
Servings 16
Author What Jessica Baked Next

Ingredients

Brownie Batter:

  • 100 g dark chocolate
  • 200 g caster sugar
  • Zest from 1 large orange
  • 140 g plain flour
  • 20 g cocoa powder
  • 1 teaspoon baking powder
  • 80 ml vegetable oil
  • 240 ml plant milk
  • 1 teaspoon orange extract
  • 100 g vegan chocolate chips/chunks (optional)

Chocolate Orange Buttercream:

  • 75 g vegan butter softened
  • 150 g icing sugar sifted
  • 1/4 teaspoon orange extract
  • 75 g vegan chocolate
  • 2 tablespoons vegan cream or plant milk

Instructions

Make The Brownie Batter:

  • Preheat oven to 180°C / 160°C Fan / 350°F / Gas Mark 4. Line a 20cm square cake tin with parchment paper and set aside.
  • Break the dark chocolate up and add to a small heatproof bowl set over a pan of simmering water (bain-marie) - make sure the base of the bowl is not directly touching the water. Gently melt the dark chocolate until it’s smooth.
  • In a large mixing bowl, mix the sugar and orange zest together. Now sift together the flour, cocoa powder and baking powder. Give these ingredients a quick whisk together to combine then whisk in the oil, plant milk and orange extract until you have a smooth batter. Whisk in the melted chocolate until incorporated. Finally, if using fold through the extra chocolate chips/chunks.
  • Transfer the brownie batter to the lined tin.
  • Bake the brownies for 25-30 minutes - I always bake mine for 25 minutes because I like the brownies extra fudgy. Leave to cool completely in the tin before cutting in to 16 squares. We left ours overnight before cutting.

Make The Buttercream:

  • Cream the butter and icing sugar for about 2 minutes until light and fluffy. Add the orange extract, melted chocolate and vegan cream and mix until combined. Spread the buttercream over the top of the brownie or slice the brownie up and pipe the buttercream on top.
  • The brownies will keep stored in an airtight container at room temperature for up to one week.

My other Christmas recipes you’ve been enjoying!

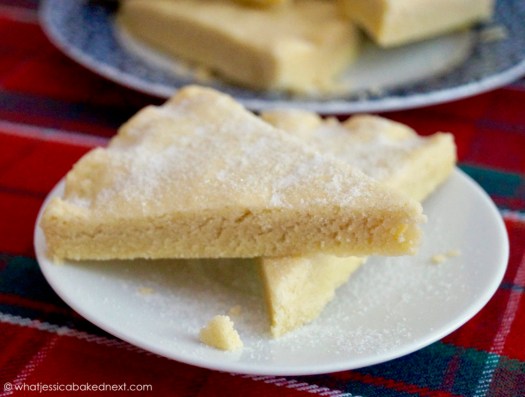
Scottish Shortbread

Vegan Biscoff Cheesecake

Terry’s Chocolate Orange Cheesecake

Keep up to date with me on:

Like my Facebook page here

Instagram: @whatjessicabakednext

Twitter: @jessbakednext

Pinterest: @jessbakednext

Baking · Buttercream and Frosting · Chocolate · Cupcakes · Vegan

Vegan Biscoff Chocolate Cupcakes

Vegan chocolate cupcakes with Biscoff buttercream. These decadent cupcakes are drizzled with melted cookie butter spread and decorated with crunchy speculoos.

Cupcake Day is on June 17th this year and there’s nothing like cake to bring everyone back together. Last year I created a recipe for Marble Cupcakes with Milk Chocolate Buttercream to raise awareness and vital funds for Alzheimer’s Society’s annual Cupcake Day. This year I’ve got another cupcake recipe to inspire you to take part and host your own Cupcake Day for this important charity.

We love cupcakes and any cake for that matter! I’ve added a different flavour to our favourite Vegan Chocolate Cupcakes and that new tasty addition is Biscoff.

If you’ve not tried this dreamy spread before then you’ve been missing out! It has a lovely caramelised flavour with a hint of cinnamon, ginger and other spices. Once I’ve opened a packet of biscuits I find it hard to stop eating them, one is never enough!

I’m going through a bit of a Biscoff craze lately after buying a massive 700g jar and having that in the kitchen made me want to create a new Biscoff bake for the blog. Asides from adding Biscoff to buttercream, I’ve been having it on my breakfast bowl of porridge with strawberries or spread on a couple of crumpets – two breakfast ideas I highly recommend!

The chocolate cupcakes are the same as my original recipe, but instead of chocolate buttercream I’ve made Biscoff buttercream. I use the smooth spread, but the crunchy spread can also be used.

The cupcake is fudgy, moist and rich in chocolate flavour. While the Biscoff element features just in the buttercream and decoration, once the cupcakes are cooled you can cut out the centre and fill with a spoonful of Biscoff spread. I didn’t do this, but I think it’s a great idea!

The buttercream is made like a regular buttercream, but to make sure it’s completely vegan we’re using a dairy-free baking spread, icing sugar, Biscoff spread and some plant cream/milk. It has just the right balance of creaminess and caramelised flavour.

The cupcakes can be decorated however you want. I pipe my buttercream on top of each chocolate cupcake, then drizzle melted Biscoff spread and crushed Biscoff biscuits over the top. I love how simple the decoration is and makes the finished cupcakes look so tempting.

(Makes 12)

Ingredients:

Chocolate Cupcakes:

120ml plant milk (I use soya but any plant milk will work)

1 and 1/2 tablespoons apple cider vinegar or white vinegar

200g caster/granulated or dark/light brown sugar

180g plain flour

40g cocoa powder, sifted

1 teaspoon baking powder

1 teaspoon bicarbonate of soda

1/2 teaspoon salt

80ml vegetable oil

1 teaspoon vanilla extract

120ml plant milk + 1 teaspoon instant coffee – the milk will need to be warmed before adding the coffee

Biscoff Buttercream: 

150g dairy-free baking spread

300g icing sugar, sifted

150g crunchy or smooth Biscoff spread

2-3 tablespoons vegan cream or plant milk (optional) – add enough until the buttercream has reached your preferred consistency

Method:

  1. Preheat oven to 180°C / 160°C Fan / 350°F Gas Mark 4. Line a 12-hole muffin tin with paper liners and set aside.
  2. To make the cupcakes: In a jug, mix together 120ml plant milk with the vinegar and leave it to one side – this makes a vegan-style buttermilk and will help the cupcakes rise when baking.
  3. In a large mixing bowl, add the sugar, flour, cocoa powder, baking powder, bicarbonate of soda and salt. Whisk together until combined.
  4. Now to the dry ingredients add the oil, the plant milk/vinegar mixture you prepared earlier along with the vanilla extract.
  5. Heat the remaining 120ml plant milk until warm (approx. 30 seconds in the microwave will do or place on the stove top and heat until warm) and add the coffee. Stir to dissolve the coffee in the milk and then add this mixture to the other ingredients.
  6. Whisk until you have a smooth batter free of any lumps. Distribute the cupcake batter between the paper liners and bake for 18 minutes or until a cake tester comes out clean when inserted into the centre of one of the cupcakes. Leave the cupcakes to cool in the tin for a few minutes, then transfer them to a wire rack to finish cooling completely.
  7. To make the buttercream: In a large mixing bowl, cream the dairy-free baking spread until softened – about a minute or two should do. Now add the icing sugar in two batches, mixing well after each addition. Now continue mixing for a further 5-7 minutes until the buttercream is pale and creamy.
  8. Add the Biscoff spread and give that a quick mix. Now add the vegan cream/plant milk (if using) and mix for another 30 seconds until thoroughly combined. Transfer the buttercream to a piping bag fitted with piping nozzle and decorate the cupcakes. You can spread the buttercream on each cupcake if you prefer. Decorate the cupcakes further as desired, I decorated mine with a drizzle of melted Biscoff spread and crushed Biscoff biscuits before serving.

The cupcakes will keep stored in airtight container at room temperature or in the fridge for up to 3 days.

Keep up to date with me on:

Like my Facebook page here

Instagram: @whatjessicabakednext

Twitter: @jessbakednext

Pinterest: @jessbakednext

Baking · Buttercream and Frosting · Chocolate · Vegan

Vegan Chocolate Cupcakes

Vegan chocolate fudge cupcakes with decadent chocolate buttercream. This recipe makes a dozen delicious chocolate cupcakes that are a breeze to make and taste like they’re from a bakery!

Chocolate cupcakes that are perfect for simply any celebration or occasion, but especially great to bake in time for Easter!

These chocolate cupcakes are soft, fluffy and topped with ultra smooth and creamy chocolate buttercream. One bite of these cupcakes and no one will guess they’re vegan.

The cupcake batter takes all of just 10 minutes to prepare. Start by making a vegan ‘buttermilk’ and to do this you’ll mix plant milk with vinegar – this mixture will help the cupcakes rise as they bake. In a mixing bowl you’ll combine sugar, flour, cocoa powder, baking powder, bicarbonate of soda and salt. Next, add oil and vanilla extract to the vegan ‘buttermilk’ mixture you prepared at the start of the recipe. Add that to your dry cake mix ingredients and then add plant milk/coffee and whisk until you have a smooth batter.

As with most chocolate cupcake batters, this one is runny so I’d recommend pouring the batter into a jug or using an ice cream scoop to distribute between the paper liners.

Bake the cupcakes until risen and springy to the touch. Then leave to cool completely, but as they cool you can make the buttercream and leave it in the fridge ready to decorate the cupcakes later on.

For this vegan chocolate buttercream, I swapped the butter for vegan baking spread, the icing sugar and cocoa powder is kept the same and then to lighten buttercream I’d normally add some double cream (I prefer adding cream instead of milk) so I switched my usual double cream for oat cream.

Testing out this vegan chocolate buttercream, I would say that the oat cream/plant milk is totally optional. I prefer a super creamy buttercream so add this extra ingredient to loosen my buttercream. However, even without the vegan cream the buttercream is easy to pipe, so don’t go out of your way to get vegan cream especially as your buttercream will taste great and have a wonderful creamy texture.

I usually make chocolate buttercream with melted chocolate, but I’d seen a lot of vegan chocolate buttercream recipes called for cocoa powder, so I decided to stick with adding cocoa powder instead of melted chocolate this time. This decision did have an added benefit too as it meant I could keep my supply of dark chocolate for future bakes and to snack on when I’m in need of some chocolate!

Top the cupcakes with grated dark chocolate, vegan mini speckled chocolate eggs or your desired cake decoration. If these cupcakes appear on your table over Easter I really do hope you enjoy them as much as we did!

(Makes 12)

Ingredients:

Chocolate Cupcakes:

120ml plant milk (I use soya but any plant milk will work)

1 and 1/2 tablespoons apple cider vinegar or white vinegar

200g caster/granulated or dark/light brown sugar

180g plain flour

40g cocoa powder, sifted

1 teaspoon baking powder

1 teaspoon bicarbonate of soda

1/2 teaspoon salt

80ml vegetable oil

1 teaspoon vanilla extract

120ml plant milk + 1 teaspoon instant coffee – the milk will need to be warmed before adding the coffee

Chocolate Buttercream: 

150g dairy-free baking spread

400g icing sugar, sifted

1 teaspoon vanilla extract

30g cocoa powder, sifted

2-3 tablespoons vegan cream or plant milk (optional) – add enough until the buttercream has reached your preferred consistency

Method:

  1. Preheat oven to 180°C / 160°C Fan / 350°F Gas Mark 4. Line a 12-hole muffin tin with paper liners and set aside.
  2. To make the cupcakes: In a jug, mix together 120ml plant milk with the vinegar and leave it to one side – this makes a vegan-style buttermilk and will help the cupcakes rise when baking.
  3. In a large mixing bowl, add the sugar, flour, cocoa powder, baking powder, bicarbonate of soda and salt. Whisk together until combined.
  4. Now to the dry ingredients add the oil, the plant milk/vinegar mixture you prepared earlier along with the vanilla extract.
  5. Heat the remaining 120ml plant milk until warm (approx. 30 seconds in the microwave will do or place on the stove top and heat until warm) and add the coffee. Stir to dissolve the coffee in the milk and then add this mixture to the other ingredients.
  6. Whisk until you have a smooth batter free of any lumps. Distribute the cupcake batter between the paper liners and bake for 18 minutes or until a cake tester comes out clean when inserted into the centre of one of the cupcakes. Leave the cupcakes to cool in the tin for a few minutes, then transfer them to a wire rack to finish cooling completely.
  7. To make the buttercream: In a large mixing bowl, cream the dairy-free baking spread until softened – about a minute or two should do. Now add the icing sugar in two batches, mixing well after each addition. Add the vanilla and continue mixing for a further 5-7 minutes until the buttercream is pale and creamy.
  8. Add cocoa powder and the vegan cream/plant milk (if using) and mix for another 30 seconds until thoroughly combined. Transfer the buttercream to a piping bag fitted with piping nozzle and decorate the cupcakes. You can spread the buttercream on each cupcake if you prefer. Decorate the cupcakes further as desired.

The cupcakes will keep stored in airtight container at room temperature or in the fridge for up to 3 days.

Keep up to date with me on:

Like my Facebook page here

Instagram: @whatjessicabakednext

Twitter: @jessbakednext

Pinterest: @jessbakednext

Baking · Buttercream and Frosting · Chocolate · Cupcakes

Marble Cupcakes with Milk Chocolate Buttercream

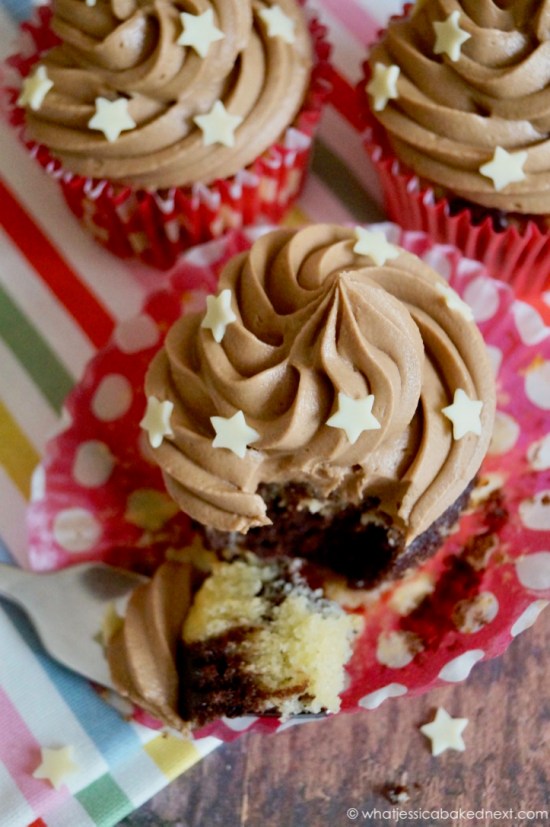
A perfect cupcake for when you can’t decide whether you fancy chocolate or vanilla cake! This simple cupcake recipe consists of chocolate and vanilla cake batter layered together and decorated with a swirl of milk chocolate buttercream. 

Sometimes I want a chocolate cake and other times I really crave a vanilla cake, but when you combine the two in a cake you’ve created a truly special cupcake treat.

My sister bakes amazing marble cakes and this cake really is a super popular birthday cake choice in our house because you get the taste of chocolate and vanilla together!

I asked on my social media platforms what cupcake recipes you wanted to see on the blog and I had some delicious responses. My friend, Alice, suggested baking marble cupcakes and I figured because I hadn’t shared a marble cake/cupcakes recipe on here yet, it was time to do something about that!

As you know already if you’ve baked/read recipes from this blog you’ll know I only share easy recipes that are totally fail-proof. The last thing I want you to do is waste your time and money on recipes that don’t work and you’re unhappy with. I love putting a big smile on you and your family and friends faces with my recipes!

This cupcake batter is super easy to prepare. It’s made the same way I make the batter for this Classic Victoria Sandwich, but this time we’re splitting the batter into two and adding cocoa powder to one part of the batter. The only bad part is there’s one more bowl to wash up once you’re done baking, but these cupcakes are worth it!

To construct the cupcakes ready for baking, once you’ve filled your cupcake/muffin tin with paper cases, dollop a spoonful of vanilla batter in one paper case, then repeat the previous step this time with a spoonful of chocolate batter on top of the vanilla batter (or do this the opposite way round if you prefer). Then continue to repeat alternating the batters until all the paper cases are 3/4 full and you’ve used up both cake batters. Seriously so easy and these cupcakes look impressive when they’re baked!

The cupcakes suit a whole host of different buttercream recipes. I picked to decorate my cupcakes with milk chocolate buttercream, but cream cheese frosting or even vanilla or white chocolate buttercream would pair well with the cupcakes.

I used my favourite ultra creamy milk chocolate buttercream recipe to top the cupcakes. I had a slight ingredient problem in my kitchen before baking these as I was running low on icing sugar and we couldn’t get any in our shopping and to make things worse I also discovered that my muffin tin was thrown out by accident < every bakers absolute nightmare! So first I had to order a new tin to bake the cupcakes and then I had to improvise by making icing sugar ready for my buttercream! Simply using my blender (which I use to make smoothies) I blended caster sugar with cornflour. I worried how it would turn out, but I’m impressed how easy it was to make my own.

If you’re looking for a new cupcake recipe to bake during lockdown, here’s my super simple and yummy marble cupcakes. These cupcakes lasted less than a day in our house, I think that tells you just how good these cupcakes taste. Enjoy everyone!

(Makes 12)

Ingredients:

Cupcake Batter: 

175g butter (salted or unsalted), softened

175g caster or granulated sugar

3 large free-range eggs, at room temperature

1 teaspoon vanilla extract

175g self-raising flour, sifted

50ml milk

3 tablespoons cocoa powder, sifted

Milk Chocolate Buttercream:

125g butter (salted or unsalted), softened

250g icing sugar, sifted

200g milk chocolate, melted and cooled slightly – you can use a mix of dark/milk or use all white chocolate

1 teaspoon vanilla extract

3-4 tablespoons double cream or milk (sometimes I add a tablespoon extra to make it creamier)

Small pinch of salt (add a pinch extra if using unsalted butter)

Method: 

  1. Preheat oven to 180°C / 160°C Fan / 350°F / Gas Mark 4. Line a 12-hole cupcake/muffin tin with paper cases.
  2. To make the cupcakes: In a large mixing bowl, cream the butter and sugar until creamy and pale in colour. Add the eggs one at a time mixing well before adding the next and also add the vanilla – don’t worry if the mixture looks curdled as once you add the flour it will be fine.
  3. Now fold through the sifted flour and once the flour is nearly all mixed through add the milk and mix until combined.
  4. Split the batter into two portions – this doesn’t have to be exactly equal. Then stir the cocoa powder into one batter until incorporated.
  5. Take a spoonful of vanilla batter and add to the paper case, then place a spoonful of the chocolate batter in top. Repeat until all the cake batter has been used up.
  6. Bake the cupcakes for 18-20 minutes or until a cake tester comes out clean when inserted into the centre of one of the cupcakes. Leave the cupcakes to cool in the tin for a few minutes and then transport them to a wire rack to finish cooling completely.
  7. To make the buttercream: Cream the butter for a minute to soften. Add the icing sugar and vanilla extract and beat for about 5 minutes until it’s fluffy and has turned pale in colour. Add the melted chocolate along with the cream and a pinch of salt. Mix until just combined.
  8. Decorate the cupcakes as desired, I pipe buttercream on the tops of mine but you can also spread the buttercream with knife on top of the cupcakes. Add sprinkles if you like – I used white chocolate stars from Cake Angels Sweetie Pie Sprinkles which were kindly gifted to me to bake with during lockdown.

The cupcakes will store in an airtight container at room temperature for up to 3 days.

Keep up to date with me on:

Like my Facebook page here

Instagram: @whatjessicabakednext

Twitter: @jessbakednext

Pinterest: @jessbakednext

Baking · Buttercream and Frosting · Cakes

Carrot Cake Traybake

Just in time for Easter, I’m serving you a piece of my favourite carrot cake traybake. This delightful cake is full of delicious flavour from cinnamon, ginger and nutmeg and it’s covered with a rich homemade cream cheese frosting. This recipe will be a real treat for all carrot cake lovers out there! 

What’s your favourite cake? If you asked me that exact question my list would probably be endless. I really do honestly love any kind of cake and I believe there’s definitely a cake perfect for every occasion.

Since it’s Easter week and you might need a last minute Easter bake to make today or over the weekend, I decided I would share my go-to easy carrot cake recipe again with updated photographs.

Ever since I baked these Carrot Cupcakes with Cream Cheese Frosting I’ve had my mind set on adapting the recipe into a traybake. The first time I shared this carrot cake recipe, I baked it as a layer cake, however how delicious it was I decided the original recipe needed to be made easier.

Traybake’s are perfect for times when you just don’t have the energy to put a lot of effort into decorating a cake. They’re super easy to make and the decoration can be kept as minimal as you want. I find layer cakes too much of a faff, but traybake’s are so much easier to decorate and style up, so if you’re of the same opinion as me then I hope you’ll love my take on a classic carrot cake.

To make my carrot cake extra special I like to add ground cinnamon, ginger and freshly grated nutmeg. Sometimes I also add orange zest and chopped walnuts – I’ve included these in the recipe incase you feel like adding those in too. If you don’t want to add walnuts you can swap them for a different nut like pecans or even leave them out and replace with raisins.

Carrot cake is extremely adaptable so you can pick and chose whatever add-ins you want in your cake and truly make it your own!

The cake is dairy-free, however for a dairy-free frosting/icing you could swap the cream cheese frosting for a drizzle icing. Try adding some of the juice from a lemon or orange and whisk the juice into icing sugar to create a drizzle icing that’s perfect for decorating your traybake.

To decorate my carrot cake, once the cake has completely cooled I use a serrated knife and slice the cake into 12 neat bars/squares and pipe the cream cheese frosting on the top of each piece of cake. I was kindly gifted a box of cake decorating goodies from the lovely team over at Cake Angels and I thought it would be fun to decorate my cake with the cute Carrot Wait for Cake sugar decorations and the Rainbow Sprinkles – how fun do these look?

(Serves 12-15)

Ingredients:

Carrot Cake Traybake:

150g dark or light brown sugar

150g caster or granulated sugar

300ml sunflower or vegetable oil

3 large free-range eggs, at room temperature

300g plain flour

1 teaspoon bicarbonate of soda

1 teaspoon baking powder

1/2 teaspoon salt

2 teaspoons ground cinnamon

1 teaspoon ground ginger

1 teaspoon ground nutmeg (freshly grated is recommended)

300g carrots, peeled and grated – weigh to ensure this is correct

100g nuts (pecans or walnuts), chopped into small pieces (optional)

Zest from 1-2 oranges (optional)

Cream Cheese Frosting: 

100g butter, softened

100g icing sugar, sifted

1 teaspoon vanilla extract

300g full-fat cream cheese, softened – I leave mine out at room temperature for an hour to soften

Method:

  1. To make the carrot cake traybake: Preheat oven to 180°C / 160°C Fan / 350°F / Gas Mark 4. Line a 9 x 13-inch (23 x 33cm) tin with parchment paper.
  2. In a large mixing bowl whisk together the sugars, oil and eggs until smooth.
  3. In another bowl sift together the flour, bicarbonate of soda, baking powder, salt and spices. Add the dry ingredients to the wet mixture a little at a time and whisk until completely incorporated.
  4. Now fold through the grated carrot, chopped walnuts and orange zest (if using). Spread the cake batter out into the tin and bake for 35-40 minutes or until the cake is well risen and a cake tester when inserted into the centre comes out clean without any uncooked batter remaining.
  5. Leave the cake to cool in the tin for 20 minutes, then carefully transport to a wire rack and allow to cool completely to room temperature.
  6. To make the cream cheese frosting: Cream the softened butter in a stand mixer on medium speed for about 2 minutes to soften. Now add the sifted icing sugar and vanilla and starting on a low speed mix to combine. Continue to cream for 1-2 minutes until light and fluffy.
  7. Once creamed add the softened cream cheese. Turn the mixer up and whisk on high speed for another 1-2 minutes or until the frosting is creamy, thick and smooth. You need to use an electric hand mixer or stand mixer with a whisk attachment to make sure the frosting reaches the correct consistency.
  8. Spread the top of the cake with the cream cheese frosting or cut the cake into squares and spread the top of each piece with the frosting or pipe the frosting on the top of each piece of cake. Further decorate with chopped nuts or sprinkles as desired. The cake will store in an airtight container in a cool place for up to 3 days, but if you’re not consuming it right away then I recommend refrigerating the cake.

Recipe Notes:

  • The weight of the carrots is based on weighing the carrots after they have been peeled and topped and tailed.
  • When adding the spices, I like to add a heaping teaspoon of each spice. This is down to personal preference as I really love the flavour the spices add to the cake.
  • This cake serves 12 generous portions or up to 15 smaller pieces.

Keep up to date with me on:

Like my Facebook page here

Instagram: @whatjessicabakednext

Twitter: @jessbakednext

Pinterest: @jessbakednext

Baking · Buttercream and Frosting · Cakes

Pumpkin Cake with Cream Cheese Frosting

Homemade pumpkin cake filled with cosy spiced flavour is both easy and quick to make. Decorated with a vanilla cream cheese frosting and dusted with extra cinnamon, this cake is a quintessential autumn treat. 

Autumn is well and truly here now with the arrival of the cooler weather and darker evenings. We’ve said goodbye to summer and now we’re all looking for comforting, cosy and warming recipes. I’ve already been indulging in lots of my favourite autumnal recipes and I always look forward to the start of a new season.

I love all seasons, but spring/summer are my personal favourites. In summer we’re eating lighter meals that aren’t too heavy, whereas in the autumn and winter months it’s all about devouring (savoury and sweet) pies, stews and indulgent desserts and puddings – I’m certainly not complaining about the last part…

A recipe I think is just perfect for autumn is this pumpkin cake and if you’re a lover of carrot cake then this cake will hit the spot for you! I really enjoy cakes that are full of spices, so much so that I shared this Spice Loaf Cake recipe earlier this year and after sharing that recipe I wanted to make a pumpkin spice traybake for my blog.

Compared to carrot cake this pumpkin version is SO much easier and quicker to prepare, no peeling and grating carrots and best of all it takes a matter of minutes to rustle up and have in your oven baking!

Whilst this cake is scrumptious on its own, my favourite part of this recipe is still the incredible frosting that tops it. For me, no frosting pairs better with pumpkin cake than cream cheese frosting does.

My cream cheese frosting is rich and smooth, it’s not too sweet and pipes wonderfully – this is a recipe I learnt while studying at culinary school and it’s totally fail-proof if you follow the instructions closely and take your time while preparing it.

This truly is one of my family’s favourite cakes, it’s always a huge hit with everyone and goes down a storm (it’s definitely something to do with the amazing cream cheese frosting)! Perfect for an autumn treat, serve the cake at Halloween parties this week, take along to a firework display on Bonfire Night or for any readers celebrating Thanksgiving in the States next month, this could be your showstopper dessert to serve on the special day!

(Serves 12-20)

Ingredients:

Pumpkin Cake:

4 large free-range eggs, at room temperature

350g caster sugar

240ml vegetable oil

425g (15 ounce) can pure pumpkin

300g plain flour

2 teaspoons bicarbonate of soda (baking soda)

1 teaspoon baking powder

2 teaspoons ground cinnamon

1 teaspoon salt

Cream Cheese Frosting: 

100g butter (salted or unsalted), softened

100g icing sugar, sifted

1 teaspoon vanilla extract

300g full-fat cream cheese, softened – I leave mine out at room temperature for an hour to soften

Method:

  1. Preheat oven to 180°C / 160°C Fan / 350°F / Gas Mark 4. Line a 9 x 13-inch (23 x 33cm) tin with parchment paper.
  2. To make the cake: In a large mixing bowl whisk together the eggs, sugar, oil and canned pumpkin until well combined. Now over the top of bowl sift the flour, bicarbonate of soda, baking powder, cinnamon and salt and mix until all the ingredients are completely incorporated.
  3. Pour the cake batter into the cake tin and smooth the top over evenly with a spatula or the back of a spoon. Bake the cake for 25-30 minutes or until a cake tester comes out clean when inserted into the centre of the cake – my cake took around 35 minutes before I was happy with it being baked all the way through. Now leave the cake to cool in the tin completely before preparing the frosting.
  4. To make the cream cheese frosting: Cream the softened butter in a stand mixer on medium speed for about 2 minutes to soften. Now add the sifted icing sugar and vanilla and starting on a low speed mix to combine. Continue to cream for 1-2 minutes until light and fluffy.
  5. Once creamed add the softened cream cheese. Turn the mixer up and whisk on high speed for another 1-2 minutes or until the frosting is creamy, thick and smooth. You need to use an electric hand mixer or stand mixer with a whisk attachment to make sure the frosting reaches the correct consistency.
  6. Decorate the cake as desired, either spread the top of the cake with the cream cheese frosting or slice the cake up into pieces and pipe the top of each piece with the frosting.
  7. This cake will keep in an airtight container for up to 3 days – without the cream cheese frosting the cake itself will last for up 5 days. We prefer ours chilled and eaten straight from the fridge, but it’s also great served at room temperature.

Keep up to date with me on:

Like my Facebook page here

Instagram: @whatjessicabakednext

Twitter: @jessbakednext

Pinterest: @jessbakednext

Baking · Buttercream and Frosting · Cupcakes

Butterscotch Cupcakes with Caramel Buttercream

Indulgent homemade cupcakes with butterscotch and caramel flavour in every tasty bite. Each cupcake is individually garnished with a drizzle of caramel and decorated with fudge chunks. 

I’ve baked traditional British sponge cakes for as long as I can remember – it was the first recipe I learnt to bake and I’m the most confident with baking this kind of cake.

I love the classic sponge cake, but what’s really wonderful is how versatile it is. With this new recipe, I’ve revamped a plain sponge cake batter by swapping caster sugar for brown sugar and added a packet of Butterscotch Angel Delight, which is butterscotch flavoured mousse – I don’t mind it served as mousse, but I prefer mine baked into a cake!

One taste of these cupcakes and you’ll be in caramel heaven. Adding butterscotch mousse/pudding to the cupcake batter brings another dimension, but if you can’t find it where you live or just don’t feel like adding it then omit from the recipe. Also, use up some of the leftover caramel/dulce de leche and give your cupcakes a caramel filling.

The cake itself is beautifully airy, light and moist. I topped these cupcakes with caramel buttercream made from four simple ingredients (butter, icing sugar, a pinch of salt and caramel (homemade or readymade). Whilst the caramel buttercream is super delicious, equally a (milk or white) chocolate, cinnamon or vanilla buttercream would be complementary too.

I might just bake these cupcakes again to try out all the different buttercream ideas I suggested!

Surprise any caramel and cupcake lover with this special treat. Trust me, you’ll be baking a second batch of these cupcakes without hesitation!

(Makes 12)

Butterscotch Cupcakes: 

150g butter (salted or unsalted), softened

150g dark or light brown sugar

3 large free-range eggs, at room temperature

150g self-raising flour, sifted

1 x 59g packet Butterscotch Angel Delight – this is one standard UK packet (optional)

4 tablespoons milk

Caramel Buttercream: 

125g butter (salted or unsalted), softened

350g icing sugar, sifted

Generous pinch of salt

100g caramel or dulce de leche

Method: 

  1. To make the cupcakes: Preheat oven to 180°C / 160°C Fan / 350°F / Gas Mark 4. Line a 12-hole cupcake/muffin tin with paper cases.
  2. In a large mixing bowl cream the butter and sugar until light and fluffy. Add the eggs one at a time and mix well after each addition. Fold through the flour, butterscotch mousse/pudding (if using) and milk – the cake batter will be quite thick.
  3. Evenly distribute the cupcake batter between the paper cases and bake for 20-25 minutes or until the cupcakes are well risen, golden and a cake tester when inserted into the centre of one of the cupcakes comes out clean. Leave the cupcakes to cool in the tin for a few minutes then transport them to a wire rack and allow the cupcakes to cool completely.
  4. To make the buttercream: Cream the butter and icing sugar together until light and fluffy – this should take about 3-5 minutes. Now add the salt and caramel/dulce de leche and continue mixing until they’re incorporated.
  5. Decorate the cupcakes with the buttercream as desired, you can spread the buttercream on with a small palette knife or pipe the buttercream on the cupcakes like I did. Garnish with extra drizzles of caramel/dulce de leche and fudge chunks. I especially love decorating my bakes with Cake Angels Salted Caramel Fudge Pieces or the yummy Zillionaire Sprinkles.

The cupcakes will keep stored in an airtight container for up to 3 days.

Keep up to date with me on:

Like my Facebook page here

Instagram: @whatjessicabakednext

Twitter: @jessbakednext

Pinterest: @jessbakednext

Baking · Brownies · Buttercream and Frosting · Candy and Sweets · Chocolate

Ganache Frosted Fudge Brownies

Bake yourself these chocolate fudge brownies frosted with dark chocolate ganache ready for when a chocolate craving hits. These brownies have a delectable truffle-like texture and are dangerously good served with a scoop or two of vanilla ice cream. 

I’ve taken my go-to Chocolate Fudge Brownies to the next level of deliciousness by covering them in silky smooth chocolate ganache and topping with M&M chocolates (FYI I actually didn’t realise until now that the last two recipes I’ve shared have both contained M&M’s!). Decorate and dress up your batch of brownies as you wish, you can leave them plain or beautify them as much as you want.

As the title describes these brownies are scrumptiously fudgy in texture just like a rich chocolate truffle, so if you’re more into cakey brownies then this recipe might not be what you’re looking for, but that said this brownie recipe has converted even the most chocolate dessert loathing person I know!

I’m a lover of all types of brownies, both cakey and fudge, but these fudge brownies have the edge for me.

This recipe is little more lengthy than other brownie recipes but it’s definitely well worth the wait. I say this because once baked, the brownies will need to be left to set for at least 6 hours, I usually make mine in advance and leave them overnight, then the ganache will need to be left to set at room temperature for an additional couple of hours on top of that.

The brownies are best stored in the fridge and because I baked mine on a really hot day, I found that my ganache took a little longer to set because of the heat and the brownies were very soft (just something to take into account). They’re far easier to slice up into pieces when they’ve been chilled for a while in the fridge, plus once they’ve been in the fridge they go all dense and even yummier in my opinion!

This is the perfect treat yourself brownie – it has tonnes of chocolate flavour and the ganache layer just makes these even more special!

We love these brownies as they are even without the luxurious ganache topping, however I feel the ganache makes these into a restaurant-worthy dessert. My sister and I took the M&M’s off a couple of squares of these brownies and microwaved them for about 20-30 seconds and the brownies went all gooey and reminded us of a molten lava chocolate pudding.

These brownies are an all-round favourite and this recipe will not let you down. Grab your apron and ingredients and get ready to bake up a storm and some of the most sinful brownies you’ll ever taste!

(Makes approx. 16-24 small pieces)

Ingredients:

Chocolate Fudge Brownies:

200g butter (salted or unsalted), cut into small cubes

200g dark chocolate, coarsely chopped

3 large free-range eggs

2 large free-range egg yolks

270g caster sugar

115g plain flour

35g cocoa powder

Chocolate Ganache:

200g dark chocolate, cut into 2cm pieces

200ml double cream

1 tablespoon golden syrup

1 tablespoon butter (salted or unsalted)

Method:

  1. To make the brownies: Preheat oven to 160°C / 140°C Fan / 325°F / Gas Mark 4. Line a 8 x 8 inch (20 x 20cm) square tin with parchment paper and set aside.
  2. Melt the butter and chocolate over a bain-marie or in the microwave in 20-second intervals until completely melted and smooth. Set this mixture aside and leave it to cool for 5 minutes.
  3. Meanwhile whisk the eggs and egg yolks together until combined. Once the chocolate mixture has cooled slightly, add the egg mixture and stir to combine.
  4. In large mixing bowl, mix together the flour and sugar, sift the cocoa powder over the top and mix until thoroughly combined and no lumps of flour remain.
  5. Now add the chocolate mixture and stir until combined, try not to over mix otherwise this may result in your baked brownies being tough. Transfer the brownie batter to the prepared tin and smooth the surface. Bake the brownies for 40-45 minutes, they’ll be ready when they’re risen, the top has started to slightly crack and a cake tester when inserted into the centre comes out with just a few moist crumbs attached.
  6. Leave the brownies to cool completely in the tin, then once cooled leave them to set for at least 6 hours or overnight for best results.
  7. To make the ganache: Place the chopped chocolate in a medium mixing bowl. Heat the cream and golden syrup in a small saucepan until bubbles just begin to appear on the surface and just before it starts to come up to the boil. Pour the hot cream over the chocolate and stir with a spatula or wooden spoon until mostly melted. Now add the butter and continue to stir until smooth. Directly place a piece of clingfilm on the top of the ganache and leave it at room temperature for about two hours until spreadable.
  8. Every spread the ganache on top of the now cooled brownie and further decorate as you desire – I decorated mine with M&M chocolates, at this point I highly recommend chilling the brownies for a bit before slicing.
  9. When ready to serve, slice the brownies into 16-24 squares – because of the ganache layer you might want to cut the pieces a little smaller as these brownies are very rich. Brownies will store in an airtight container at room temperature for up to 3 days or in the fridge for up to a week.

Recipe Notes:

  • My oven is fan assisted and even though the recipe states to bake the brownies at 140°C Fan, I’ve always baked mine at 160°C Fan instead to ensure they’re not too undercooked.
  • Serve the brownies as they are or with ice cream, pouring or whipped cream and fruit. I like to serve my brownies with fruit, because it cuts through the richness of the brownie.
  • Usually I would say this brownie (without the ganache) serves about 16, however with the ganache layer they’re even more decadent so I reckon you could slice the brownies into 24 smaller pieces.

Keep up to date with me on:

Like my Facebook page here

Instagram: @whatjessicabakednext

Twitter: @jessbakednext

Pinterest: @jessbakednext