Retro 99 Flake Cupcakes! Everyone’s favourite ice cream styled in cupcake form.

If there’s one particular food that reminds me of the British summer, then that’s a 99 Flake ice cream. If you’re a Brit, then you probably get excited during the spring/summer hearing the sound of an ice cream van arriving down your road.
My order from an ice cream van is always a whippy/soft serve ice cream with a Cadbury Flake and sprinkles. So I’ve created a new cupcake recipe based on my go-to ice cream van order!


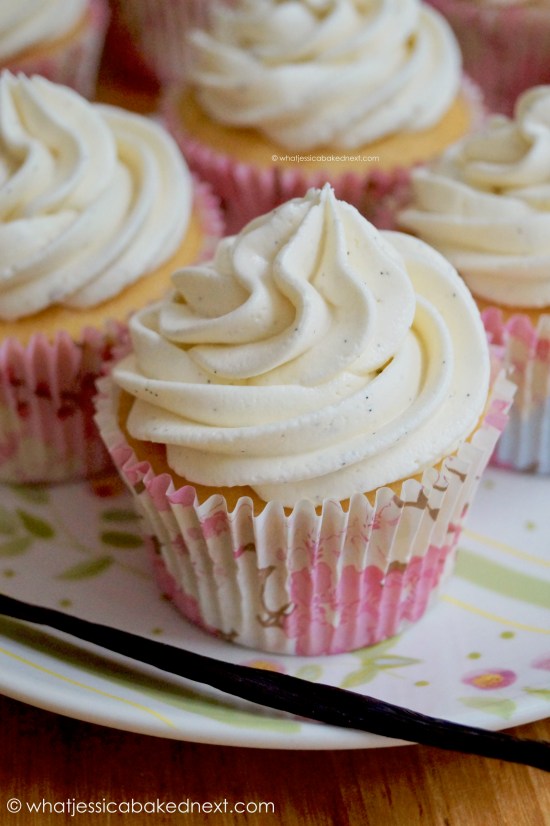
The cupcakes consist of a vanilla cake batter. Once baked until golden, they’re topped with a homemade vanilla buttercream – the buttercream itself tastes like whippy ice cream, whilst looking like it too.
I then decorated with a drizzle of strawberry sauce and added some colourful sprinkles. The best part comes last, topping each cupcake with a Cadbury Flake.
You can take out the centre of each cupcake and fill it with jam or even Nutella for a little twist on the standard recipe.

The perfect bake for taking a trip down memory lane. Delicious and they look exactly like they’ve come from an ice cream van! Your family and friends will love these.

99 Flake Cupcakes
Ingredients
Vanilla Cupcake Batter
- 175 g butter or margarine softened - use the margarine straight from the fridge
- 175 g caster or granulated sugar
- 3 eggs at room temperature
- 1 teaspoon vanilla extract
- 175 g self-raising flour
- 2-3 tablespoons milk enough to loosen the batter slightly
Vanilla Buttercream
- 200 g butter (salted or unsalted) softened
- 350-400 g icing sugar
- 2 teaspoons vanilla extract
- 2-3 tablespoons double cream optional - this lightens the buttercream
Decoration
- Caramel/chocolate/raspberry/strawberry sauce
- Sprinkles
- Cadbury Chocolate Flake bars
Instructions
- Preheat oven to 180°C / 160°C Fan / 350°F / Gas Mark 4. Line a cupcake tin with 12 cupcake cases and set aside.
- To make the cupcakes, beat the softened butter with the sugar until fluffy and smooth. Add the eggs one by one along with the vanilla and mix until incorporated.
- Now fold through the flour and mix until no lumps of flour remain. Add enough milk to loosen the mixture slightly - approx. 2-3 tablespoons of milk will do.
- Evenly divide the cupcake batter between the cupcake cases. Bake the cupcakes for 20-25 minutes or until a cake tester comes out clean without any uncooked batter remaining. Leave the baked cupcakes to cool in the tin for a 5-10 minutes, then carefully remove the cupcakes from the tin and transport to a wire rack and allow the cupcakes to cool completely to room temperature.
- Once the cupcakes are fully cooled make the buttercream. Cream the softened butter for a minute or two to soften. Add the icing sugar and the vanilla extract and beat gently together until the butter and sugar has combined. Now continuing creaming for another 2-3 minutes until the buttercream is a light pale colour. Now add the double cream or milk and beat until combined fully.
- Fit a large disposable piping bag with an open star tip nozzle. Fill the piping bag with the buttercream, pipe even swirls on the top of each cupcake, decorate with a drizzle of strawberry sauce and finish with some sprinkles. Finally, place a flake on top of each cupcake.
- The cupcakes will keep stored in an airtight container for up to 3 days.


Keep up to date with me on:
Like my Facebook page here
Instagram: @whatjessicabakednext
Twitter: @jessbakednext
Pinterest: @jessbakednext