Baking · Cakes

School Cake

A true British classic – this is my take on the popular old-fashioned School Cake. This simple, fluffy vanilla traybake is topped with icing and lots of colourful sprinkles!

When it comes to cake, the simplest of cakes is definitely a winner in my opinion.

The cake I have for you today is easy to make and even easier to eat!

School Cake is a nostalgic bake that often reminds many British people of their childhood at primary school. My sister and I went to school in the 2000’s. We actually don’t remember having this cake, but I’ve seen this recipe everywhere!

When talking to my family, we discussed our memories of school food, and obviously, pudding was our main topic of conversation. Sweet treats we remember enjoying at school included chocolate shortbread and flapjacks.

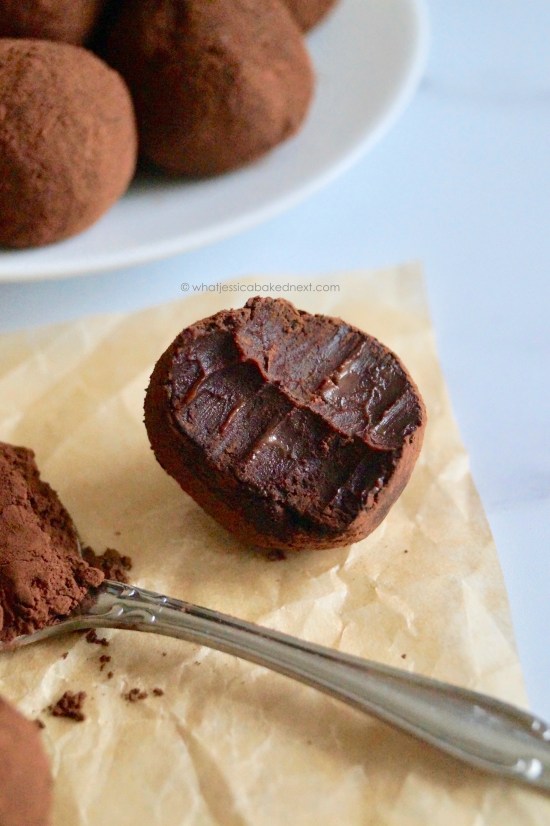
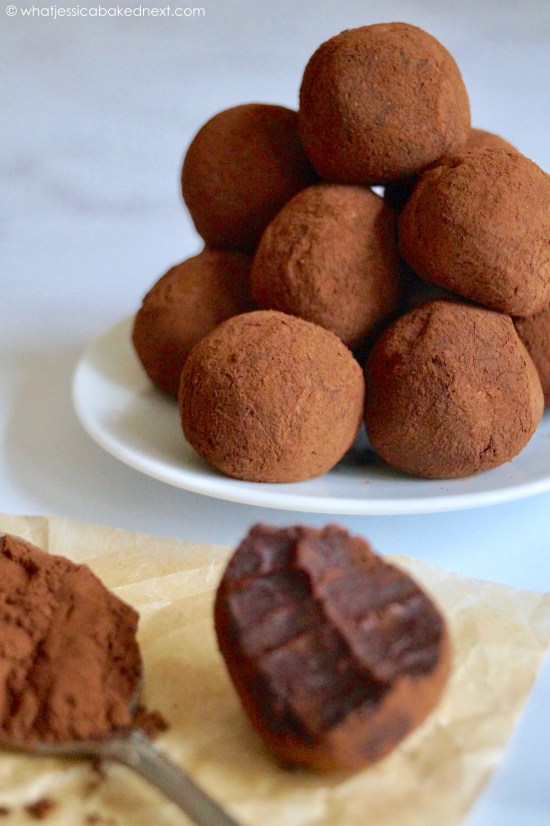
If you love flapjacks, then you just have to try my popular British Flapjacks recipe ASAP!

I bake cakes like this at work very often, so I thought about sharing one on my blog. You can make this cake one of two ways. The all-in-one method or creaming method. I like to cream my margarine and sugar first, then add the eggs, along with the vanilla extract, flour and milk.

I would recommend using margarine over butter. Butter adds amazing richness, but personally, for me, the margarine keeps the cake super moist and tastes more traditional. Plus, a bonus of using margarine, is that you can use it straight from the fridge, unlike butter which needs to be softened.

Decorate this amazing vanilla traybake with a simple white icing. Then follow that with a generous amount of sprinkles (either sugar strands or hundreds and thousands).

Leave the icing to set, then slice into squares as big or small as you like.

We ate this cake as it is, and also with some custard. This divine cake stays moist for days, it’s perfect for all occasions. Whether that be for a weekday/weekend pudding, or for a birthday party.

Take a step back in time to your school days with this fabulous, retro cake!

Print

School Cake

A true British classic. My take on the popular old-fashioned School Cake. This simple, fluffy vanilla traybake is topped with icing and lots of colourful sprinkles!
Prep Time 15 minutes
Cook Time 30 minutes
Servings 16
Author What Jessica Baked Next

Ingredients

  • 300 g butter (salted or unsalted) or margarine margarine produces a lighter sponge
  • 300 g caster or granulated sugar
  • 5 medium or large eggs
  • 1 teaspoon vanilla extract
  • 300 g self-raising flour
  • 4 tablespoons milk
  • 325 g icing sugar
  • 4-5 tablespoons water or enough for a thick, spreadable icing
  • Sprinkles (either sugar strands or hundreds and thousands) to decorate

Instructions

  • Preheat oven to 180°C / 160°C / 350°F / Gas Mark 4. Line a 23cm x 30cm (9 x 13-inch) baking tin with baking parchment.
  • In a large mixing bowl, cream the softened butter/margarine with the sugar for about 2 minutes, until light and creamy. Add one egg, along with the vanilla extract, and a tablespoon of the flour. Mix well to incorporate, then repeat with the remaining eggs and the flour. Finally, add the milk and continue mixing to combine - don't over mix.
  • Transfer the cake batter to the lined baking tin and smooth the top with the back of a spatula or spoon. Bake for 25-30 minutes, or until golden, risen and a cake tester, when inserted into the centre of the cake, comes out clean without any uncooked batter remaining. Leave the cake to cool in the tin for about 10 minutes, then transport it to a wire rack to finish cooling completely.
  • Once the cake is cooled, prepare the icing. In a medium sized mixing bowl, combine the icing sugar with enough water to make a thick, spreadable icing - start adding a teaspoon of water and keep adding until you get the consistency you desire.
  • Spread the icing over the top of the cake, then cover with a generous amount of sprinkles. Leave the icing to set, before slicing up into 12-16 squares. The cake will keep for up to 3 days stored at room temperature.

Try these cake recipes next!

Classic Victoria Sandwich

Chocolate Traybake

Carrot Cake Traybake

Keep up to date with me on:

Like my Facebook page here

Instagram: @whatjessicabakednext

Twitter: @jessbakednext

Pinterest: @jessbakednext

Chocolate · Ice Cream · No-Bake

White Chocolate Ice Cream (Easy Three Ingredient Recipe)

Indulgently creamy homemade White Chocolate Ice Cream. This ice cream is made with three ingredients and without an ice cream machine in sight!

This White Chocolate Ice Cream is another recipe inspired by food I ate whilst away on a trip.

Ice cream was something we certainly indulged in during that holiday. I think I devoured about two or three ice creams a day…

I talked about a fantastic ice cream shop in this blog post. This shop sold really great ice cream and there was a flavour suited to everybody. On offer were classics like chocolate, strawberry and vanilla, and then some slightly different flavours, such as Kinder Bueno, berry/strawberry cheesecake, and fruity flavours including refreshing lemon, mango and watermelon.

One flavour that did amaze us, was white chocolate ice cream (chocolate blanco).

My sister picked this flavour the first night out and we all tried some. It was delicious, so utterly creamy and tasted just like eating a bar of white chocolate.

And you guessed it, the very next night I picked that flavour without hesitation!

I have a few no-churn ice cream recipes on my blog already, check these out below!

My most recent ice cream recipe is this No-Churn Oreo Ice Cream

Try my Cadbury Creme Egg Ice Cream for a delicious Easter-inspired recipe

Or if you’re a fan of Biscoff, try this incredibly good Speculoos Cookie Butter Ice Cream

I’ve said this many times before, but the no-churn method of making ice cream is truly special. It’s amazing how easy and quick (minus the freezing time) you can make homemade ice cream. I’ve made ice cream a couple of times in my ice cream machine, but it really is a faff and takes a lot longer than this no-churn version does to make!

The texture of this ice cream is very similar to gelato. A very decadent ice cream, one of which when you’ve started eating, it isn’t easy to stop yourself going back for more…

The ice cream takes just 10 minutes to prepare and then needs to freeze for at least 6 hours, or up to overnight.

All you need is a mixing bowl, a whisk, a spatula, three ingredients and a dish to pop your ice cream into.

Remember to take your ice cream out from the freezer and allow it to warm up for 10 minutes before scooping.

Serve your homemade ice cream in cones or a bowl. Other serving ideas include: serving the ice cream with strawberries or raspberries, topping the ice cream with a sprinkle of coconut, some toasted hazelnuts or pistachios. You could also serve this ice cream with a slice of your favourite chocolate or vanilla cake, brownies, a stack of pancakes, or even some apple crumble.

Print

White Chocolate Ice Cream (Easy Three Ingredient Recipe)

Deliciously creamy white chocolate ice cream. Made with only three ingredients!
Prep Time 6 hours 10 minutes
Total Time 6 hours 10 minutes
Servings 8
Author What Jessica Baked Next

Ingredients

  • 300 g white chocolate
  • 500 ml double cream chilled
  • 397 g tin sweetened condensed milk

Instructions

  • Melt the white chocolate either in a heatproof bowl atop a pan of simmering water (bain-marie), or in a microwave in 20-second bursts, stirring well until it's completely melted, and then set aside to cool slightly. Watch carefully as chocolate burns very easily.
  • In a large mixing bowl, whisk the cream until soft peaks form. Fold through the condensed milk, followed by the melted chocolate. Mix until everything is all combined - the mixture will thicken significantly once the white chocolate is added. Don't over mix.
  • Spread the ice cream mixture out into a suitable container. Scatter over some white chocolate curls and extra pieces of white chocolate, if desired. Cover the top with a lid or a piece of clingfilm.
  • Freeze for at least 6 hours or until firm and scoopable. I recommend freezing it overnight for the best results. Once ready to serve, scoop into cones or bowls. The ice cream will store in the freezer for up to one month.

Keep up to date with me on:

Like my Facebook page here

Instagram: @whatjessicabakednext

Twitter: @jessbakednext

Pinterest: @jessbakednext

Baking · Muffins

Magdalenas (Spanish Lemon Muffins)

Magdalenas are delicious, light and fluffy Spanish lemon-flavoured muffins.

Today, I’m channeling all the springtime vibes with this gorgeous, zesty lemon muffin recipe.

I’ve been enjoying Magdalenas since first visiting Spain. When I visit Spain, I always pick up a pack of Magdalenas for breakfast to enjoy, but I also find myself eating these for a mid-afternoon snack, or after dinner for dessert.

We love sharing recipes from all over the world here on WJBN and celebrating different cuisines.

Magdalenas are soft, citrus-y muffins that are beautifully light. You’ll find them in supermarkets and in bakeries all across Spain, among other baked goods.

Towards the end of January, I made my Crunchie Cheesecake again. That recipe is pure chocolate indulgence, but after eating several slices of cheesecake, I wanted something not as rich as my next bake.

Last month, I also shared my first muffin recipe on this blog and said this year, I would definitely be sharing more muffin recipes with you. If you haven’t seen them yet, here are my Blueberry White Chocolate Muffins.

This isn’t my first attempt at baking Magdalenas. I baked these a couple of years ago. However, the muffins I made were yummy, but they weren’t exactly what I remembered Magdalenas to be like.

I decided to find another recipe to follow and landed on this one by Anna Recetas Fáciles.

The previous recipe I used contained extra virgin olive oil instead of butter. I found the olive oil flavour too strong. I much prefer using a combination of vegetable oil and melted butter.

These Magdalenas are made differently to the muffin recipe I shared with you last month. In the first step, rather than creaming the butter with the sugar, we whisk the eggs with the lemon sugar until frothy.

Once you’ve done that, you will add the milk, melted butter and oil, and then fold the dry ingredients in and allow the muffin batter to rest in the fridge for at least one hour. Resting time is essential and will aid the rise and help keep the muffins super tender.

Magdalenas are very similar in texture to a classic French Madeleine. The only difference here, is that Madeleines are baked in a shell-shaped tin. They have the same lemon flavour and textured sponge.

The lemon can be substituted for orange or lime zest. I want to try orange zest next time I make these and also add some chocolate chips in too!

Print

Magdalenas (Spanish Lemon Muffins)

Magdalenas are traditonal Spanish lemon muffins, with a light and fluffy texture.
Prep Time 1 hour 15 minutes
Cook Time 15 minutes
Total Time 1 hour 30 minutes
Servings 12
Author What Jessica Baked Next

Ingredients

  • 150 g granulated or caster sugar plus extra for the muffin tops
  • Zest from one large lemon
  • 4 eggs
  • 60 ml milk
  • 100 g butter (salted or unsalted) melted and warm
  • 80 ml vegetable oil
  • 200 g plain flour
  • 10g baking powder
  • Pinch of salt

Instructions

  • In a large mixing bowl, add the sugar and lemon zest. Using your fingertips, rub the lemon zest into the sugar to release the oil.
  • Crack the eggs into the mixing bowl and whisk for 2-3 minutes or until they're foamy and have lightened in colour.
  • Add the milk, melted butter and vegetable oil. Whisk again to combine fully.
  • Sift the flour, baking powder and a smallish pinch of salt over the other ingredients and gently fold to incorporate until no lumps of flour remain. Be gentle when folding and try not to over mix.
  • Cover and chill the cake batter for at least one hour. When ready to bake the magdalenas, preheat the oven to 220ºC / 200ºC Fan / 425ºF / Gas Mark 7. Line a 12-hole muffin tin with paper liners. Evenly distribute the cake batter between the paper liners. Sprinkle the tops with a little extra sugar.
  • Bake the muffins for 10 minutes, then turn the oven temperature down to 200ºC / 180ºC Fan / 400ºF / Gas Mark 6 and continue baking the muffins for a further 5 minutes until the muffins are well risen and a skewer, when inserted in the centre, comes out clean without any uncooked batter remaining.
  • Leave the muffins to cool for a few minutes in the muffin tin, then transport them to a wire rack to finish cooling completely. These muffins are best eaten fresh on the day of baking, but they will keep for up to 3 days stored at room temperature.

Try these lemon recipes next!

Lemon Poppyseed Drizzle Cakes

Lemonade Scones (3 Ingredients)

Pistachio Lemon Drizzle Cake

Keep up to date with me on:

Like my Facebook page here

Instagram: @whatjessicabakednext

Twitter: @jessbakednext

Pinterest: @jessbakednext

Candy and Sweets · Chocolate · Gluten-Free · No-Bake

Chocolate Truffles

Homemade French-style chocolate truffles. Made with dark chocolate, cream, butter and a touch of brown sugar. These fudgy truffles will just melt in your mouth. They make a wonderful gift or after dinner sweet treat.

At Christmas and for my birthday, during the summer, for the last couple of years, I received a box of chocolate truffles from friends and family, as a gift. The people close to me know just how much I love a good chocolate truffle.

We’ve been working our way through all the confectionery we got recently for Christmas and the other day, I finished the last of my latest box of dark chocolate truffles.

Whilst I was eating them, I thought about making chocolate truffles for the blog. In the past, I’ve made these 3 Ingredient Oreo Truffles, but today I have a classic chocolate truffle for you.

Chocolate Truffles are a decadent treat made from dark chocolate and double cream. These two ingredients, when heated and combined, make a chocolate ganache.

I use ganache to spread on top of Chocolate Fudge Cake, pipe on cupcakes, but in this case, you can roll the ganache once it’s chilled into balls to make truffles.

Making your own chocolate truffles is super easy. This recipe requires a fair bit of patience, as the ganache needs to chill in the fridge for a few hours or even better, up to overnight.

What Ingredients You’ll Need To Make Chocolate Truffles

  • Dark Chocolate – I use a supermarket’s own brand chocolate bar. Honestly, you don’t need to spend lots on expensive chocolate – use whatever fits in with your budget. I tend to go for a chocolate that is at least 50% cocoa solids or thereabouts. You can make chocolate truffles with chocolate containing over 70% cocoa solids. These will be slightly more bitter in taste, so bear that in mind.
  • Double Cream – Full-fat double cream is essential for these chocolate truffles. The cream will make your truffles extra decadent, will give them that soft, melt in the mouth texture.
  • Butter – Use either salted or unsalted butter – I prefer to use salted butter. The butter adds even more richness and will help make the chocolate truffles easier to roll. Once the truffles come to room temperature ready for serving, the butter, just like the cream, gives them that soft texture.
  • Brown Sugar – Just a tablespoon of brown sugar brings a touch of extra sweetness to balance out the dark chocolate. You can omit it if you want.

Transfer your chocolate mixture to a shallow baking tin, cover and chill. Chilling time is very important.

The ganache needs chilling for at least 3 hours. I would recommend longer, even up to overnight.

These are indulgently creamy chocolate truffles. The only downside to that is that they’re very sticky when rolling.

Scoop the truffles into 2 teaspoon sized portions. You can roll them smaller and use 1 teaspoon instead and therefore make double the amount of truffles. Roll them as quickly as you can, as soon as the chocolate hits your hand, it will begin to soften/melt slightly, so the trick is to roll as quickly as you can – they don’t need to be the perfect round shape.

Once you’ve rolled your truffles, roll them in sifted cocoa powder. Alternatively, you can roll the truffles in chocolate or colourful sprinkles. Desiccated coconut, chopped nuts, crushed biscuit/cookies, or even some crushed freeze-dried fruit would contrast really well.

Once the truffles are coated, finally, place the truffles back in the fridge again for a further half an hour to set. After that, the wait is finally over and the truffles are ready to eat!

The longer they sit in the fridge, the firmer texture your truffles will have.

These make a lovely edible treat for your friends and family for a special occasion.

Our truffles only lasted just over a day. I loved them even more the next day when they’d been in the fridge overnight and the chocolate flavour definitely intensified.

Print

Chocolate Truffles

Homemade French Chocolate Truffles. The perfect, indulgent chocolate treat made with 4 ingredients.
Prep Time 3 hours 30 minutes
Total Time 3 hours 30 minutes
Servings 18
Author What Jessica Baked Next

Ingredients

  • 200 g dark chocolate use chocolate containing at least 50% cocoa solids
  • 150 ml double cream
  • 25 g butter (salted or unsalted)
  • 1 tablespoon brown sugar optional
  • 1-2 tablespoons cocoa powder for coating the truffles

Instructions

  • Chop the chocolate into small pieces - the smaller, the quicker the chocolate will melt. Transfer the chopped chocolate to a medium sized mixing bowl.
  • Place the cream, butter and brown sugar (if using) in a small pan. Heat gently until bubbles just begin to appear on the surface. You don't want this mixture rapidly boiling.
  • Pour the warm cream mixture over the chopped chocolate. Gently stir until the chocolate is completely melted. Transfer the ganache to a shallow baking tray, cover and place in the fridge for at least 3 hours or up to overnight.
  • When ready to roll the truffles, sift about a tablespoon or two of cocoa powder on a plate or in a small bowl. Take 2 teaspoons worth of the ganache, very quickly roll into a ball using your hands - try to limit how long the mixture is in your hands. Drop the truffles in the cocoa powder and roll around to coat. Transfer to a plate and repeat with the remaining ganache.
  • Place the truffles in the fridge to set for a further 30 minutes before serving. The truffles will keep stored in the fridge for up to one week.

Keep up to date with me on:

Like my Facebook page here

Instagram: @whatjessicabakednext

Twitter: @jessbakednext

Pinterest: @jessbakednext

Baking · Chocolate · Muffins

Blueberry White Chocolate Muffins

The fluffiest blueberry muffins studded with creamy white chocolate chips.

This comes as a shock to me, but this is the FIRST muffin recipe I’ve shared on WJBN!

Muffins are something I don’t tend to make often, but I’m going to rectify that now.

I love how simple they are to make, no different to a cake but without all the need for elaborate decoration. Simplicity is key here.

When it comes to muffins, the ultimate muffin, in my opinion, is the classic blueberry muffin. A chocolate chip muffin and a chocolate muffin are both close behind.

So, as blueberry muffins are my favourite, that’s where I thought I’d start with my muffin recipe creations.

These Blueberry White Chocolate Muffins are beautifully rustic. They are seriously light, fluffy, not at all dense thanks to the addition of yoghurt (which makes the softest muffins) and gentle mixing.

This muffin is filled with lots of blueberries, meaning you get plenty of sweet and juicy blueberries in each bite. The blueberries burst as they bake in the oven and will fill your kitchen with a gorgeous aroma.

I also decided to add a pack of white chocolate chips, because chocolate always makes everything better, in my opinion!

The creamy white chocolate works wonderfully with the blueberry flavour. You can use dark or milk chocolate chips instead, or just skip the chocolate all together and add even more blueberries to your muffin batter.

Once the muffins come out of the oven, they only need to cool for about 10-15 minutes and they’re ready to eat.

Even after a couple of days, if we do have any left, I heat one up in the microwave and it’s just like a muffin fresh from the oven!

When I start early at work, I love to wake up to a plate of these on the kitchen countertop for breakfast.

Or at the weekend, instead of having to flip pancakes, these muffins make an easy breakfast to grab along with a glass of juice or cup of coffee.

Print

Blueberry White Chocolate Muffins

Homemade blueberry muffins studded with white chocolate chips.
Prep Time 10 minutes
Cook Time 20 minutes
Total Time 30 minutes
Servings 12
Author What Jessica Baked Next

Ingredients

  • 100 g butter (salted or unsalted) or baking spread (I use Stork) at room temperature
  • 140 g caster or granulated sugar
  • 2 eggs
  • 1 teaspoon vanilla extract
  • 140 g full-fat natural yoghurt substitute with buttermilk or sour cream
  • 2 tablespoons milk
  • 250 g plain flour
  • 2 teaspoons baking powder
  • 1 teaspoon bicarbonate of soda
  • 150 g blueberries fresh or frozen
  • 100 g white chocolate chips

Instructions

  • Preheat oven to 200°C / 180°C / 400°F / Gas Mark 6. Line a 12-hole muffin tin with paper liners and set aside.
  • In a large mixing bowl, cream the softened butter/baking spread with the sugar for 2 minutes until fluffy and lighter in colour.
  • Now add the eggs and beat to combine - don't worry if it looks curdled at this point, as once you add the dry ingredients, they will come together. Mix in the vanilla extract along with the yoghurt and milk.
  • Now take one tablespoon of the weighed out flour and stir that through your chocolate chips (this stops the chocolate sinking to the bottom of the muffins. You don't need to do this with the blueberries though). In a medium sized bowl, stir together the remaining flour, baking powder, bicarbonate of soda and a pinch of salt (omit this if you're using salted butter).
  • Add the dry ingredients to the wet ingredients and mix until just combined. Now add the blueberries and white chocolate chips and gently fold to combine - be careful not to over mix at this point.
  • Divide the muffin batter between the paper liners. Bake for 5 minutes, then turn the oven temperature down to 180°C / 160°C / 350°F / Gas Mark 4 and continue baking the muffins for 15-18 more minutes or until a cake tester comes out clean when inserted into the centre.
  • Once the muffins are baked, allow them to cool for a few minutes and then transport them to a wire rack. Serve warm or at room temperature. The muffins will keep for up to 3 days.

Keep up to date with me on:

Like my Facebook page here

Instagram: @whatjessicabakednext

Twitter: @jessbakednext

Pinterest: @jessbakednext


Baking · Dips and Sides · Gluten-Free · Vegan

Spanish Roasted Almonds (Almendras Fritas)

Spanish-style almonds flavoured with olive oil, smoked paprika and garlic. A quick recipe to prepare ready for snacking on.

Almendras Fritas is a traditional Spanish tapa. The almonds are usually fried, but instead I’ve roasted mine and once lightly toasted and still hot from the oven, I’ve mixed the almonds with olive oil, garlic and paprika seasoning, and flaky sea salt.

In Spain, you’ll typically find fried almonds (only seasoned with salt) on the side in bars, ready to devour with a beer or glass of wine.

They also make a fabulous, healthy snack to munch on. They’re perfect for all occasions, whether it be for a mid-morning/midday snack to re-engerise yourself with, or served up at a party alongside other tasty nibbles.

Last summer, I went on a holiday to beautiful Nerja in Andalusia. It was on that trip that I discovered the Spaniards’ love of savoury and sweet nuts.

Walking around most cities or towns, there are many stalls selling warm almonds. We also found a shop that sold caramelised nuts. They took anything from almonds, to cashew nuts, to sunflower seeds and coated these nuts and seeds in caramel – some with salt added too.

I brought back a few packs to eat at home, but this is something I’ve wanted to recreate for the blog since my holiday.

But first, I chose to make a savoury version of roasted nuts.

I intended to share this recipe before Christmas/New Year and wanted to post it alongside these Cheese and Mustard Puff Pastry Pinwheels. In the end, time got the better of me, but I made sure this recipe went straight to the top of my 2023 recipe planner.

Print

Spanish Roasted Almonds (Almendras Fritas)

Spanish-style roasted almonds, flavoured with smoked paprika and garlic.
Prep Time 5 minutes
Cook Time 10 minutes
Total Time 15 minutes
Servings 6
Author What Jessica Baked Next

Ingredients

  • 300 g raw almonds
  • 1 teaspoon garlic granules
  • 1 teaspoon smoked paprika
  • 1/2 teaspoon salt I use sea salt, but table salt is fine too
  • 1 tablespoon olive oil

Instructions

  • Preheat oven to 200°C / 180°C Fan / 400°F / Gas Mark 6.
  • Evenly spread the almonds out on a large baking tray. Toast the almonds for 5-8 minutes until slightly darkened in colour - watch them carefully as the nuts toast very quickly.
  • While the almonds are toasting, prepare the spice mix. In a small bowl, mix together the garlic granules, smoked paprika and the salt.
  • When the almonds are ready, transfer them to a large mixing bowl. Add the olive oil and the spice mix and toss to combine.
  • Serve the almonds warm or at room temperature. The almonds will keep stored in an airtight container for up to 3 days.

The recipe makes enough almonds to generously fill a medium sized serving dish and will roughly serve about 6 people.

Deliciously crunchy and each almond has a tasty coating of smoky paprika and garlic.

You’ll find these addictive and will be eating them constantly by the handful…

Similar recipes to try next!

Patatas Bravas – my most popular savoury recipe

Paprika Roasted Potatoes

Roasted Vegetable Couscous

Cheese and Mustard Puff Pastry Pinwheels (3 Ingredients)

Keep up to date with me on:

Like my Facebook page here

Instagram: @whatjessicabakednext

Twitter: @jessbakednext

Pinterest: @jessbakednext

Baking · Chocolate · Crêpes and Pancakes

Homemade Crêpes

Soft and fluffy traditional French Crêpes are quick and easy to make from scratch. This 4 ingredient recipe is one to have ready for Pancake Day!

Originally posted in February 2015, recipe and photographs updated January 2023.

When I’m craving homemade soft, buttery and fluffy crêpes this recipe ticks all the boxes for me.

These crêpes are incredibly easy to make as the batter can be made in a blender or just in a mixing bowl with a whisk. The batter also doesn’t require chilling before cooking, but it can also be made ahead of time.

I enjoy serving my homemade crêpes with chocolate hazelnut spread, Chantilly cream and berries, but the neutral flavour of these means you can serve and top them with anything that takes your fancy!

With Shrove Tuesday approaching next month, I’m sharing one of my favourite pancake recipes.

Shrove Tuesday or Pancake Day is a day we celebrate and eat lots of homemade pancakes. The reason is that it uses up butter, eggs and other items that are given up for Lent.

I have very fond memories of Pancake Day growing up. We ate plate after plate of pancakes, all with different toppings!

I love big, fluffy American-style pancakes equally as much as I adore crêpes, and this Nigella recipe has never let me down – it’s a recipe I’ve made for years.

This is the kind of dessert I could eat forever and I would be happy. I love a thin crispy pancake packed full of warm Nutella, that really is dessert heaven for me!

These crêpes make an awesome weekend breakfast. They’re light, airy, and delicious with the warm, oozy Nutella spilling out.

Crêpes are great served with savoury fillings such as ham (a vegetarian option is also brilliant too), cheese and mustard. Another favourite of ours is lemon juice and sugar, it’s such a fresh and sweet flavour combination.

The list and choices are endless!

You can even make a Crêpe Cake too! Layer each crêpe, spread with your choice of filling and continue going until you’ve used all your crêpes up – you will probably need to make a double batch of this recipe to make enough crêpes for a cake.

Bookmark this recipe to make right away or next month for Pancake Day! You might also like to try my popular Fluffy American Pancakes or Fluffy Vegan Pancakes too!

I made a double batch of this recipe, and that made plenty of crêpes for dessert one night and breakfast the next day. We can’t get enough of these and they use very little ingredients, which is an added bonus!

Print

Homemade Crêpes

How to make traditional French Crêpes! These thin pancakes are great served with your favourite savoury or sweet fillings.
Prep Time 10 minutes
Cook Time 20 minutes
Total Time 30 minutes
Servings 6
Author What Jessica Baked Next

Ingredients

  • 30 g butter (salted or unsalted)
  • 150 g plain flour
  • 325 ml milk
  • 1 egg

Instructions

  • Melt the butter and allow it to cool slightly.
  • In a blender or mixing bowl blend/whisk the flour, milk and egg until combined. Now add the melted butter and combine until you have a smooth and thin pancake batter. If there are any lumps in your batter, pass through it through a sieve. At this point you can chill the batter for up to 2 days before using - I always allow my batter to rest overnight, but this is optional.
  • Heat a small amount of extra butter in a small pan (the pan I use is approx. 20cm / 8-inch in diameter). Once melted carefully wipe away any excess butter. Take roughly 2-3 tablespoons of the pancake mixture into the pan and swirl around until a thin, crisp pancake forms covering the base of your pan. It will only take about a 1 minute to cook on one side. Now flip over and cook on the other side for about another 30 seconds until lightly coloured. Once cooked place on some parchment paper and keep warm in the oven - placing a layer of parchment paper in between each crêpe to avoid them sticking together.
  • Repeat the above step with the remaining batter. Fold or roll the crêpes and serve warm with a choice of fillings and toppings.
  • Crêpes will keep once cooked, covered for up to 3 days. They can be frozen, wrapped well for up to 3 months - when ready to serve, thaw in the fridge overnight and reheat in the microwave in 20 second bursts until hot.

Keep up to date with me on:

Like my Facebook page here

Instagram: @whatjessicabakednext

Twitter: @jessbakednext

Pinterest: @jessbakednext

Baking · Vegetarian Recipes

Cheese and Mustard Puff Pastry Pinwheels

An easy canapé to serve at upcoming Christmas, New Year parties or to take out for a picnic. These puff pastry pinwheels are made with only 3 ingredients!

Looking for a last minute, sophisticated canapé you can make in time for Christmas and New Year?

My Cheese and Mustard Puff Pastry Pinwheels are a couple of bites of gooey cheesy, flaky pastry deliciousness.

We’ve made these pastry pinwheels for years and love serving them at all kinds of gatherings.

Both sets of our grandparents love these, whenever we made them (which was usually every Christmas or party) where we served a buffet for tea, these pastry pinwheels would disappear very quickly!

When I want to make something quick and easy, I always grab a pack of ready made puff pastry. It’s great to have a pack in the fridge ready for any occasion. I love how effortlessly easy these pinwheels are to make and how very little ingredients you need on hand to make them.

Ingredients can be switched around depending on your dietary requirements. For gluten-free, use gluten-free puff pastry, for dairy-free/vegan, use a dairy-free cheese you like.

Try some different cheese too, swap the Cheddar for Gruyère, Mozzarella or even Red Leicester.

Once they’re baked until golden, it’s very hard to stop at just one…

Print

Cheese and Mustard Puff Pastry Pinwheels

An easy and impressive canapé to put out at upcoming Christmas, New Year parties or to take out for a picnic. These puff pastry pinwheels only use 3 ingredients too!
Prep Time 20 minutes
Cook Time 15 minutes
Total Time 35 minutes
Servings 22
Author What Jessica Baked Next

Ingredients

  • 375 g pack ready rolled puff pastry
  • 2 tablespoons mustard I use 1 tablespoon wholegrain mustard and 1 tablespoon Dijon or English mustard
  • 100 g mature Cheddar grated

Instructions

  • Take your puff pastry and unroll it. Spread the mustard evenly across the sheet of puff pastry and top with the grated cheese.
  • Starting at the long end of the pastry, tightly roll the pastry. Cover and leave to chill in the fridge for at least 10 minutes - this makes slicing easier.
  • Once you're ready to bake the pinwheels, preheat the oven to 200°C / 180°C Fan / 400°F / Gas Mark 6. Line two large baking trays with parchment paper.
  • Take a serrated knife, trim the edges and slice the pastry roll into 1cm pieces and distribute evenly between the baking trays. The recipe makes approx. 22-24 pinwheels. (At this point you can freeze the (unbaked) pinwheels for up to one month.)
  • Bake the pinwheels for 15 minutes or until lightly golden. Allow to cool for a few minutes before serving. They can be eaten both hot and cold, store the pinwheels in an airtight container at room temperature for up to 2 days.

Keep up to date with me on:

Like my Facebook page here

Instagram: @whatjessicabakednext

Twitter: @jessbakednext

Pinterest: @jessbakednext

Cheesecake · Chocolate · Christmas · No-Bake

No-Bake White Chocolate Orange Cheesecake

White chocolate cheesecake flavoured with zesty orange, on top of a buttery digestive biscuit base.

Ever since I made this Terry’s Chocolate Orange Cheesecake for my blog 7 years ago, this cheesecake has remained the most viewed recipe on the blog. It’s especially popular around this time of year!

That cheesecake is a recipe many have made over Christmas. For years I’ve loved seeing photos of your TCO cheesecake creations!

Since Terry’s chocolate orange comes in different flavours, I wanted to experiment with the white chocolate variety you can now get.

Sensationally soft and light cheesecake, that celebrates the divine combination of creamy white chocolate and orange.

No-bake cheesecakes are so easy to make. Just mix together all the ingredients and then pop the cheesecake in the fridge to set and your work is done! Once it’s set, decorate however you fancy.

I went for more whipped cream, white chocolate orange segments and, some grated chocolate and orange zest.

We loved this cheesecake, so much so we might just have to make it again before Christmas.

If you adore chocolate orange recipes, then this cheesecake is a MUST on your Christmas baking list! After you’ve finished one slice, you’ll be dreaming of the next…

Print

No-Bake White Chocolate Orange Cheesecake

White chocolate cheesecake flavoured with zesty orange, on top of a buttery digestive biscuit base.
Prep Time 6 hours 15 minutes
Total Time 6 hours 15 minutes
Servings 12
Author What Jessica Baked Next

Ingredients

Biscuit Base:

  • 140 g butter (salted or unsalted)
  • 300 g digestive biscuits

White Chocolate Orange Cheesecake:

  • 300 g white chocolate
  • 600 g full-fat cream cheese softened - I leave mine out at room temperature for about an hour
  • 3 tablespoons icing sugar
  • 2 teaspoons orange extract adjust to taste
  • 300 ml double cream

Instructions

  • To prepare the biscuit base: Melt the butter in a small saucepan. Blitz the biscuits in a food processor to a fine crumb. Add the melted butter and mix until well combined. Tip the biscuit crumbs into a 23cm springform cake tin and press down until firm. Use the back of a spoon to smooth over, place in the fridge to chill whilst you make the filling.
  • To make the cheesecake filling: Melt the chocolate over a bain-marie or in the microwave in 20 second intervals. Leave to cool for a few minutes - chocolate stills needs to be slightly warm before adding the remaining cheesecake ingredients later to avoid lumps forming. In a medium mixing bowl beat together the cream cheese with the icing sugar and orange extract.
  • In another mixing bowl whisk the cream until soft peaks form. Fold through the melted chocolate into the cream cheese mixture. Finally, fold the cream into the cream cheese mix.
  • Spoon the cheesecake mixture over the biscuit base and smooth over with a spatula or palette knife. Cover and leave to chill for at least 6 hours, or preferably overnight.
  • When ready to serve, remove the cheesecake from the tin and decorate. Best serve chilled. The cheesecake can be made ahead of time, leave it in the tin, covered with cling film for up to 3 days. Leftover slices can be stored in an airtight container in a fridge.

Keep up to date with me on:

Like my Facebook page here

Instagram: @whatjessicabakednext

Twitter: @jessbakednext

Pinterest: @jessbakednext

Baking · Biscuits and Cookies

Butter Cookies

Butter Cookies are a wonderfully delicious bake all year round, but they’re extra special baked over Christmas. Serve with a light dusting of icing sugar or dipped/drizzled with chocolate. It’s love at first bite with these cookies…

I’ve been working on perfecting these Butter Cookies for over a year now. There’s been many struggles to find a recipe I was one hundred percent happy to share. When you finally get a recipe perfected, it’s the best feeling!

When I first made these, every time I tried to pipe the dough on my baking trays, I could never easily pipe the dough and countless times, my piping bag would end up splitting! Even though I was feeling frustrated, I wasn’t going to give up, so I kept experimenting with different methods of making these cookies.

I’m so glad I did, because the cookies are absolutely divine.

This recipe doesn’t involve creaming the softened butter and sugar like most butter cookie recipes instruct. Here we’re combining all the ingredients in the bowl of a stand mixer and creaming on medium speed until super light and fluffy – this takes just 30 seconds to achieve and, best of all, it’s EASY!

These are the biscuits you get around Christmas, very similar to Danish butter cookies, with a beautiful texture that’s like shortbread. Though I love buying tins of biscuits at Christmas, making your own is a fun activity and of course, they taste amazing because they’re homemade.

Why You’ll Love These Butter Cookies

  • Deliciously soft and buttery
  • Crispy edges
  • Quick to make with no chilling time required, the cookies keep their defined swirls even without chilling. These cookies are ready in 30 minutes!

These cookies look chic, they take only half an hour to make and all you’ll need is 4 ingredients! Swap the vanilla extract for almond or orange for a flavour twist if you like.

Decoration is where the fun continues. Before baking, top each cookie with half a glacé cherry. Once baked, dip half in melted chocolate or drizzle with (dark, milk or white) chocolate. Then top the chocolate with toasted nuts or sprinkles.

Print

Butter Cookies

Four ingredient Butter Cookies are soft, buttery and will just melt in your mouth.
Prep Time 10 minutes
Cook Time 20 minutes
Total Time 30 minutes
Servings 12

Ingredients

  • 175 g butter (salted or unsalted) softened
  • 175 g plain flour sifted
  • 50 g icing sugar sifted
  • 1/2 teaspoon vanilla extract

Instructions

  • Preheat oven to 170°C / 150°C Fan / 300°F / Gas Mark 2. Line two large baking trays with parchment paper and set aside.
  • In the bowl of a stand mixer fitted with a paddle attachment, add the softened butter, flour, icing sugar and vanilla. Cream on medium speed for 30 seconds, then stop the mixer, scrap down the sides and bottom of the bowl and mix again for a few seconds to fully combine. The mixture should be creamy and light.
  • Fit a piping bag with a medium sized star nozzle and fill the piping bag with the cookie dough. Pipe even swirls of cookie dough on the baking trays. This recipe makes 10-12 cookies, depending on how big or small you pipe the cookies.
  • Bake the cookies for 20 minutes or until a light golden colour. All ovens are different, so yours might not need as long in the oven. Leave the cookies to cool on the trays for 5 minutes, before transporting to a wire rack to finish cooling completely. Decorate with melted chocolate or dusting with icing sugar before enjoying.
  • The cookies will keep for up to 2 days stored in an airtight container at room temperature.

Now grab your apron, put some festive music on and get baking these gorgeous Butter Cookies!

Keep up to date with me on:

Like my Facebook page here

Instagram: @whatjessicabakednext

Twitter: @jessbakednext

Pinterest: @jessbakednext