Baking · Biscuits and Cookies

Scottish Shortbread

Buttery melt in the mouth shortbread biscuits. With just three ingredients, this moreish recipe is brilliant to make over Christmas, but is also great for a weekend treat! 

There really is no other biscuit that quite compares to classic Scottish shortbread. With a rich and beautiful buttery flavour, shortbread is favourite for many people.

Every single Christmas we always have a box (or two or even maybe three!) of shortbread biscuits on hand ready to devour our way through. But for me homemade is definitely better so I thought it would be great to share my favourite shortbread recipe ready for your Christmas festivities. I’ve been making shortbread for years with my mum. My maternal side of the family hail from Dunblane in Scotland – it must be my Scottish roots that are the reason why I love making and eating shortbread as much as I do!

I’ve baked my shortbread in a Victoria sandwich cake tin. I love baking shortbread this way because you don’t need to roll out the dough and therefore will not risk overworking the dough. Once the shortbread is baked it’s important to cut it into eight wedges whilst still hot. This ensures you get nice, clean slices. The finishing touch is to sprinkle over caster (superfine) sugar just before serving.
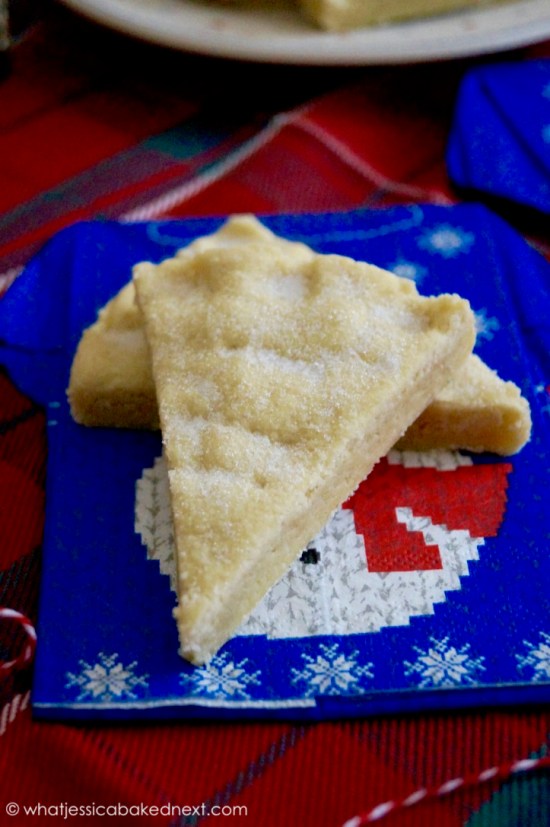
If you want to do something different you could definitely use your favourite cookie cutters and cut out festive shaped biscuits. But do remember baking time will differ for smaller biscuits.

I’m a traditionalist when it comes to shortbread, I’ve never really been a fan of fancy flavour pairings, so that’s why I prefer to keep mine plain and simple. I sometimes add some chocolate chips to the dough or even dip the baked shortbread in melted chocolate for a little twist. But you could easily add any of your favourite flavours to the mix such as lemon or orange zest or even spices like cinnamon or ginger.

If you’re a regular reader of this blog, then you will know my favourite recipes are those that are both easy and quick to prepare. It may surprise you that this shortbread recipe only requires 3 ingredients and you will have homemade shortbread ready in less than an hour. So if you’re like me and sometimes forget about Christmas presents, but only remember at the last minute, they would make a brilliant edible gift for your close ones.

(Makes 8 shortbread wedges)

Ingredients:

100g unsalted butter, softened

50g caster sugar

175g plain flour (all-purpose)

Method:

  1. Preheat oven to 150°C / 130°C Fan / 300°F / Gas Mark 2. Lightly grease the base and sides of a 20cm/8 inch loose-bottomed cake tin. Set to one side.
  2. Cream the softened butter and sugar until pale and fluffy. This will take approx. 5 minutes – so use an electric mixer if you own one.
  3. Now add the flour and stir well until incorporated and a soft and slightly crumbly dough comes together.
  4. Press the dough into the cake tin and smooth into an even, flat layer with the back of a spoon, you can also use your hands to do this. Crimp the edges, score (don’t cut right through) the shortbread into 8 triangular portions. Then prick each portion with three fork stamps. Bake for 40 minutes, until pale gold.
  5. As soon as the shortbread has finished baking, cut into wedges and leave to cool completely in the tin. Once cool, sprinkle with caster sugar.

Recipe Notes:

  • Cream the butter and sugar until pale and fluffy. Cream for at least 5 minutes to achieve the perfect textured shortbread.
  • Once you’ve added the flour, make sure you stir until it’s just about blended. Over handling the dough will mean your shortbread will not be as light and short as it could be.

Keep up to date with me on:

Like my Facebook page here 

Instagram: @whatjessicabakednext

Twitter: @jessbakednext

Pinterest: @jessbakednext 

Baking · Cheesecake · Chocolate · Christmas · No-Bake

Terry’s Chocolate Orange Cheesecake

Terry’s Chocolate Orange Cheesecake. An impressive and delicious no-bake dessert. 

Christmas is fast approaching – in a month’s time we will be just a couple of days away from the big day! Christmas is my favourite time of year for several reasons. I love putting the decorations up, listening to festive music, baking and cooking lots of delicious food, but most of all I enjoy having break from college and seeing all my family and friends.

So I told you in an earlier post that I’d already been planning all my seasonal recipes. For this year’s first festive recipe I’m sharing this amazing Terry’s Chocolate Orange Cheesecake. All you chocolate orange lovers out there NEED to give this cheesecake a try!

It wouldn’t be Christmas without Terry’s chocolate orange. It’s one of mine and my sister’s favourite chocolates, I just love the rich chocolate mixed with the aromatic orange. My obsession with chocolate orange is proven with these cupcakes and these cookies.

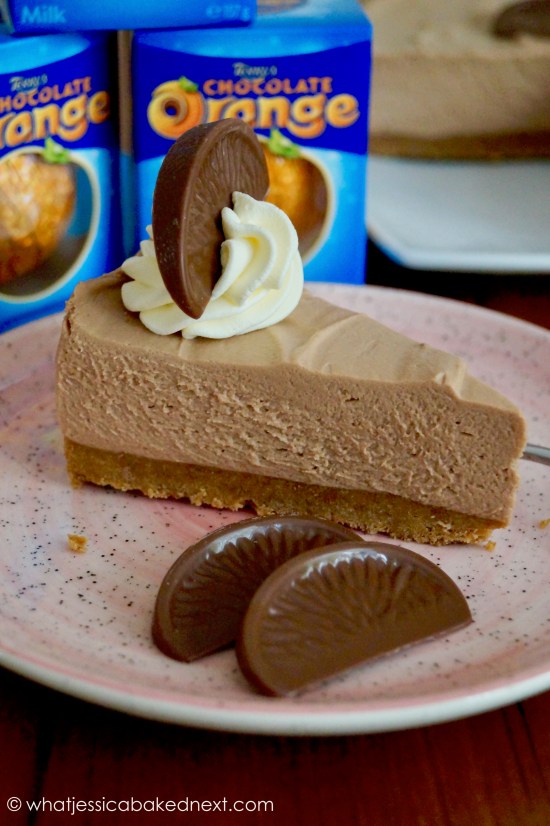
This cheesecake is based on my popular No-Bake Ferrero Rocher Cheesecake. The base is made up of crushed chocolate orange digestive biscuits and is simply mixed together with melted butter and pressed into a cheesecake tin until compact. The cheesecake filling is made using the same method I use for all my no-bake cheesecakes. Beat together softened cream cheese with a touch of icing sugar and vanilla until smooth, then the fold through melted chocolate orange. I used two whole chocolate oranges in this cheesecake, so it is guaranteed to have a gorgeous flavour! Then the final step is to fold through some very lightly whipped cream and then spread the mixture over the prepared biscuit base. I told you it was unbelievably easy!

For decoration I like to keep it simple with nothing too elaborate. My sister gave me the idea to fan the chocolate orange segments in the centre of the cheesecake. So we went for that easy design, finishing with swirls of piped whipped cream. This cheesecake is a gorgeous dessert that’s an absolute breeze to make and a treat to eat!

(Serves 10-12)

Ingredients:

Biscuit Base:

300g chocolate or plain digestive biscuits (or graham crackers)

140g butter (salted or unsalted), melted and cooled slightly

Cheesecake Filling:

500g full-fat cream cheese or mascarpone, softened at room temperature

2 x 157g Terry’s chocolate orange (or other orange flavoured chocolate)

300ml double cream (heavy cream), chilled

85g icing sugar, sifted

1 teaspoon vanilla extract

Decoration:

Terry’s chocolate orange segments – I also grated some over to decorate

Whipped cream – approx. 150ml double or whipping cream

Method:

  1. To prepare the base: Melt the butter in a small saucepan. Blitz the biscuits in a food processor to a fine crumb. Add the melted butter and mix until well combined. Tip the biscuit crumbs into a 23cm springform cake tin and press down until firm. Use the back of a spoon to smooth over, place in the fridge to chill whilst you make the filling.
  2. To make the cheesecake filling: Melt the chocolate over a bain-marie or in the microwave in 20 second intervals. Leave to cool only for a few minutes – chocolate stills needs to be slightly warm before adding the remaining cheesecake ingredients later to avoid lumps forming. In a medium mixing bowl beat together the cream cheese with the icing sugar and vanilla until softened. In another mixing bowl whisk the cream until soft peaks form.
  3. Fold the cream into the cream cheese mix. Finally, fold through the melted chocolate.
  4. Spoon the cheesecake mixture over the biscuit base and smooth over with a spatula or palette knife. Cover and leave to chill for at least 6 hours, or preferably overnight.
  5. When ready to serve, remove the cheesecake from the tin and decorate. Best serve chilled. The cheesecake can be made ahead of time, leave it in the tin, covered with cling film for up to 3 days. Leftover slices (if any!) can be stored in an airtight container in a refrigerator.

Cheesecake lovers you’re going to adore this! The cheesecake will make an amazing centrepiece on the dinner table on Christmas day!

Keep up to date with me on:

Like my Facebook page here 

Instagram: @whatjessicabakednext

Twitter: @jessbakednext

Pinterest: @jessbakednext
Baking · Biscuits and Cookies · Chocolate

Triple Chocolate Cookies

Irresistible cookies filled with a mix of triple chocolate chips. Perfectly crisp on the outside, fudge like and chewy on the inside. Enjoy these bakery-style cookies with a glass of milk or a scoop of your favourite ice cream. You will be in cookie heaven! 

If you know me well, then you will know that I really do love chocolate. I’m a self-confessed chocoholic at heart. Why have just one type of chocolate in a cookie, when you can have three? The more chocolate the better, because life is always sweeter when there is chocolate AND cookies involved.

These triple chocolate chip cookies are really quite amazing. They have the perfect chewiness and crispy outside, but also have the texture of a chocolate fudge brownie. My sister and myself have been baking these cookies for many years now and each time we make them they disappear almost instantly! I really love that each cookie is jam-packed with chocolate chips. Every bite is filled with an explosion of gooey chocolate!

The greatest thing about this cookie recipe is that you don’t have to chill the dough. Though, I often find chilling the dough allows the flavour to develop and also promotes a slightly thicker and chewier cookie. If the dough is too sticky, then I’d also recommend leaving it in the fridge for around 30 minutes to make the dough easier to roll.

You will combine the butter with brown sugar and a couple of drops of vanilla, then add an egg along with flour, raising/leavening agents, cocoa powder and LOTS of chocolate chips!

Roll the cookies and spread out onto two large baking trays lined with parchment or silicone baking mats. The baking time is really important to get correct. 10-12 minutes is perfect, the cookies will appear uncooked and very soft when they leave the oven, but it’s a crucial step to leave them to cool for a few minutes on the baking tray. In that time the cookies will harden and will have become more easily transferable and will not fall apart.

These cookies will keep for up to 3 days, they’re fantastic served as they are with a glass of ice-cold milk or you can warm one up in the microwave and serve with a scoop of ice cream.

(Makes 8-10 cookies)

Ingredients:

110g butter (salted or unsalted), softened

200g dark or light brown sugar

1 large free-range egg, at room temperature

Couple of drops of vanilla extract

165g plain flour

Pinch of salt (only add if using unsalted butter)

1/2 teaspoon baking powder

1/2 teaspoon bicarbonate of soda

30g cocoa powder

100g mix of dark and milk chocolate chips

100g white chocolate chips

Method:

1. Preheat your to 190°C / 170°C Fan / 375°F / Gas Mark 5. Line two large baking trays with parchment paper or silicone mats and set aside.

2. Cream the butter, sugar and vanilla together until just combined – it doesn’t need to be light and fluffy. Add the egg and mix until incorporated.

3. Next, add the flour, a pinch of salt (only is using unsalted butter), baking powder, bicarbonate of soda and cocoa powder and mix until a dough comes together.

4. Finally, fold through the chocolate chips and mix to combine into the dough.

5. At this point you can chill the dough for 30 minutes to make it easier to roll or you can bake the cookies straight away. Divide the mixture into 8-10 balls. Spread out evenly on the baking trays. Bake the cookies for 10-12 minutes. Don’t over bake – once baking time is over, the cookies will appear very soft, but they’ll carry on cooking whilst they cool. Whilst the cookies are cooling I pressed a few extra chocolate chips into the tops just for decoration purpose.

6. Allow the cookies to cool on the baking trays for 5-10 minutes. In this time they will harden and will become more easily transferable. Finish cooling on a wire rack. The cookies will store in an airtight container for up to 3 days.

Recipe from “Baking Made Easy” by Lorraine Pascale

Keep up to date with me on:

Like my Facebook page here

Instagram: @whatjessicabakednext

Twitter: @jessbakednext

Pinterest: @jessbakednext

Baking · Cakes

Apple Crumb Cake

Classic Apple Crumb Cake. Layers of fluffy vanilla cake, cinnamon sugar apples and crumbly streusel topping. 

DSC02059

Happy Monday everyone! And happy November! I can’t believe this time next month we’ll all be getting ready for Christmas. Don’t you feel like this year has just flown by? I am excited to share lots of festive bakes this December on the blog. To be honest I think I’ve been planning all my Christmas recipes since the summer! Anyone else guilty of doing this? 😉

Today I’m sharing this gorgeous apple crumb cake. It would be perfect paired with hot mug of coffee or tea to warm you up on a chilly autumn or winter day.

The reason I decided to bake this apple crumb cake is because my grandparents kindly gave me an entire box full of apples from a relative’s apple tree (the perks of being a food blogger!), and I promised to bake something in return.

When I started brainstorming some possible recipes to use the apples in, two autumnal bakes in particular sprung straight to mind. Apple cake and apple crumble are two firm favourite desserts of my family. This apple crumb cake combines the two desserts and is everything a great crumb cake should be. The best part about this cake is the generous thick streusel topping. So if you’re like me and really like streusel, I know you’ll enjoy this recipe a lot!

DSC02064

Prior to baking the cake I tossed the sliced apples in cinnamon and sugar. The cinnamon adds a warm spiced flavour and makes this cake perfect for the time of year. Brilliant served at room temperature, but I really think it would also be great served warm with a scoop vanilla ice cream, clotted cream or custard. Talk about indulgence!

Oh and don’t forget to drizzle over caramel or toffee sauce! The sauce takes this cake over the top! Slice it up and enjoy for breakfast or dessert, if you’re looking for a new autumn-inspired cake recipe, then look no further! Give this cake a try, you’re going to love it.

(Serves 10-12)

Ingredients:

Vanilla Cake:

4 eating apples (such as Granny Smith for the best texture)

1 teaspoon ground cinnamon

200g (7 ounces) unsalted butter or margarine, softened

275g (10 ounces) caster sugar

2 teaspoons vanilla extract

4 free-range eggs, at room temperature and lightly beaten

300g plain flour (all-purpose), sifted

Crumb Topping:

125g (4 ounces) plain flour

50g (2 ounces) light or dark brown sugar

60g (2 and 1/2 ounces) unsalted butter, melted

Method:

  1. Preheat oven to 160°C (140 fan), Gas Mark 3. Grease the sides and base of a 20.5cm springform or loose-bottomed cake tin liberally with butter.
  2. Peel and core the apples, then cut into 1/2 cm (1/4 inch) slices. Place the apple slices in a bowl and toss together with the cinnamon and 2 tablespoons of the weighed out sugar. Set aside.
  3. To make the cake: Cream the butter, remaining sugar and vanilla until fluffy and pale in colour. Gradually add the beaten egg bit by bit, whisking well after each addition. Add the flour and fold through until combined. The mixture will be very thick, just be careful not to over mix.
  4. Spread the cake batter out into the prepared cake tin. Now layer the apple slices evenly across the top. Press them down very slightly into the cake batter – discard any remaining juices the sliced apples have released.
  5. To make the crumb topping: Combine all the ingredients listed (melted butter, brown sugar and flour), and mix with a spatula or spoon until the mixture resembles large, damp crumbs. Scatter the crumbs over the top of the cake.
  6. Bake for 1½ – 1¾ hours, or until cake tester comes out clean when inserted into the centre of the cake.
  7. Once fully baked, allow the cake to cool in the tin for 10-15 minutes, then remove from tin and leave to cool completely on a wire rack. Serve warm or at room temperature. Dust with icing sugar before serving.

Recipe adapted from here

DSC02061

This is the autumn dessert you’ve all been waiting for! Enjoy!

jess

Keep up to date with me on:

Like my Facebook page here 

Instagram: @whatjessicabakednext

Twitter: @jessbakednext

Pinterest: @jessbakednext 

Baking · Cupcakes

Pumpkin Spice Cupcakes

Fluffy and moist pumpkin spice cupcakes topped with tangy cream cheese frosting. My new favourite autumn cupcake recipe and a must try for all pumpkin lovers! 

pumpkin-spice-cupcakes

Happy Monday everyone, I hope you all had a brilliant weekend! Wow! How fast is time flying?! We’re already halfway through October and that means Halloween is just around the corner!

I’m super excited to be sharing my first ever pumpkin recipe on the blog and there’s no better recipe to share than homemade pumpkin cupcakes swirled with cream cheese frosting!

I finally bought my first can of pumpkin puree the other day. I’ve held off until now but as autumn is in full swing now and Halloween fast approaching it seemed the perfect opportunity to start sharing some pumpkin recipes with you all.

The funny thing is, in the US everyone seems to be crazy for pumpkin but in the UK we don’t seem to embrace it as much. Using pumpkin in sweet baking is a totally new thing for me and at first it seemed seriously weird. After taking a bite of one of these cupcakes I soon realised pumpkin is a very versatile ingredient and brilliant in both savoury and sweet baking.

The cupcake batter is super easy to make. I love the combination of spices in these cupcakes. Each cupcake is topped with cream cheese frosting which is smooth, fluffy and has the perfect tanginess which compliments the spiced flavour in the cupcakes. I have to admit, I cheated this time and used pre-made frosting. This is because I had a frosting fail at the weekend but it is ok to cut corners sometimes!

psc

Because Halloween is nearing closer I gave a few of the cupcakes some Halloween inspired decorations, hence the spooky Halloween scene and styling! 🙂 I topped some of these gorgeous spiced cupcakes with marshmallow pumpkins. But even without all the decorations these cupcakes will be amazing. Serve the cakes on platters at Halloween parties this year they will go down a treat!

(Makes 12)

Ingredients:

Cupcakes – 

195g (1 and ½ cups + 2 tablespoons) plain (all-purpose) flour

1 teaspoon baking powder

1/4 teaspoon bicarbonate of soda (baking soda)

1/2 teaspoon salt

1 teaspoon ground cinnamon

1/4 teaspoon ground nutmeg

1/4 teaspoon ground ginger

130g (2/3 cup) granulated or caster sugar

90g (1/2 cup packed) light brown sugar

120ml (1/2 cup) vegetable oil (canola or a light olive oil can be used)

2 large free-range eggs, at room temperature

200g (3/4 cup + 2 tablespoons) pumpkin puree

1 teaspoon vanilla extract

Decoration –

Frosting – cream cheese, chocolate, vanilla, marshmallow will all work well

Sprinkles, sweets/candy

Method:

  1. Preheat oven to 160 Fan / 180 C / 350 F. Line a 12-hole muffin tin with paper cases.
  2. To make the cupcakes: In a small mixing bowl whisk together the flour, baking powder, bicarbonate of soda, salt and spices. Leave to one side.
  3. In a medium mixing bowl cream the sugars together until combined. Add the oil and blend until mixed fully. Add the eggs one at a time and beat until incorporated. Finally, mix in the pumpkin and vanilla.
  4. Add the flour mixture in two batches and fold to combine. Make sure you scrape the sides and bottom of the bowl to ensure it is well blended.
  5. Divide the cupcake batter between the paper cases. Make sure you fill each cup about 3/4 of the way up. Bake for 20-25 minutes or until a cake tester comes out clean without any uncooked batter remaining. Leave the cupcakes to cool in the tin for 3 minutes then carefully remove and transport to a wire rack to finish cooling completely.
  6. Once the cupcakes are cooled, frost and decorate. The frosted cupcakes will store in the refrigerator in an airtight container for up to 5 days. Best served at room temperature. I also recommend decorating these just prior to serving.

Recipe from Cooking Classy

pumpkin-spice-cupcake-recipe

Enjoy!

jess

Keep up to date with me on:

Like my Facebook page here 

Instagram: @whatjessicabakednext

Twitter: @jessbakednext

Pinterest: @jessbakednext 


Baking · Cakes

Sticky Toffee Pudding

Sticky Toffee Pudding is a classic British dessert consisting of date sponge served with a sweet toffee sauce. Pudding doesn’t get much better than this! 

IMG_7711

I posted this recipe a while back when I had first started writing my blog. They’re one of my favourite desserts so I wanted to update and share the blog post once again because I love it so much! Sticky toffee pudding is a dessert you will make time and time again. I had previously baked these in celebration of Great British Pudding Week, my sister, Becky, took a look through my blog and requested I made these again over the weekend for a family dinner.

These gorgeous cakes are warm, sweet, sticky and drizzled with lots of homemade toffee sauce. Sticky toffee pudding is one of my most treasured childhood desserts. It’s got to that time of year where I think these kinds of comforting desserts should be eaten and enjoyed, especially desserts that come with lashings of warm homemade toffee sauce… 😉

Sticky toffee pudding is the epitome of food comfort on a cold afternoon or evening. The cake itself has to be eaten warm for you to experience its full glory and don’t skimp on the toffee sauce!

Print

Sticky Toffee Pudding

Sticky Toffee Pudding is a classic British dessert consisting of date sponge served with a sweet toffee sauce. Pudding doesn't get much better than this! 
Prep Time 15 minutes
Cook Time 35 minutes
Total Time 50 minutes
Servings 9
Author What Jessica Baked Next

Ingredients

Date Sponge:

  • 280 g pitted dates roughly chopped
  • 1 teaspoon bicarbonate of soda
  • 250 ml boiling water
  • 40 g dark or light brown sugar
  • 80 g (salted or unsalted) butter softened
  • 2 eggs
  • 185 g plain flour
  • 1 and 1/2 teaspoons baking powder

Toffee Sauce:

  • 200 g dark or light brown sugar
  • 300 ml double cream
  • 70 g (salted or unsalted) butter I recommend adding a pinch of salt if using unsalted butter

Instructions

  • Preheat oven to 180°C / 160°C / 350°F / Gas Mark 4. Line a 20cm / 8-inch square cake tin with parchment paper and set aside. Place the chopped dates in a bowl and sprinkle over bicarbonate of soda. Pour over boiling water. Stand 10 minutes, then mash well with a potato masher (or fork).
  • Place the softened butter and sugar in a bowl. Beat until combined and smooth. Now, add the eggs and beat until incorporated. Add flour along with the baking. Mix until flour is fully incorporated.
  • Add the date mixture, mix quickly until dates are well incorporated into the batter. Pour the cake batter in the lined tin. Bake for 35 minutes or until a cake tester when inserted in the centre of the cake comes out clean.
  • Now make the toffee sauce ready for serving the cake. To make the toffee sauce, place the sugar, cream and butter in a saucepan over medium heat. Once butter is melted, stir, then bring to simmer. Simmer for 2 minutes, stirring occasionally, then remove from heat.
  • Once the cake is baked, take a cake skewer and poke holes over the top of the cake - about 40 will do. Take about 1/2 cup (120ml) of the sauce and pour this over the top of the cake. Leave it to stand and soak in the sauce for 10 minutes.
  • When ready to eat, take a piece of the sticky toffee pudding, pour over more of the remaining sauce, and serve with custard, ice cream or pouring cream.

IMG_7717

sticky pudding copy

I like to use any leftover toffee sauce to dip into churros, top pancakes or drizzle over ice cream!

Keep up to date with me on:

Like my Facebook page here

Instagram: @whatjessicabakednext

Twitter: @jessbakednext

Pinterest: @jessbakednext

Baking · Biscuits and Cookies · Chocolate · Cupcakes

Biscoff Cookie Butter Cupcakes

Vanilla white chocolate chip cupcakes topped with a creamy swirl of Biscoff buttercream frosting!

From one cupcake recipe to another! This time I’m sharing my delicious recipe for cookie butter cupcakes. I’m pretty much obsessed with Biscoff, so it was definitely about time to share a Biscoff cupcake recipe on here. I’ve used my popular Perfect Vanilla Cupcakes as a base but this time decided to add some white chocolate chips to the batter. How do you make a vanilla cupcake EVEN more yummy? Adding chocolate is the answer! 😉

If you’re wondering what cookie butter is exactly, then if you ask me I will tell you it is one of the most heavenly foods out there! The spread is made of ground Speculoos biscuits and just like Nutella I could it by the spoonful jar. Speculoos (or speculaas) is a traditional Dutch spiced biscuit very popular here in Europe. They’re crunchy in texture and have a gorgeous warming flavour from spices such as cinnamon, nutmeg, ginger, cloves and cardamom.

So to make these scrumptious cupcakes I start off with an easy no-fail cupcake batter. I went for a classic vanilla cupcake because I wanted the creamy cookie butter frosting to be the star of the show. The sponge cupcakes are moist, buttery and bake perfectly every single time. They have a beautiful light vanilla flavour and a hidden white chocolate chip surprise. 🙂

Once the cupcakes are fully baked and have had a chance to cool, I made my frosting. You may be tempted to devour the frosting straight from the bowl. To make it, simply cream the butter until pale, then add the icing sugar along with the vanilla extract and beat for about 5 minutes until the frosting is light and fluffy.

Then all that is left to do is add the Biscoff cookie spread and mix. Make sure you adjust the consistency with a splash of cream or milk as this will make it easier to pipe onto the cupcakes.

Swirl each cupcake with the frosting and then decorate with a sprinkle of Speculoos biscuit crumbs, white chocolate chips and half a Speculoos biscuit. These were really easy to make and will certainly impress all your family and friends.

(Makes 12)

Ingredients:

Vanilla Cupcakes:

150g butter or margarine, softened

150g caster sugar or light brown sugar

1 teaspoon vanilla extract

3 medium or large free-range eggs, at room temperature

150g self-raising flour, sifted

100g white chocolate chips (optional)

2-3 tablespoons milk

Cookie Butter Frosting:

150g butter, softened

250-300g icing sugar, sifted

1 teaspoon vanilla extract

200g Biscoff or speculoos cookie butter spread

2-3 tablespoons milk or double cream

Method:

1. Preheat your oven to 180°C / 160°C Fan / 350°F / Gas Mark 4. Line a cupcake tin with 12 cupcake paper liners and set aside.

2. To make the cupcakes: Cream the butter, sugar and vanilla together until light in colour and very fluffy. Add eggs one by one and mix to combine. Toss the white chocolate chips with about a tablespoon of the weighed out flour, then add to the bowl along with the remaining flour and the milk and mix until just combined and no lumps of flour remain.

3. Evenly distribute the cupcake batter between the cupcake liners. Bake in the preheated oven for 15-20 minutes or until a cake tester comes out completely clean of any uncooked batter. Leave to cool in the tin for 5 minutes, then when cool enough to touch remove from the tin and transport to a wire rack to finish cooling completely.

4. To make the buttercream: Cream the butter until really pale in colour. Add the sifted icing sugar and the vanilla extract and mix together until the butter and sugar has combined. Continue to beat until fluffy and very creamy in colour and texture. Once the buttercream is fluffy add the cookie butter spread, and mix until combined. If the mixture if too stiff loosen with the cream or milk until you reach the desired piping consistency.

5. To decorate: Fit a large disposable piping bag with your favourite nozzle – I love the large star tip for cupcakes. Fill the piping bag with the frosting. Pipe even swirls on the top of each cupcake, or use a small cake palette knife and spread the frosting onto each cupcake. Finish by decorating with biscoff crumbs and biscuit halves, and or white chocolate chips. Note: I recommend topping the cupcakes with the biscuit half just before serving, otherwise it loses its crunchiness.

Recipe Notes:

  • Baking time will depend on your oven. This recipe recommends 15-20 minutes, but different ovens may cause the baking time to differ slightly.
  • This cupcake recipe can easily be doubled or tripled to make more.
  • For the frosting I like to add a few tablespoons of double (heavy) cream. The cream makes the frosting lighter and it will have a creamier texture. If preferred you can substitute with milk but please note that frosting will not have such a creamy texture. I also reduced the sugar in the frosting so it wasn’t too sweet. But you can adjust the frosting to your own taste.
  • The frosted cupcakes will keep in an airtight container for up to 3 days. Cupcakes never last that long in our house!

Keep up to date with me on:

Like my Facebook page here

Instagram: @whatjessicabakednext

Twitter: @jessbakednext

Pinterest: @jessbakednext

Baking · Chocolate · Cupcakes

Giant Cupcake: House of Fraser Bakeware Review

I was recently reached out by House of Fraser who asked me whether I would be interested in reviewing a bakeware set to create some amazing bakes with. I received a cute cupcake pan and a castle bundt pan. I made a big cupcake for a family birthday earlier in the week, I’m quite proud of the giant cupcake, as it was my first attempt ever at making one! I’m fine with standard cupcakes, but frosting layer cakes is not my forte. To test out the cupcake pan, I baked a basic vanilla sponge cake and then decorated the cake with white chocolate buttercream, rainbow sprinkles and colourful sweets. So here it is, this is my fun and easy recipe for a giant cupcake!

DSC01093

It was my grandads 80th birthday earlier in the week and I wanted to bake a show-stopping cake perfect for this extra special occasion! As I mentioned earlier in this post, House of Fraser recently got in contact with me about working on a creative baking campaign and offered me the opportunity to test out and review a high-quality bakeware set. I am really impressed with the bakeware so far and I’m already planning my next giant cupcake creation!

The cute cupcake pan by Nordic Ware is absolutely fantastic. I think it is my new favourite cake tin! The cake pan is cast aluminum, this is great because it ensures the cake bakes really evenly and has a nonstick interior for easy release and cleanup. I used my perfect vanilla cupcake recipe as a base for this giant cupcake, but only the change I made was I upped the ingredients slightly to make more mixture for this cake pan.

To decorate I piped homemade white chocolate buttercream onto the top in swirls, which turned out to be much harder than I had first thought as my piping skills aren’t the best! Then I simply scattered over sprinkles and pressed some coloured sweets into the buttercream.

If like me you’ve been inspired by The Great British Bake Off you can visit the link here on House of Fraser’s website and browse the bakeware.

cupcake tin house of fraser

DSC01045

(Makes 1 giant cupcake using a 6 cup pan)

Ingredients:

Cupcake Batter:

200g unsalted butter or margarine, softened

200g caster sugar

4 medium free-range eggs, at room temperature

1 teaspoon vanilla extract

200g self-raising flour, sifted

2-3 tablespoons milk or water

White Chocolate Buttercream:

150g unsalted butter, softened

250-300g icing sugar, sifted

1 teaspoon vanilla extract

150g white chocolate, melted and cooled slightly

Method:

  1. Preheat oven to 160 Fan / 180°C / 400°F / Gas Mark 4. Grease the cake pan well with butter – making sure you grease really well in all the grooves. Line the bottom of the base section with a circle of greaseproof paper. Set aside.
  2.  Cream the softened butter/margarine with the sugar and vanilla until fluffy and pale in colour. This will take about 4-5 minutes.
  3. Add the eggs one by one, and beat in until fully incorporated.
  4. Finally add the flour, along with the milk/water and beat for 20-30 seconds until no lumps of flour remain and the cake batter is smooth.
  5. Distribute the cake batter between the cupcake pan, bake for 40-45 minutes or until a cake tester comes of clean of any uncooked batter. Once baked fully, leave the cakes to cool in the pan for 15 minutes. Then carefully turn out onto a wire rack and leave to cool completely.
  6. Once cool, frost with your favourite buttercream. I made my favourite white chocolate buttercream – to make it, cream the softened butter until pale in colour. Then add the icing sugar and vanilla, and and mix to combine. Continue to beat for 5-7 minutes, or until really fluffy. Finish by adding the melted chocolate, and whisk until combined fully. Use a small amount of the buttercream to sandwich together the two cake halves, then fill a piping bag with the buttercream and pipe onto the giant cupcake. Decorate with sprinkles and sweets!

vanilla cupcake giant

Enjoy!

jess

Keep up to date with me on:

Like my Facebook page here 

Instagram: @whatjessicabakednext

Twitter: @jessbakednext

Pinterest: @jessbakednext 

Baking · Biscuits and Cookies · Candy and Sweets · Chocolate

Cookies and Cream Oreo Fudge

Classic clotted cream fudge studded with crunchy chocolate Oreo cookies. Just 5 ingredients and incredibly simple + easy to make! You are going to love this cookies and cream fudge! 

DSC00319

I don’t think I’ve ever met anyone who doesn’t love fudge. I mean what’s not to like about creamy smooth sweet bites of pure deliciousness?

What I really like most about fudge, besides the fact it is delicious and seriously addictive, is how versatile each fudge recipe can be. I’ve already shared my Custard Cream Fudge (the best creation!). That recipe always goes down a treat with my blog readers, and when I made it for a charity bake everybody went CRAZY for it, and it sold out in less than 2 minutes!

After I realised the popularity of that fudge recipe, I decided to make a new version. I made this Oreo fudge to take over to my best friend’s house last weekend and yet again, like the previous times I’ve made it, this fudge went down a storm with everyone who tried a piece!

I’ve taken that previous fudge recipe and swapped the custard creams, which if you’re wondering are the British equivalent of golden Oreos for regular chocolate Oreo cookies. The fudge is just as tiring to make as I remember, I’m not gonna lie the recipe requires quite a bit of muscle to make! But after an extreme arm workout you can reward yourself with square after square of the yummy fudge! 😉

 oreo fudge

One of the best homemade treats and beautifully modelled by my sis! 

This fudge requires just a handful of ingredients. It’s inspired by Cornish clotted cream fudge which always reminds me of family holidays in beautiful Cornwall. But I’ve added a twist, the fudge is speckled with crushed Oreos which are one of my favourite cookies!

The greatest thing about this simple recipe is that it’ll only take 30 minutes from start to finish to make and it doesn’t even require a candy thermometer! Making fudge can be an intimidating process, heating the fudge to the correct temperature, making sure it reaches “soft ball” stage. What is best about my recipe, is all you need to do with boil all the ingredients (minus the Oreos) for just 3 minutes then take straight off the heat and continuously beat the fudge until it turns nice and thick – that and waiting for the fudge to set are the two hardest parts of the recipe! Then finally finish by folding through the cookies. Leave it to set and then slice up!

The fudge would make fab gifts wrapped up or put into decorative jars. It is the best kind of sweet chocolate treat, perfect for any occasion! Enjoy!

DSC00301

(Makes about 32-40 squares)

Ingredients –

1 x 227g (8 oz) tub clotted cream

275g (9¾ oz) caster sugar

100g (3.5 oz) golden syrup

1/2 teaspoon vanilla extract

8-10 Oreos, crushed

Method –

  1. Line an 8″ x 8″ square tin with parchment paper and set aside.
  2. Place the clotted cream, sugar, golden syrup and vanilla in a medium saucepan. Heat gently and stir until all the sugar has dissolved.
  3. Turn the heat up, and the bring the mixture up to the boil. Allow to boil for 3 minutes. Then take straight off the heat.
  4. Using a wooden spoon, continuously beat the fudge for 10 minutes until it is really thick and matte.
  5. Finally fold half the crushed Oreos through the fudge. Spread out into the lined tin, and then decorate the top with the fudge with the remaining Oreos – make sure you press them in slightly. Place in the refrigerator for at least 4 hours or overnight. Once set, cut into cubes.

Recipe Notes:

  • Fudge is best served chilled.
  • It will keep in an airtight container in the refrigerator or at room temperature for up to 2 weeks.


DSC00360

Enjoy the recipe everyone!

jess

Keep up to date with me on:

Like my Facebook page here 

Instagram: @whatjessicabakednext

Twitter: @jessbakednext

Pinterest: @jessbakednext 


Other treats you make like to try!

DSC03398

Flapjacks (British chewy oat squares)

DSC09401

Classic Chocolate Chip Cookies (a must try recipe!)

fudge british

Custard Cream Fudge

Baking · Buttercream and Frosting · Cakes

Lemon Cupcakes with Fresh Raspberry Buttercream

Light and buttery lemon-scented cupcakes topped with fresh raspberry buttercream.

DSC07602

I’m super excited to share this cupcake recipe over on the Laura Ashley blog! The Great British Bake Off is currently airing on TV here in the UK, I am absolutely loving it! There really is nothing more British than tea and cake!

I am thrilled to have been chosen along with three other amazing bloggers (Aimee, Catherine and Sara) to take part in The Great Blogger Bake Off! I’m full aware most bloggers are going crazy over pumpkin recipes right now, but it is still the summer and I’m taking full advantage of that! I made these cupcakes way back in the middle of the summer, they went down a treat with everyone who tried one and are one of my favourite cupcake recipes.

THE GREAT BLOGGER BAKE OFF

DSC07716

I love dusting each cupcake with a little bit of icing sugar – they look prettier that way! 

DSC07613

DSC07735

For my recipe on the Laura Ashley blog, I decided to bake some summery cupcakes. I love cupcakes, so it seemed the obvious choice! Each cake is swirled with fresh raspberry buttercream. The buttercream is seriously addictive, so much so you could probably eat it by the spoonful straight from the mixing bowl – I’m always guilty of doing this!

I use a classic sponge cupcake, there is nothing more British than sponge cake! It’s a brilliant cake, light, fluffy and buttery. And perfect in so many ways!

I added the zest from one lemon to my cupcake batter, the lemon has a beautiful light flavour and it works amazingly with the tart raspberry buttercream. I use a brilliant vanilla buttercream base, but I’ve added some homemade raspberry puree to the mix. It naturally colours the buttercream, giving it a pretty pink colour!

These cupcakes would make a brilliant and pretty tasty addition to an afternoon tea party. Paired with my Easy Homemade Lemonade they would be the ultimate treat!

DSC07576

For my recipe I received these absolutely gorgeous cupcake cases and toppers from the new collection! Along with the beautiful floral pastry guide worktop saver. I’m excited to make lots of pastry and roll out biscuits on this!

(Makes 12)

Ingredients:

Cupcakes:

150g (2/3 cup) unsalted butter, softened

150g (3/4 cup) caster or granulated sugar (superfine sugar)

3 free-range eggs, at room temperature

1 lemon, zest only

150g (1 and 1/4 cup) self-raising flour, sifted – be careful not to overmeasure – you can sub with 150g plain flour and 2 tsp baking powder

2-3 tbsp water or milk – water makes a lighter cake

Buttercream:

1 heaping cup (approx. 160g) fresh or frozen raspberries

150g (2/3 cup) unsalted butter, softened

300g (3 cups) icing sugar (confectioners’ sugar), sifted

1 teaspoon vanilla extract (optional)

2-3 tablespoon milk or cream

Method:

1. Preheat your oven to 180 degrees C Fan / 200 °C / 400 °F / Gas Mark 6. Line a cupcake tin with 12 cupcake liners and set aside.

2. To make the cupcakes: In a stand mixer fitted with the paddle attachment cream the butter, sugar and vanilla together until light in colour and very fluffy – this will take 5 minutes. Make sure you stop the mixer halfway through creaming and using a rubber spatula scrape down the sides and bottom of the bowl to ensure even mixing.

3. Add eggs, one by one and mix to combine. Now fold in the flour – mix until just combined and no lumps of flour remain. Add the lemon zest along the milk or water to loosen the mixture slightly. Do not over mix!

4. Take an ice cream scoop and evenly distribute the cupcake batter between the cupcake liners. Bake in the preheated oven for 18-20 minutes or until a cake tester comes out completely clean of any uncooked batter. Leave to cool in the tin for 5-10 minutes, then when cool enough to touch remove from the tin and transport to a wire rack to finish cooling completely.

5. To make the buttercream: Blitz the raspberries in a food processor or blender until pureed. Then pass through a fine mesh sieve into a small saucepan. Heat gently and reduce by about half – this will take approx. 3-5 minutes. Pour the thickened raspberry puree into a bowl and chill until cold.

6. Once the cupcakes are fully cooled make the buttercream. Add the softened butter to a stand mixer fitted with the paddle attachment. Cream on a medium speed for about a minute just to soften. Add the sifted icing sugar and the vanilla extract and mix together on a low speed (this is to avoid a sugar cloud!) until the butter and sugar has combined. Now turn up the speed to medium and cream for another 5 minutes – remember to stop the mixer and scrape down the sides and bottom of the mixing bowl. Once the buttercream is fluffy add the raspberry puree and double cream, and mix on low speed for another minute to combine.

7. To decorate: Fit a large disposable piping bag with your favourite nozzle. Fill the piping bag with the frosting. Pipe even swirls on the top of each cupcake, then finish with a fresh raspberry and the beautiful cake toppers or any other decorations you like. Enjoy!

DSC05205

DSC07713

Vote your favourite recipe here for the chance to win a baking bundle and a £100 voucher!

jess

Keep up to date with me on:

Like my Facebook page here 

Instagram: @whatjessicabakednext

Twitter: @jessbakednext

Pinterest: @jessbakednext