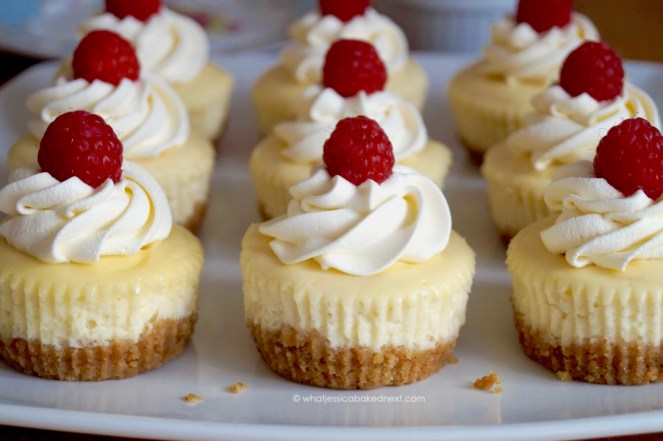
Made in a muffin tin, these mini cheesecakes are a yummy bitesize dessert with whipped cream and decorated with various toppings. This easy recipe makes a dozen delicious mini vanilla cheesecakes – I dare you not to eat the whole batch!

Originally posted in January 2015, recipe and photographs updated March 2020.
We’re pressing fast forward and jumping straight from 2015 to 2020 with the recipe re-do I’m sharing today! Back in 2015, little did I know many times I would bake these divine (and super adorable) mini cheesecakes. I had so much fun going back and baking an older blog recipe and I’m really pleased with the updated photographs I’ve taken of these cheesecakes.
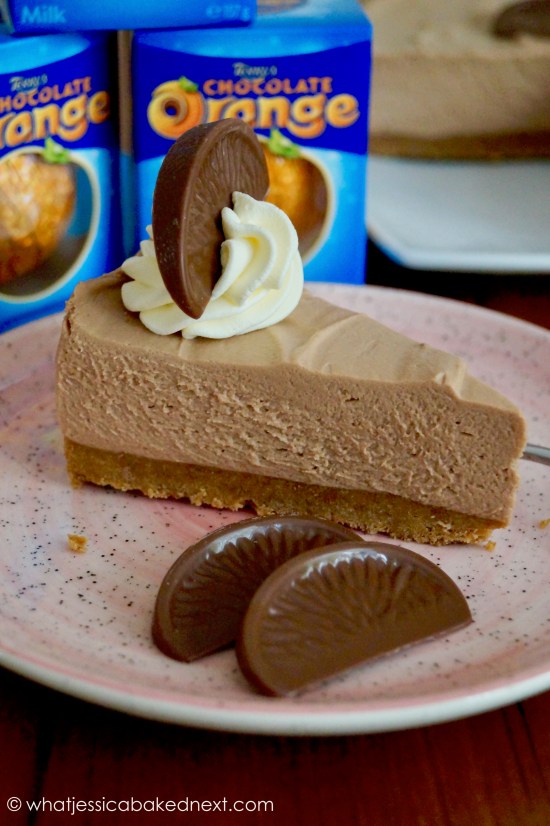
These mini vanilla cheesecakes are scrumptious little bites of creamy cheesecake bliss and what’s so amazing about this recipe is that you can bake a cheesecake in a muffin tin! I even adapted the recipe by adding lemon juice and zest to the cheesecake filling to make Mini Lemon Cheesecakes (one of the most viewed recipes on my blog).

It’s not really a secret, I think I’ve probably told you a million times already that cheesecake is my favourite dessert? Chocolate brownies/cake is a very close second, but cheesecake (something I used to hate when I was younger) takes the crown for my most loved dessert ever.
I usually prefer No-Bake Cheesecake, but lately I’ve been really enjoying baked cheesecakes, as when made well, they’re super light and creamy and a gourmet dessert that’s pretty hard to resist.

This recipe perfect for when you don’t have the time to make a whole cheesecake, they take less than half the time to make compared to a full-sized cheesecake baked in springform tin does! These mini cheesecakes remind me of my favourite New York Baked Cheesecake, but you won’t have to wait as long to devour these. I love cheesecake a lot, but sometimes I don’t want a big cheesecake hanging around in my kitchen – it’s too tempting for a massive cheesecake fan like myself to fight the urge to grab slice after slice of cheesecake straight from the fridge!

As the cheesecakes bake they will rise slightly and upon cooling the cheesecakes will sink a little and may even develop a dip in the centre. But don’t worry too much about this as you can pile on toppings and hide this and if your cheesecakes do happen to crack you can cover it up very easily!
Once baked the cheesecakes will need to be left to cool completely to room temperature, then cover the tray tightly and chill the cheesecakes for at least 4 hours or overnight for best results. I do recommend chilling overnight if you have the time, as this will make a lot of difference regarding the taste and texture of your cheesecakes.

I chose to top my batch of cheesecakes with various toppings like homemade raspberry sauce, whipped cream, chopped strawberries and because it’s nearly Easter, I topped a few of my cheesecakes with Cadbury mini eggs. Decorate the cheesecakes right before you’re planning to serve them otherwise the toppings will go soft from the moisture in the cheesecake.
Because these are vanilla cheesecakes they suit lots of flavours. Instead of a fruit coulis/sauce why not drizzle the tops with caramel, chocolate sauce or a spoonful of curd or jam. You could even sprinkle over some chocolate chips or curls, top with pieces of your favourite chocolate bar or scatter over chopped nuts.
(Makes 12)
Ingredients:
Biscuit Base:
150g digestive biscuits (1 and 1/2 cups of biscuit crumbs), crushed – alternatively you can use graham crackers
2 tablespoons caster or granulated sugar (optional)
70g (5 tablespoons) butter (salted or unsalted), melted
Cheesecake Filling:
450g (16 ounces / 1lb) full-fat cream cheese, softened – I leave mine out at room temperature for an hour to soften
130g (2/3 cup) caster or granulated sugar
2 large eggs, at room temperature
2 teaspoons vanilla extract
Method:
1. Preheat your oven to 170°C / 150°C Fan / 325°F / Gas Mark 3. Line a 12-hole cupcake/muffin tin with 12 paper liners.
2. Mix together the biscuit crumbs with the melted butter until well combined. Using a tablespoon measure distribute the biscuit crumbs into the muffin cases and press down with a teaspoon until level. Bake the biscuit bases for 5 minutes until lightly toasted. Take out of the oven and leave to cool in the tin.
3. Whilst the biscuit bases are cooling make the cheesecake filling. In a stand mixer fitted with a paddle attachment or a large mixing bowl with an electric mixer beat the cream cheese for to soften. Gradually add the sugar and once it’s all added continue to mix for another minute. Add the eggs and vanilla and mix through – at this point make sure you scrap down the base and sides of your mixer to make sure the batter and ingredients are all well incorporated.
4. Evenly distribute the cheesecake batter between the paper liners – spoon roughly 3 tablespoons of the batter into each prepared mini cheesecake base making sure you fill 2/3 of the way up of each. (I start with a tablespoonful in each case and go round again until the batter mix is used up.)
5. Bake the cheesecakes for 22-24 minutes or until the centres are just set. Once set take out of the oven and leave to cool in the tin completely. Refrigerate for at least 4 hours or overnight. When ready to serve, gently run a butter knife around the outside of the muffin case to help release the cheesecakes from the tin, as the biscuit base can sometimes release some butter which makes the case stick slightly. The cheesecakes will keep stored in the fridge for up to 3 days.
Recipe Notes:
- For the biscuit base I like using a plain flavoured biscuits like digestives or rich tea. Graham crackers are a good substitute for overseas readers.
- To save you time weighing out ingredients: 150g of digestive biscuits crumbs is exactly 10 digestive biscuits and that’s 1 and 1/2 cups of biscuit crumbs for anyone using cup measurements.
- I like adding a couple of tablespoons of sugar to my biscuit base to sweeten it, however this is optional and you don’t have to add any sugar to the base ingredients if you prefer not to.
Keep up to date with me on:
Like my Facebook page here
Instagram: @whatjessicabakednext
Twitter: @jessbakednext
Pinterest: @jessbakednext