Homemade Hobnob-style biscuits. These oat biscuits are slightly chewy and perfectly sweet.

It’s been a while since I’ve shared a new recipe, but during that time I’ve been busy updating some older recipes including this Biscoff Chocolate Tart and this Creamy Homemade Hummus.
I’ve shared quite a few biscuit recipes on this blog: Jammy Dodgers, Shortbread and Gingernuts are a few of my personal favourites. The biscuit recipe I have for you today is similar to my gingernut biscuits recipe, as you don’t need to chill the biscuit dough before baking and they don’t take long to bake either.
If you’re from the UK like me or have lived/been to the UK, then you might well be familiar with Hobnobs?
They’re a British brand of biscuit and make a yummy biscuit base for a banoffee pie or cheesecake, or simply devoured straight from the packet…

Though readymade Hobnobs are totally addictive, homemade Hobnobs are definitely superior.
This recipe starts with mixing together self-raising flour, brown sugar, porridge oats, bicarbonate of soda, and a smallish pinch of salt. Then, adding melted butter and golden syrup, then folding this mixture into the dry ingredients to combine.
Divide the biscuit dough into 16 portions and roll into balls. Spread out evenly on a couple of large baking trays, then flatten slightly and bake until golden.
If you want a softer biscuit, check the biscuits after 12 minutes of baking then continue baking longer for a crispier biscuit.
Ready to eat in only 30 minutes and they taste incredible still warm from the oven!


The oat biscuit dough before baking is easy to roll, not too sticky and bakes into delicious, crunchy biscuits

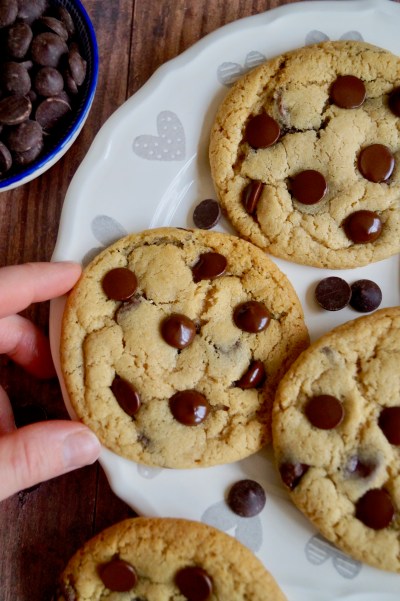
Once the biscuits are baked you can serve them up right away. A drizzle of melted chocolate isn’t needed as these biscuits taste amazing without it, but the chocolate adds that extra touch of indulgence.

Easy Oat Biscuits (Homemade Hobnobs)
Ingredients
- 125 g self-raising flour
- 125 g dark or light brown sugar
- 125 g porridge oats
- 1/2 teaspoon bicarbonate of soda
- Pinch of salt
- 125 g dairy-free baking block (you can use regular butter)
- 1 tablespoon golden syrup
- 125 g dark or milk chocolate (optional)
Instructions
- Preheat oven to 180°C / 160°C Fan / 350°F / Gas Mark 4. Line two large baking trays with parchment paper and set aside.
- In a large mixing bowl, combine the flour, sugar, oats, bicarbonate of soda and salt until thoroughly mixed.
- Now gently heat the dairy-free baking block/butter and golden syrup in a small saucepan and stir until melted.
- Add the melted butter/syrup mixture to the bowl of dry ingredients and mix to combine.
- Divide the mixture into 16 equally sized portions and roll into balls. Spread the balls of dough out onto the baking trays, leaving some space between each to allow for spreading and with the palm of your hand, flatten each ball of biscuit dough down slightly. Bake for 12-15 minutes until golden. If you like a slightly crispier biscuit, then bake the biscuits for nearer to 15 minutes.
- Allow the biscuits to cool on the baking trays for 5 minutes, then transport to a wire rack to finish cooling to room temperature.
- Serve or if you want to decorate, dip or drizzle each biscuit with melted chocolate of your choice and allow to set before serving. The biscuits will keep stored in an airtight container for up to 2 days.
This recipe also features on Twinkl’s Top Ten Ideas for Celebrating National Biscuit Day.

Love biscuits/cookies? Try these recipes below next!


Keep up to date with me on:
Like my Facebook page here
Instagram: @whatjessicabakednext
Twitter: @jessbakednext
Pinterest: @jessbakednext

I made these last night for my children’s wraparound care and admit I couldn’t resist trying one. I didn’t think they were setting and left them in a couple of minutes too long so they are very crunchy (but very tasty!)! Really easy recipe to follow and I used Willow which works nicely.
Hi Emma – I’m so happy you enjoyed the biscuits! Have a lovely Christmas. 🙂 x
Made these with gluten free self-raising flour and they came out AMAZING! Super tasty and couldn’t be easier
Hiya – so pleased you enjoyed the biscuits! Thank you for your review of the recipe. 🙂
Hi Jessica how much is your recipe book
I have a perennial problem with making Hobnobs. Mine always crumble apart in the oven. What am I doing wrong? Any suggestions would be appreciated!
By swapping and using gluten free self-raising flour, did you need to add anything to it, e.g. baking powder/soda?
Thank you for reading
Hey Alex – I reckon you wouldn’t need to add any baking powder/soda. Enjoy the biscuits 😊👍🏼
I made them today with g/f SR flour and 1/4 teaspoon xanthum gum – came out perfect.
That great to hear! Thank you for your feedback ☺️
Why doesn’t my mix
stick together?
Hi – this biscuit mixture needs to be pressed very firmly together to form. Enjoy the recipe!
I made these for the first time, they taste really good but they spread too much whilst in the oven. Did I pat them flat too much, or should I have left them in the ball shape.
Hi Elizabeth – I flatten mine beforehand, but you might find if they’ve spread too much it might be best to not flatten next time you bake them. Hope you enjoy the biscuits still!
Just made these and followed the recipe exactly.
I found the round balls of mixture to be quite big (so that you made 16 equal balls). I could have made smaller balls and got more than 16 cookies, but I didn’t deviate.
The mixture was a little dry and loose/crumbly towards the end, and you really had to squeeze together the ball mixture so that they didn’t fall apart!
Wasn’t sure how much to “flatten” each ball down onto the baking tray, so I flattened a little with a finger, but in doing so, the balls crumble a little and start to fall apart! 🙁
After checking at 12 mins, these look like cookies but quite tall (not flat like your photos). Left them in for another 3 mins to total 15 mins to make sure they’re golden colour.
I haven’t tasted them yet – just cooling on the baking sheet as I write this comment, but I hope regardless of the height/shape, they taste nice! 🙂
Thank you x
Hi Alex – it’s great to have you stop by the blog! Thank you for tips with the recipe, which will help fellow bakers making this recipe. 👍🏼 I’m really pleased you enjoyed the taste of these biscuits!
Jess
x
Reporting back Jess – These were made for hubby (two days ago, and there’s only one left in the cookie tin!) He thinks they’re amazing (just as they are) and I’ve had requests to make these again (no changes) – so that’s a very good sign! 😉 x
Thank you!
Aww that is great to hear, Alex! ❤️ x
Made these with the dark brown sugar and I put a little more syrup in – probably around 3 tablespoons. They taste lovely and flapjacky. Nice chewy texture (in for 22 minutes). Will definitely make again. Great way to use up oats that had been in the cupboard for a while. Thank you.
So happy to hear you enjoyed the recipe, Josie! X
This is the second batch of these I’ve made, I’m munching on a slightly warm one as I write, watching the storm from my window in Dorset, UK. Heavenly. This time I put some giant raisins in with the mix.
Thankyou for sharing this excellent recipe.
Hi Anna 🥰 I’m so happy you’re enjoying the recipe! The addition of raisins sounds super delicious – I will try that myself! Stay safe and warm and enjoy the rest of your weekend.
Jess
X
Made these twice now really happy with them. First time perfect. Second time added little bit of grated nutmeg and had insufficient butter so made up with avocado oil. Mixture not binding so added tablespoon of water – worked well as bound together and excess liquid evaporated- really love this recipe thank you.
Hi Terry – thank you for stopping by my blog! ☺️ I’m really happy you’re enjoying this biscuit recipe. Thank you for your brilliant tips, which will definitely help fellow bakers making these!
Love this! Such an easy recipe to follow & they turned out great! My friends asked me for the recipe! My kids demolished them & I will definitely be making these again and again! I added a little desiccated coconut & some mixed chopped nuts & they turned out amazing! My children are demanding that I make them again! Such an easy recipe to follow too. Thank you!
Hiya Sonja – thank you for taking the time to stop by my blog and leave a brilliant review of this recipe. Love the sound of adding coconut and chopped nuts – delicious! So pleased you and your family are enjoying the biscuits! ❤️
Hi
My husband and I love these biscuits.
Do you know how many calories?
I have made these twice in as many weeks now, one with a dark chocolate drizzle and one with a toasted chocolate topping – stunning and such a nice recipe to do when you want something sweet and moreish but haven’t loads of time to invest. Thank you for posting.
Hi Carol – I’m so pleased you’re enjoyed the recipe! Thank you for stopping by my blog. X
Hi, I have just finished another of these great biscuits, it is the 4th batch I have made, I tend to flatten mine out and cook them for the full length of time making them a mid brown and crunchy, the flavour is really good and thy last for over a week, If I go on holiday for a week and finish them off when I get back. I congratulate you on a good recipe.
Hi Gordon, thank you for your great review! I’m really pleased you’re enjoying the recipe so much 😁
I have just made these biscuits for the first time my husband asked me to add a few cashew nuts to the mixture,he said they tasted lovely,i will definately be making them again
So pleased you all enjoyed the recipe! Adding cashews sounds delicious, I will try that myself. ☺️👍🏼
Hi great recipe, I added some ginger powder ,very nice 😋
The addition sounds divine, Linda! So happy you enjoyed the biscuits ☺️
What can I say they are superlative,we are having to limit ourselves or otherwise! Do you think the recipe could be used as A a base B Date filling and C a topping in a smallish tin,would like your input
Thank you Carol