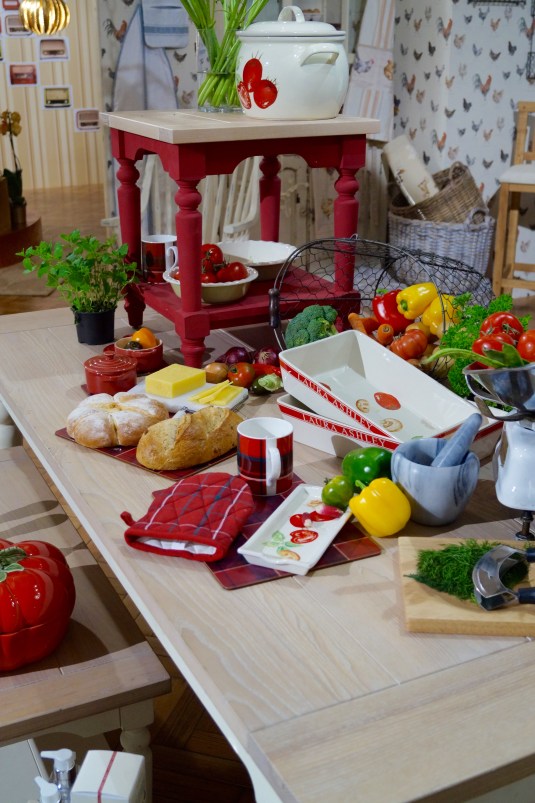
Baking · Cakes

Honey Walnut Cake

Delicately tender cake flavoured with cinnamon, fresh orange zest and chopped walnuts. Soaking with honey sugar syrup whilst still warm gives this cake its unique flavour and texture.

Recipe posted in August 2015, photos updated in May 2018. 

Matilda the Musical is running a bake off competition and we want you to get in the kitchen and bake something inspired by Matilda!

The prize for the competition is two tickets to Matilda the Musical, an afternoon tea at the Radisson Blu Edwardian and a night’s stay at the Radisson Blu Hotel, Mercer Street, London. To take part and have the chance to win, click here to go to the official site and find out more! #MatildaBakeOff

It’s great fun to be involved in this baking campaign with Matilda the Musical! So when I brainstormed some recipe ideas inspired by Matilda, I had many ideas of recipes that were influenced by the story. Some favourites like chocolate fudge cake sprung straight to my mind, but it was my sister who suggested I baked honey cake for this blog post. If you’ve read Matilda then you will know one of the main characters in the story is Miss Honey. So a honey cake seemed the perfect bake to choose!

This honey and walnut cake is wonderfully sweet with beautiful flavour from the cinnamon and orange zest and fantastic texture from the chopped walnuts added to the cake batter.

Now it’s your turn, so grab your apron and mixing bowl. It’s time to get baking and come along and join the Matilda Bake Off!

(Serves 10-12)

Ingredients:

Cake:

170g butter (salted or unsalted), softened

150g caster sugar

Zest from one large orange

3 large free-range eggs, at room temperature

120g plain flour

1 and 1/2 teaspoons baking powder

1/2 teaspoon ground cinnamon

4 tablespoons milk

125g walnuts, chopped into small pieces

Honey Sugar Syrup: 

175g honey

100g caster sugar

90ml water

Squeeze of fresh orange juice (optional)

Method:

  1. To make the cake: Preheat oven to 180°C / 160°C Fan / 350°F / Gas Mark 4. Line the base of a 23cm springform cake tin with parchment paper. Grease the base and sides of the tin well with butter and set aside.
  2. Mix together the sugar and orange zest until fragrant – doing this releases the natural oils in the orange. In a large mixing bowl cream the butter and orange sugar together until light and fluffy (this should take about 2-3 minutes).
  3. Now add the eggs one at a time, beating well after each addition.
  4. Sift together the flour, baking powder and cinnamon and fold through along with the milk. Finally, fold through the walnuts.
  5. Transfer the cake batter to the cake tin. Bake for 40 minutes or until a cake tester when inserted into the centre of the cake comes out clean. leave the cake to cool in the tin for 15 minutes – in this time you can start preparing the honey sugar syrup for glazing the cake.
  6. To make the honey sugar syrup: Place the honey, sugar, water and orange juice in a small saucepan. Gently simmer for 5 minutes, stirring occasionally. Pour the syrup over the cake and leave the cake to cool completely, as it cools the syrup will soak into the cake.
  7. I recommend leaving this cake overnight as it allows the syrup to moisten the cake and the flavour will develop. Once ready to serve, slice up and serve with Greek yoghurt and fresh berries such as blackberries and raspberries.
  8. Cake will store in an airtight container at room temperature for up to 3 days.

Keep up to date with me on:

Like my Facebook page here

Instagram: @whatjessicabakednext

Twitter: @jessbakednext

Pinterest: @jessbakednext

Baking · Breakfast · Chocolate · Granola

Peanut Butter Chocolate Chip Granola

 Peanut butter and chocolate chip granola. The perfect mix of sweet ‘n’ salty flavour. If you love peanut butter, then this granola recipe is for you! 

Peanut butter granola has to be one of my favourite breakfast recipes. PB + chocolate = amazing flavour combo! I have always loved making my own granola – when it’s homemade you know exactly what’s gone into it and you can easily control the sugar levels. It’s also a super fun activity baking your own. Plus, because of the chocolate chips, this granola definitely feels like you’re eating dessert for breakfast!

Ever since I shared this delicious vanilla almond granola, I’ve been hooked on creating and testing out new granola recipes. So many granola recipes, so little time!

The granola requires just a handful of ingredients, it’ll take you 30 minutes at tops to bake and makes a great breakfast treat any day of the week! You know it’s SO good because it even coerces me to get out of bed in the morning, which is usually a very hard thing to do! The granola makes a great snack too, you could easily add a handful of M&M’s or some roasted peanuts to the mix.

The recipe couldn’t be any simpler or easier to prepare. To start toss together oats and sugar. I also like to add a couple of tablespoons of brown sugar to this granola, I find it adds a yummy caramel flavour and gives the granola a slightly crunchy texture. Then all you need to do is melt together peanut butter, oil, honey/maple syrup and vanilla. Once melted, pour it over the oats and stir to coat. Spread out on a large baking tray and then bake until golden. I told you it was easy!

Once the granola is cooled I really like adding about a packet (100g / 1/2 cup of chocolate chips – I prefer adding dark chocolate chips or sometimes I even cut up chunks of chocolate if that’s what I have in my store cupboard.

Ingredients:

300g (3 cups) jumbo rolled oats

2 tablespoons dark or light brown sugar (optional)

60ml (1/4 cup) oil – I use rapeseed oil

125g (1/2 cup) smooth or crunchy peanut butter

125ml (1/2 cup) honey or maple syrup

1 teaspoon vanilla extract

100g (1/2 cup) milk or dark chocolate chips

Method:

1. Preheat oven to 150°C / 130°C Fan / 300°F / Gas Mark 2. Line a large baking sheet with baking parchment or a silicone baking mat.

2. In a large mixing bowl toss together the oats and brown sugar (if using).

3. In a small saucepan, on a medium heat melt together the oil, peanut butter and maple syrup/honey and vanilla. Don’t boil or get this mixture too hot.

4. Pour the melted peanut butter mixture over the oats and mix to combine. Make sure all the oats are completely moistened. Spread the mixture out over the baking sheet and bake for 35 minutes – stirring every 10 minutes or so. Once the granola is cooked it will be soft and lightly golden and toasted.

5. Leave the granola on the tray to cool. As it cools it will get crisp. Once completely cool, mix through the chocolate chips. Store in an airtight container or jar. Granola will keep for up to two weeks. Great eaten by the handful or served with milk or yoghurt.

Enjoy!

Keep up to date with me on:

Like my Facebook page here 

Instagram: @whatjessicabakednext

Twitter: @jessbakednext

Pinterest: @jessbakednext

jess

Travel

Cyprus

I’ve been super busy going through the hundreds of snaps from our holiday and I finally put together a post capturing all our favourite pictures. We visited the stunningly beautiful island of Cyprus for 2 weeks dedicated to relaxation, sightseeing and lots of delicious food. In this article my passion for travel, photography and food combines, so I really hope you enjoy reading and getting a taste for the Cyprus we love.

IMG_0212

Cyprus is a family favourite holiday destination and before this last visit, we’d visited Cyprus twice before staying on different parts of the island. This year we stayed on the western side of the island in the Paphos district. As with all the holidays we go on we love to get away from the tourist trails and appreciate the hidden gems. Our villa was located in beautiful Argaka – a small village with stunning shorelines, beachside restaurants and local bakeries. The area where we were staying was within a short car journey from the lovely town of Polis, where we would drive most nights to get an ice cream to cool down in the evening heat – it’s actually a common thing for most Cypriots to head out for an evening ice cream or cake after dinner. I’ll pretty much take any excuse to eat ice cream or cake!

DSC05856

DSC03846

We had many picturesque views from our villa

DSC05871

Aphrodite’s Rock – also known as “Petra tou Romiou”. According to Greek mythology and local legends, this is the exact spot where Aphrodite – the Greek ggoddess of love and beauty rose from the waves and sea. The area is beautiful, with glistening water and stunning rocky views. 

DSC06250

Views of the Arkamas from the beach shoreline in Argaka 

DSC06213

Harbour views from Agio Georgios 

DSC06229

cyprus viewpoint pano

DSC05562

I remembered from our last visit to Cyprus at Agio Georgios there were food and pottery stalls located just outside by the church. And as you can imagine, being a food blogger and loving collecting new bowls, plates and props it was great fun to look around and buy my favourite pieces from the stall. I love the hand painted pottery, it has a homely touch, looks very special and will make a beautiful addition to my kitchen.

DSC03731

Cypriots absolutely adore their fresh fruit. In the supermarkets there is so many different, healthy fresh fruits to chose from. Watermelon is a particular favourite of ours. The funny thing is as we were driving through some of the towns they have trucks crammed full of watermelons and it’s not uncommon to see the odd melon or two fall off and crack open when it hits the road!

A number of years ago when we visited Zakynthos we dined at an amazing family run restaurant, Gallini’s. It was a family run business and the owners and staff were extremely welcoming and we became good friends. I remember every meal ended with a large platter of watermelon to refresh our palate after an evening of authentic Greek food. I didn’t realise until this visit to Cyprus that a traditional Cypriot summer snack is watermelon and halloumi cheese – sounds like a great combo, with the mix of sweetness and the salty cheese. Halloumi is a Cypriot speciality food and the best way to serve it is fried and then drizzled with fresh lemon and tzatziki!

DSC06069

We enjoyed many local specialities everyday and I even had the chance to try some new foods like kattimeri (a Cypriot pancake/crepe) and tasted some old favourites like the local village bread – in Greece and Cyrpus they serve this style bread before a meal. As appealing as the local restaurants are serving delicious food, they tend to be very expensive, and every year we self cater and stay at our own villa so most nights we became quite creative with the food we cooked. I made quite a few savoury recipes from the W.J.B.N kitchen including this spaghetti with courgettesGreek-style orzo pasta salad and this linguine gamberi with the fresh local seafood.

DSC05623

This dish is one of mum actually created. Sypros (the lovely villa owner) had many trees around the property with all homegrown and organic produce (avocado and mango trees) – I wish I could grow mangoes and avocados at home. He came round one day with homegrown tomatoes and apples, he had previously promised to bring round some avocados but I don’t think they were ripened enough. I’d already planned my mornings brekkie of avocado toast with chilli and lemon. However, both the apples and tomatoes were deliciously sweet and I love the fact they were homegrown too because organic produce always tastes better. The tomatoes were amazing stuffed with veggies and orzo for dinner – that is a very Greek dish!

DSC05865

Mandarins are grown all over the island – you see them everywhere! At first we thought these were limes! 

DSC05273 (1)

Greek salad – the perfect summer lunch served with pita bread. We ate Greek salad every day and enjoy it all the time at home. 

DSC05682

Above and below are pictures from our visit to Paphos archaeological park at Kato Pafos

DSC05697

DSC05719

Paphos Lighthouse 

DSC05754

DSC05309

DSC05344

Views whilst driving through the Troodos Mountains (Troodos Massif) 

It’s amazing up in the Troodos Mountains. There is not a soul in sight, we drove up through the winding roads on our way to the Kykkos Monastery and on the way stopped off at the Mouffalon Enclosure. It’s free entry and if you’re lucky enough like we were you may get the chance to see the moufflon and their babies.

DSC05305

DSC05315

Beautiful flowers at Kykkos Monastery (Panagia tou Kykko) 

DSC03836

Sunset from our villa (picture cred to my sis!) – we watched the sunset every single night before heading out for our evening ice cream in Polis or Paphos

It wouldn’t be a summer holiday without ice cream and fro-yo! We enjoyed or fair share whilst away in Cyprus!

DSC05393

A scoop of each cookies ‘n’ cream and stracchiatella – my favourite flavours! (my dad is great at photobombing – he did that in most my photos this year!) 

DSC05770

The sorbets are amazing – my favourites were strawberry and lemon! 

DSC05974

Mum modelling some gorgeous cherry frozen yogurt! Greek frozen yogurt is a must try! 

If you’re looking to find out more about Cyprus or about the places we visited, then be sure to visit the official website – argaka.org and find out more about Cyprus here on the official tourism website visitcyrpus.com 

jess

Keep up to date with me on:

Like my Facebook page here 

Instagram: @whatjessicabakednext

Twitter: @jessbakednext

Pinterest: @jessbakednext 

Baking · Cakes

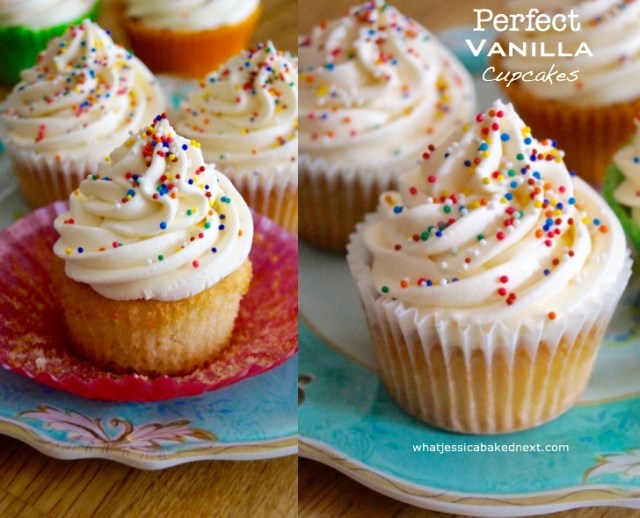
Perfect Vanilla Cupcakes

Light and fluffy vanilla cupcakes topped with a lush vanilla buttercream and sprinkles! The perfect bake for any occasion and a great recipe for anyone new to baking!

DSC06468

It’s about time to share my favourite and fail-proof vanilla cupcake recipe on the blog! And when I say perfect I mean these are the BEST vanilla cupcakes I have ever made!

I baked some delicious vanilla cupcakes to ready celebrate my birthday later this weekend! I turn 19 this Sunday and it wouldn’t be a celebration without cake or sprinkles involved, right?! Vanilla cupcakes have always been one of my favourite bakes and this is a recipe adapted from childhood and it’s one I have been making with my mum since I first stepped into the kitchen.

DSC06520

These are seriously fluffy and with a beautiful vanilla flavour. They’re not sickly sweet and have just the right balance of flavour, sweetness and deliciousness. If you’re a regular reader, then you will know how popular the simple and easy recipes are on this blog! I love my no-bake recipes or no-churn ice creams and now quick and easy cupcake recipes too!

image

When you’re baking cakes or cupcakes you need to remember some important points for a successful bake. Below I’ve put together my top tips.

1. Always cream the butter and sugar for at least 5 minutes. You want the mixture to be really pale and airy with no big lumps of hard butter. I usually leave the butter out at room temperature overnight to soften. But I am also guilty of softening it in the microwave too!
2. Always bake with room temperature eggs. I experienced many baking fails before finally perfecting these cupcakes. Room temperature eggs will give your cupcakes a finer crumb and they will bake more evenly and quickly. To warm your eggs before baking, place the eggs in a bowl or glass of warm tap water for 5-10 minutes. This is a life-saving baking tip and it’ll save you a lot of frustration!
3. Remember to sift your flour – to avoid lumps of flour in your cupcake batter.
4. Always fold your dry ingredients into the batter. I love to use a rubber spatula to fold in the flour into this cupcake batter, this will stop you knocking any air out of the batter.
5. Test the doneness with a cake tester, this is the most precise way to check the cupcakes are completely cooked through. When the cake tester is inserted into the centre of the cupcake it should come out with no uncooked batter. This way you can guarantee they’re cooked fully!

I recently baked this vanilla cupcake recipe again and decorated the cupcakes with Cake Angels Blush sprinkles and individually hand-crafted Pastel Hydrangea – Flower Power royal icing sugar decorations. Both the sprinkles and royal icing sugar decorations make these cupcakes extra special!

(Makes 12)

Ingredients:

Vanilla Cupcakes:

150g unsalted butter, softened
150g caster or granulated sugar
3 medium or large free-range eggs, at room temperature
1 teaspoon vanilla extract
150g self-raising flour, sifted (this can substituted with 150g of plain flour + 2 teaspoons baking powder)

Vanilla Buttercream:

150g unsalted butter, softened
300g icing sugar, sifted
2 teaspoons vanilla extract
2-3 tablespoons double cream or milk

Method:

1. Preheat oven to 180°C / 160°C Fan / 350°F / Gas Mark 4. Line a cupcake tin with 12 cupcake cases and set aside.

2. To make the cupcakes: Beat the softened butter with the sugar until fluffy and smooth. Add the eggs one by one along with the vanilla and mix until incorporated – at this point the batter will look like it’s curdled, however once you’ve added the flour it will come together.

3. Now fold through the flour and mix until no lumps of flour remain. Add enough milk to loosen the mixture slightly – approx. 3-4 tablespoons of milk will do.

4. Evenly divide the cupcake batter between the cupcake cases. Bake the cupcakes for 15-20 minutes or until a cake tester comes out clean without any uncooked batter remaining. Leave the baked cupcakes to cool in the tin for a 5-10 minutes, then carefully remove the cupcakes from the tin and transport to a wire rack and allow the cupcakes to cool completely to room temperature.

5. To make the buttercream: Once the cupcakes are fully cooled make the buttercream. Cream the softened butter for a minute or two to soften. Add the sifted icing sugar and the vanilla extract and beat gently together until the butter and sugar has combined. Now continuing creaming for another 2-3 minutes until the buttercream is a light pale colour. Now add the double cream or milk and beat until combined fully.

6. To decorate the cupcakes: Fit a large disposable piping bag with your favourite nozzle. Fill the piping bag with the frosting, pipe even swirls on the top of each cupcake, then finish decorating with sprinkles. If you don’t want to pipe the buttercream onto the cupcakes, you can spread the buttercream onto each cupcake using a small palette knife.

Recipe Notes:

  • Baking time will depend on your oven. This recipe recommends 18-20 minutes, but  different ovens may cause the baking time to differ slightly.
  • This cupcake recipe can easily be doubled or tripled to make more.
  • For the frosting I like to add a few tablespoons of double (heavy) cream. The cream makes the frosting lighter and it will have a creamier texture. If preferred, you can substitute with milk, but please note that frosting will not have a such a creamy texture.
  • The frosted cupcakes will keep in an airtight container for up to 3 days.
  • With the frosting you can add a few drops of your favourite food colouring. Add a touch of red for a pink colour or blue!

perfect vanilla cupcakes

Keep up to date with me on:

Like my Facebook page here 

Instagram: @whatjessicabakednext

Twitter: @jessbakednext

Pinterest: @jessbakednext

Drinks · Travel

Easy Homemade Lemonade

Easy Homemade Lemonade. 3-ingredients and unbelievably simple and quick to make. It’s refreshing, tangy and the perfect quench-thirsting drink to sip on a warm summer day. 

image

As you read this blog post, I’m currently relaxing in the beautiful Mediterranean in sunny paradise. It’s a much needed break, after a long year of studies and working on my blog. It’s nice to have 2 weeks dedicated to total relaxation. When I’m back I have lots more recipes lined up for the blog and I’ll definitely be sharing pictures from our trip.

So back to today’s recipe. For me there is nothing quite like a glass of ice cold lemonade on a boiling hot day. It’s one of my favourite summer drinks and I knew this year I needed to share a basic recipe on how to make your own homemade lemonade. You will have this fab and easy recipe on hand ready for those hot summer days. Luckily the English summer has been fantastic so far with soaring temperatures and long sunny days and evenings so I’ve had the chance to enjoy this delicious lemonade many times!

image

My recipe couldn’t be any easier to make! I mean it’s not really even a recipe because it’s so incredibly easy and quick to prepare! You won’t believe that all you have to do is stir together just 3 ingredients, chill and it’s ready to drink!

Most lemonade recipes on the web are over complicated and require standing over hot stove and making sugar syrup. When it’s a gazillion degrees outside I don’t know about you but the last place I want to be is in a hot kitchen stirring something over the stove.

It’s really important to stir the lemonade well before chilling as you really need to dissolve all the sugar otherwise it will have a gritty texture.

Plus it’s such a good feeling when you have make homemade lemonade – it’s 100% fresh and free from all those added flavourings, additives and colourings. This lemonade is still but if preferred you can swap the cold water for sparkling water. Making a drink recipe for the blog gave me the perfect opportunity to use these beautiful floral straws sent to me by my lovely friend Jemma at Iced Jems.

(Makes 2 litres)

Ingredients:

4 lemons, juiced

1 litre cold water – you can use sparkling water, if preferred

100g (1/2 cup) caster or superfine sugar

Method:

  • In a large pitcher (2 litres) combine the lemon juice, water and sugar. Simply stir until all the sugar has dissolved. Chill the lemonade in the refrigerator. When ready to serve, pour into a glass and garnish with ice cubes and lemon wedges.

Enjoy!

jess

Keep up to date with me on:

Like my Facebook page here 

Instagram: @whatjessicabakednext

Twitter: @jessbakednext

Pinterest: @jessbakednext

Baking · Biscuits and Cookies · Ice Cream · No-Bake

Oreo Ice Cream Pie

Oreo cookies take centre stage in this decadent ice cream pie. A crumbly Oreo cookie base with a layer of vanilla Oreo ice cream.

I’m taking a step back in time and revisiting an older blog recipe from 2015 with some brand new photos. My Oreo Ice Cream Pie is a sweet and refreshing summer dessert recipe.

I’m willing the sun and summer weather to come back with this recipe. As I write this blog post, it’s been pouring down outside and doesn’t feel like July. I have this ice cream ready for a sunny day, hopefully not too far away!

This amazing pie starts with an Oreo cookie base. Made with 2 packs/28 Oreo’s in total, mixed with 75g of melted butter. Give these ingredients a quick mix together, then press onto the base of a 23-inch/9-inch cake tin. I use a spring form tin, but a pie dish is also a good choice.

For the no-churn ice cream, take some double cream (make sure it’s nice and chilled so it whips well), grab a can of sweetened condensed milk, followed by some vanilla extract.

Firstly, whip the cream until stiff peaks start to form, pour in your tin of condensed milk, along with the vanilla, continue whisking until the mixture has thickened again. The final step is folding in another pack and a half of crushed Oreo’s, then spreading the mix on top of the cookie base.

Cover and pop in the freezer overnight. Decoration is totally up to you. I whipped the remaining 100ml of cream I had leftover and piped that on top of the pie and sprinkled over extra crushed Oreo’s.

When ready to serve, allow the ice cream pie to sit at room temperature for about 10 minutes before slicing. This gives the ice cream a chance to soften slightly and you get to enjoy the creaminess of this pie!

It lasts in the freezer for up to 3 months, so you have a slice of ice cream pie whenever you want!

Print

Oreo Ice Cream Pie

Oreo cookies take centre stage in this decadent ice cream pie. A crumbly Oreo cookie base with a layer of vanilla Oreo ice cream.
Prep Time 8 hours 30 minutes
Total Time 1 day 30 minutes
Servings 12
Author What Jessica Baked Next

Ingredients

Oreo Base:

  • 28 Oreo's (this is 2 x standard packets)
  • 75 g butter (salted or unsalted) melted and cooled slightly

Oreo Ice Cream:

  • 500 ml double cream chilled
  • 1 teaspoon vanilla extract
  • 397 g can sweetened condensed milk
  • 1 and 1/2 packs Oreo cookies (this is 21 Oreo's) use the remaining Oreo's to decorate

Instructions

  • To make the crust: Crush the Oreo cookies in a food processor. Add the melted butter and mix through to combine. Scatter the cookie mixture intoa 23cm / 9-inch springform tin or pie dish, and press down until compact. Place in the fridge while you make the filling.
  • To make the ice cream: Whisk the cream and vanilla until soft peaks form. Fold through the condensed milk, followed by the crushed Oreo's and mix to combine. Transfer the mixture into the tin. Cover the top and leave to freeze for at least 8 hours, or overnight for best results.
  • To decorate: Once the ice cream pie is set, allow it sit outside the freezer for about 10 minutes to soften slightly. Now carefully remove from the tin - if you’re having trouble removing it from the tin, it’s helpful to dip a knife into hot water, wipe and then run around the sides to release more easily. Finish by decorating with swirls of extra whipped cream and Oreo's, if desired.
  • The pie will keep in the freezer for up to 3 months.

More ice cream treats!

White Chocolate Ice Cream (Easy Three Ingredient Recipe)

No-Churn Oreo Ice Cream

Speculoos Cookie Butter Ice Cream

Keep up to date with me on:

Like my Facebook page here

Instagram: @whatjessicabakednext

Twitter: @jessbakednext

Pinterest: @jessbakednext

Baking

Snapshots from Laura Ashley AW15 Press Day

I was recently invited along to the Laura Ashley A/W15 Press Day up in London. The event took place at the Music Rooms in Mayfair and I had the chance to look around at Laura Ashley’s brand new home and fashion collections. It was great fun to be invited along with journalists and other bloggers, I brought my sister Becky along with me and we enjoyed some time looking at the lovely bakeware and collections along with biscuits, cupcakes and some tasty mocktails!

DSC03192

Our day started with an early wakeup call, ready to catch the train down to London. A short hour journey and we arrived in London ready to find the venue. It was lovely to finally meet some members from the Laura Ashley team who I’ve been talking with for some time and to have a warm welcome.

I’ve always been a big fan of Laura Ashley products. The collections are always chic, pretty and perfect for all seasons. So I was ecstatic to be invited along to the event for a first look at the collection.

If you read my blog regularly then you may know that I’ve been working with the Laura Ashley over the last year sharing some of my favourite recipes over on their blog. You may even like to try this delicious Eton Mess Cheesecake I posted over on their site! It’s perfect for summer and is brilliant fun to make and decorate.

DSC03200

As we walked round we actually got to the chance to step into Christmas! Christmas in June – yes, it got me excited for those cold, cozy winter nights again! I loved how magical and christmassy the collection is this year.

DSC03207

DSC03206

DSC03211

I love this glittery cocktail set. It would be perfect for the Xmas party season!

Now for the beautiful bakeware! Definitely the highlight of the visit. I really like the adorable bakeware, the floral designs are my favourite and I pretty much love all things vintage. This flour shaker is seriously cute and I really love the rolling pin for making pastry.

DSC03291

DSC03230

DSC03296

Pretty little cupcake cases and toppers. And how cute are those dress biscuits?! Almost too beautiful to eat!

DSC03289

DSC03246

DSC03286

DSC03219

DSC03254

I hope you’ve enjoyed the snapshots! You can head over to the Laura Ashley blog and browse their collection!

jess

Gluten-Free · Italian Cuisine · Travel

Pesto alla Genovese (Fresh Basil Pesto)

A great basil pesto recipe! Learn how to make to this Italian classic in a few simple steps and with just a handful of ingredients.

Today I’m sharing a really simple recipe for fresh basil pesto. It’ll take you literally minutes to make and tastes out of this world good! This homemade pesto is the best pesto I have made to date and it couldn’t be any easier or simpler to make!

The “secret” ingredient that makes my pesto taste so good is the roasted garlic. Roasted garlic is such an underrated ingredient, it transforms this pesto and adds a light and sweet flavour. Before I perfected my own pesto recipe, I’d always made pesto with raw garlic. It’s ok, but I find it leaves a bitter taste in your mouth afterwards, whereas the roasted garlic is sweeter and gives a more rounded flavour without leaving a bitter aftertaste. I found these instructions for roasting garlic here. It filled my kitchen with most gorgeous garlic aroma and I would highly recommend you give it a try!

With just a handful of ingredients this basil pesto is not only satisfying on the taste buds, but because it’s so easy and quick to prepare it is definitely worth going to the extra effort to make it yourself. Pesto will store in the fridge for up to a week, so it’s ready and waiting for you to use to make a tasty dinner. You can’t beat this pesto mixed through cooked pasta, it’s delicious.

Ingredients:

2 x 30g (60g in total) bags of fresh basil leaves

3 cloves roasted garlic (only use 1-2 small cloves of fresh garlic)

50g pine nuts, toasted

55g Parmesan or other vegetarian hard cheese, freshly grated

5-6 tablespoons extra virgin olive oil

Salt and pepper, to taste

Method:

1. In a food processor pulse together the basil, garlic, pine nuts and Parmesan until they are minced.

2. With the processor on slow speed add the oil (a tablespoon at a time) in a slow stream. Now season to taste with salt and black pepper. Process for another minute until all the ingredients are combined.

3. Place the pesto in a jar or bowl and drizzle over a little extra oil to cover the top – this keeps it fresh. Store in the fridge for up to one week.

Recipe Notes:

  • If you can cannot find pine nuts you can easily substitute with walnuts, almonds, cashews or pistachios. For a nut-free version you can substitute with sunflower seeds.
  • Adjust the consistency of your pesto by adding a tablespoon less or more oil.
  • When toasting the pine nuts always toast on a medium heat in a dry pan. Watch them as they burn very easily and will taste bitter.

There are endless ways of serving this fresh basil pesto recipe. In the summer and when it’s too hot to cook and I don’t feel like putting together anything too elaborate for lunch or dinner, then pasta salad is a lifesaver! I simply mixed together cooked orzo/risoni with this basil pesto, then I added halved cherry tomatoes and mozzarella pearls (bocconcini). Delicious Caprese pasta salad and this will last for a week in the fridge. You can use any pasta you like, sometimes I use fusilli, penne or even orecchiette.

Keep up to date with me on:

Like my Facebook page here 

Instagram: @whatjessicabakednext

Twitter: @jessbakednext

Pinterest: @jessbakednext

Baking · Breakfast · Granola

Vanilla Almond Granola

 Sweet vanilla and almond combine with a touch of cinnamon spice and maple flavour in this crunchy homemade granola! 

I’m the biggest fan of granola! I love it so much that I’m sure there isn’t a time when I’m not in the kitchen experimenting and coming up with a new granola recipe. The list of my favourite granola recipes is never-ending and I am more than happy to share my latest granola creation with you.

This vanilla almond granola creation is inspired by my basic homemade granola recipe, but this time I replaced some of the oats with flaked/slivered almonds.

Whilst baking the flavour from the cinnamon, maple and vanilla combine and will fill your kitchen with an amazing aroma. Don’t be alarmed as my recipe calls for one full tablespoon of vanilla to be added. The reason for this is nothing more than the fact I just I love vanilla and I really wanted to be able to taste it in this granola. If you’re not so keen you can adjust the amount of vanilla to your own taste by adding a little less than the recipe states.

It’s also optional to add some cinnamon to the granola mix, cinnamon is one of those ingredients that can transform any bake and I love adding it to any bake from cake and cupcakes to cookies and now granola! I wouldn’t say you can even taste the cinnamon that much, I only add half a teaspoon so it doesn’t overpower the other ingredients and acts as a subtle background flavour in this granola.

Vanilla Almond Granola before baking

You can customise this granola to your own taste by adding chia seeds or flaxseed for added goodness. Moving onto toppings, my favourites are sliced banana and strawberries, you could add anything from dried fruit like apricots or dates or simply enjoy it with milk or Greek yoghurt for a protein-packed breakfast that’ll certainly power you through your morning at work!

I don’t just eat this granola for breakfast, I’ve also been enjoying granola parfait for dessert during the summer and it’s my favourite to enjoy when fresh berries like strawberries and raspberries are in season. The layers of fruit, granola and yoghurt work really well paired together!

Whilst the granola was baking the aromas it created in my kitchen were amazing – I knew I was onto a winning recipe!

Ingredients:

200g (2 cups) old-fashioned/rolled oats

100g (1 cup) flaked or slivered almonds

1/2 teaspoon ground cinnamon (optional)

75ml (5 tablespoons) honey or maple syrup

75ml (5 tablespoons) vegetable oil

1 tablespoon vanilla extract

Method:

  1. Preheat oven to 150°C / 130°C Fan / 300°F / Gas Mark 2.
  2. Weigh the oats out into a large mixing bowl along with the almonds and mix together with the cinnamon (if using).
  3. In a small saucepan gently heat together the maple syrup, oil and vanilla until warmed. Don’t boil this mixture.
  4. Stir together the maple syrup mixture with the oats until all the oats are moistened. Spread the granola out onto a large baking tray and bake for 15 minutes. After 15 minutes, give it a stir and return the granola to the oven for a further 15 minutes. After the second lot of 15 minutes is up, again remove the granola from the oven and give it a stir. Pop the granola back in the oven for another 15 minutes more to finish baking. (Granola will have baked for a total of 45 minutes before it’s ready.)
  5. Once the granola is baked, take it from the oven and leave it to cool. As it cools it will get crisp. This granola will store in an airtight container for up to 2 weeks.

Keep up to date with me on:

Like my Facebook page here

Instagram: @whatjessicabakednext

Twitter: @jessbakednext

Pinterest: @jessbakednext

Baking · Biscuits and Cookies · Cheesecake · No-Bake

Strawberry Lemon Cheesecake in a Jar {No-Bake}

Strawberry Lemon Cheesecake in a jar! Layers of buttery biscuit crumble, creamy lemon vanilla cheesecake filling, strawberries and cream. The perfect summer sharing dessert!
DSC03433

I was invited along with 14 other bloggers to create a foodie concoction using the humble jam jar. The Jam J-Art Challenge is to make food look good in a jam jar! I love layered desserts and one of my favourite recipes in a jar or glass is cheesecake. These Strawberry & Lemon Cheesecake in a Jar are my new favourite layered dessert!

jam jar challenge

DSC03430

And as the strawberries are in season and at their best, I thought I would make a summer-style cheesecake. My cheesecake is layers of buttery biscuit crumble, creamy lemon vanilla cheesecake filling, a small layer of chopped strawberries, whipped cream and strawberries. The dessert itself is light, fresh and one of my favourite summer recipes to date. I’m new to layered desserts, I’m not the best at decorating these kind of desserts, so this challenge was great for me!

These pots are great for sharing (but I don’t usually like doing that when there’s cheesecake involved!). It’s new favourite way to serve homemade cheesecake and I will definitely be making these throughout the summer!

DSC03461

I made a few cheesecakes in smaller jars with some of the leftover cheesecake mix. To be honest, the recipe as well as filling one large jar (as pictured), will fill a few extra smallish jars too!

This dessert links in with this great campaign about desserts that have inspired our sweet treats today – ‘Desserts Through the Decades’. The campaign consists of an infographic and accompanying article, tracing the desserts that were once all the rage, both conventional and bizarre, from the 1910s to the present day. I think it’s a great campaign because you get to see all the different desserts, anything from the classic Victoria sponge cake, eton mess, to the cronut! You can click here to read more!

Makes enough to fill a 1L Kilner jar + approx. 1-2 small extra jars  

Ingredients – 

Biscuit Crumble –

12 digestive biscuits, broken into small pieces

55g unsalted butter, melted and cooled slightly

Lemon Cheesecake Layer –

500g cream cheese, softened at room temperature

85g (3/4 cup) icing sugar, sifted

300ml double cream

1 tsp vanilla extract

1 tsp lemon zest

1 tbsp lemon juice

200g strawberries, hulled and cut into bitesize pieces

Toppings –

Whipped cream

Strawberries

Method –

1. To make the biscuit crumble: Crush the biscuit pieces in a food processor or a ziplock bag with a rolling pin until fine. Mix through the butter. Set aside, whilst you make the filling.

2. To make the cheesecake filling: Mix the cream cheese, icing sugar, vanilla, lemon zest and juice in a bowl. Whip the cream and then fold into the cream cheese mix.

3. To layer the cheesecake: Take approx. half the biscuit crumbs and sprinkle in the bottom of the jar. Follow by a layer of the cheesecake mix. Then top with the chopped strawberries. Top with another layer of cheesecake mix. Then scatter over some extra biscuit crumbs. Top with whipped cream and a strawberry for decoration.

4. Store in the refrigerator until ready to serve!

DSC03453

Enjoy the recipe everyone! I hope this dessert inspires you to make and invent your own cheesecake in a jar creations!

jess